How to Plan a Whole-Home Remodel Without Losing Your Mind

A whole-home remodel is one of the most meaningful investments a homeowner makes. It’s also one of the most complex projects you’ll ever manage while continuing to live your life. The difference between a project that stays roughly on track and one that spirals into chaos, decision fatigue, and strained relationships almost always comes down to how well it was planned before a single wall was touched.

Here’s what thoughtful planning actually involves, and how to approach it in a way that protects you and the project.

Start With What’s Actually Driving This Decision

Before you get into layouts and finishes, spend time on the honest version of why you’re doing this. Not “we want to update the kitchen,” that’s a solution, not a problem. The more useful questions are different. How do we actually use this house, and what fights us? What has to change for this to be the home we want to be in for the next 15 years? Is this about making the existing spaces work better, or do we need more space? What happens when the kids are older, or when parents need to stay?

The answers to these questions shape the scope more than any inspiration photo does. A whole-home remodel grounded in how a family genuinely lives tends to be more satisfying than one that chases a look without addressing what was actually wrong.

This is also the conversation that reveals whether you need a full whole-home remodel, a strategic addition, or focused work on a few key spaces. Not every project that feels like a whole-home remodel actually needs to be one.

Understand What “Whole-Home Remodel” Actually Means

A whole-home remodel isn’t just redoing every room. It’s typically a coordinated reconfiguration of how a house works: floor plan changes, structural modifications, updated systems, new finishes throughout. The reason it requires different planning than a kitchen or bath project is the interdependence.

Moving a wall affects the structural load. Moving a bathroom affects the plumbing stack. Changing the kitchen layout can affect sightlines to the living room. Opening up the first floor affects how light moves through the house. Each decision touches other decisions, and the sequencing of construction has to account for all of it.

This is one of the clearest arguments for working with a design-build firm on a project at this scale. When your designer and your contractor are the same team, those interdependencies get resolved in design, before construction starts, rather than discovered mid-project.

Phase Your Decision-Making

One of the most common sources of stress in a whole-home remodel is trying to make every decision at once. Homeowners go into design meetings with 400 saved photos and no framework for prioritizing, and they end up paralyzed or changing their minds repeatedly as the project goes on.

A better approach is to sequence decisions deliberately.

Make the structural decisions first. What is the floor plan? What walls are moving? Where are the wet areas? Where does the addition attach? These are the hard constraints that everything else has to work around. They also require the most lead time, because structural changes require permits and the permits require specific plans.

Make the systems decisions second. HVAC configuration, electrical panel capacity, plumbing routing, these get resolved after the structural plan is clear and before walls close up.

Make the finish and fixture decisions third. Tile, cabinetry, countertops, hardware, lighting, these are highly visible and highly personal, and homeowners rightly spend a lot of time on them. But spending that time before the structural and systems questions are answered often means making decisions that have to be revisited.

Having a clear sequence to decision-making, with the design team guiding which decisions need to happen when, is one of the things a structured design-build process provides.

Get Ahead of Lead Times

Material lead times are the most underappreciated part of whole-home remodel planning. Semi-custom and custom cabinetry typically runs 8 to 12 weeks from order. Specialty tile and natural stone can take longer. Certain appliances, like high-end ranges and paneled refrigerators, have their own lead times. Windows and doors for an addition need to be ordered well before the rough framing is complete.

If your selections aren’t made and ordered before construction starts, you will be waiting for materials in the middle of a project that has a crew showing up every day. That’s the most avoidable source of delay in remodeling.

Good planning means being aggressive about selections early. Not rushed, but early. The design phase is when this happens, and it’s one of the places where experienced design teams earn their value.

Plan for Living Through It

A whole-home remodel typically means living through some degree of disruption for weeks or months. How much disruption depends on the project scope and how the phasing is structured.

Some homeowners choose to move out for the duration, especially for projects involving extensive kitchen or bathroom work. Some stay and adapt, camping in a corner of the house, using a temporary kitchen setup. Some have the flexibility to sequence work room by room so they always have a functional space to retreat to.

There’s no universally right answer, but there is a right answer for your family and your situation. This is a conversation worth having explicitly with your contractor before the project starts, not an assumption. A good field team will help you understand what the construction sequence means for your daily life, week by week.

The Right Team Changes the Experience

A whole-home remodel is a serious working relationship for the duration of the project. You’re inviting people into your home every day and trusting them with the place your family lives. The quality of communication, how quickly things get answered, how proactively problems get surfaced, whether the field team respects your space, matters enormously.

At Pat Scales Remodeling, we’ve built our process around the idea that a project this significant deserves a team that’s genuinely accountable. That means clear communication, careful planning, and a field crew that works like they’re proud of what they’re building. Because they are.

Frequently Asked Questions

How far in advance should I start planning a whole-home remodel?

Start conversations 6 to 12 months before you want to break ground. Design takes time, permits take time, and material lead times are real. The earlier you engage a design-build team, the more flexibility you have to make good decisions without rushing.

Do I have to move out during a whole-home remodel?

Not necessarily, but it depends on scope. Your contractor should be able to give you a realistic picture of the construction sequence and what it means for your daily life. Some homeowners stay successfully; some find moving out makes the whole project go more smoothly.

How do I prioritize what gets done in what order?

Start with structural and floor plan decisions, these are the constraints that everything else works around. Systems (HVAC, electrical, plumbing) come next. Finish and fixture selections come after. A design-build firm will guide you through this sequence.

What’s the biggest mistake homeowners make on whole-home remodels?

Delaying selections. Lead times on cabinets, tile, and specialty materials are real. Making finish and fixture decisions early, during design rather than during construction, is the single biggest factor in whether a project stays on schedule.

How is Pat Scales Remodeling different from other Columbus remodelers?

PSR is a design-build firm with an in-house, nationally award-winning design team. Design and construction under one roof means your project is planned cohesively from day one, with fewer surprises and a single team accountable for the result.

If you’re planning a whole-home remodel in Columbus, whether you’re months from breaking ground or just starting to think it through, we’d be glad to talk through what it would involve. Call Pat Scales Remodeling at (614) 505-6084 or request a consultation. No pressure, just a real conversation about your home and what’s possible.

Design-Build vs. Traditional Remodeling: What Columbus Homeowners Should Know

When Columbus homeowners start researching a significant remodel, a new kitchen, an addition, a whole-home renovation, they usually encounter two distinct models for how the project gets organized. Design-build and the traditional design-bid-build process look similar from the outside but involve meaningfully different experiences for the homeowner. Understanding the difference before you start matters.

What is Traditional Remodeling?

In a traditional remodeling process, sometimes called design-bid-build, the design and construction phases are handled by separate parties. You hire an architect or independent designer to develop plans. Once those plans are complete, you take them out to bid, getting quotes from multiple general contractors. You hire a contractor. The designer and contractor work together on your project, but they’re separate businesses with separate contracts, separate billing, and sometimes separate perspectives on how the project should go.

This model has a long history and works well in certain situations, particularly for new construction and large commercial work where the design complexity warrants a fully independent architect. For residential remodeling, it has some structural friction built in.

The most common challenge homeowners report is budget surprises. Plans are designed, and then the bids come in. If the bids come in higher than expected, which they frequently do because the designer and the contractor aren’t in constant communication about what things actually cost to build, the homeowner is caught between revising the design, which means more time and often more fees, or adjusting expectations. There’s no single point of accountability when things don’t line up.

What is Design-Build?

Design-build means design and construction are handled by a single firm, under one contract, with one team in ongoing communication from the first conversation through the final walkthrough.

At a design-build firm like Pat Scales Remodeling, the designer and the project manager work from the same information from day one. Design decisions are made with full knowledge of what they’ll cost to build and how they’ll affect the construction sequence. The homeowner doesn’t have to translate between two different entities or manage the relationship between them.

The practical impact is fewer surprises. What you see in the design, including lifelike 3D renderings, reflects what you’re actually getting and what your project actually involves. Changes made during design are made before construction starts, not after walls are open.

The Single-Point-of-Accountability Difference

One of the most underappreciated advantages of design-build is what happens when something doesn’t go exactly as planned.

In a traditional model, a scope question can turn into a conversation about who’s responsible. Was it a design issue or a construction issue? Does the contractor go back to the designer? Does the homeowner manage that exchange? Even when everyone involved is acting in good faith, the structural separation creates friction.

In design-build, there’s one entity responsible for both. The team that drew the plans is the team building them, and the same leadership is accountable for both. That doesn’t mean nothing unexpected ever happens on a remodel. Anyone who tells you that hasn’t done many Columbus kitchen projects. What it means is that when something comes up, the response comes from one place, clearly, with a plan.

What the Design-Build Process Actually Looks Like

For most homeowners working with a design-build firm for the first time, the process feels more front-loaded than they expected, in a good way.

The early phase is immersive. The design team asks a lot of questions: how you use the space now, what you’d change, how you entertain, what materials you’re drawn to, what you’ve seen in other homes that resonated. At PSR, that process produces custom plans quickly, with lifelike 3D renderings that help homeowners see exactly what they’re deciding, not abstract blueprints. Design decisions get made before construction starts because that’s when they’re cheapest to make.

By the time the build crew starts, the plan is tight. Selections are confirmed. Materials are ordered. The field team knows the scope and timeline because they’ve been part of building it.

Is Design-Build Right for Every Project?

Design-build is particularly well-suited for whole-home remodels and additions, where design and construction decisions are deeply interdependent. It fits projects in Columbus’s older neighborhoods, like German Village, Bexley, Clintonville, Grandview, and Upper Arlington, where historic character, period details, and structural surprises require design and build expertise working in tandem. It suits homeowners who want a streamlined process: one team, one contract, one place to call. And it’s a strong fit for premium kitchen and bath projects where the design quality matters as much as the execution.

For smaller, clearly defined projects, like replacing a roof or painting a house, the design-build model isn’t necessary because the design component is minimal. The more complex and design-intensive the project, the more the integration pays off.

Questions to Ask Any Contractor

Whether you’re evaluating a design-build firm or a traditional general contractor, a few questions cut through quickly.

  1. How do you handle changes made during construction? The answer tells you a lot about communication and change-order practices.
  2. Can I see examples of projects similar to mine? Look for Columbus projects, not just a national portfolio.
  3. Who is my point of contact, and how do you communicate throughout the project?
  4. And if it’s a design-build firm, how do your design and construction teams coordinate? That should have a clear answer.

Frequently Asked Questions

What’s the main advantage of design-build for a homeowner?

Single point of accountability, reduced budget surprises, and a more cohesive process. Design and construction are aligned from the start rather than handed off between separate parties.

Is design-build more expensive than traditional remodeling?

Not necessarily. Hidden costs in traditional remodeling, like redesign fees when bids come in high, change orders during construction, and coordination delays, often close the gap. What design-build provides is more predictability upfront. We never discuss specific pricing in blog content; reach out for a consultation.

How long does the design phase take with a design-build firm?

PSR produces custom plans and 3D renderings quickly, in weeks rather than months. Timelines depend on project complexity and how quickly selections are finalized.

Can design-build firms handle historic homes?

PSR has specific experience with Columbus’s historic neighborhoods, the older homes in German Village, Bexley, and Grandview that require sensitivity to period character and careful handling of the surprises older structures often contain.

What awards has Pat Scales Remodeling received?

PSR was named NARI of Central Ohio’s 2024 Local Remodeler of the Year and 2025 Regional and National Remodeler of the Year, recognitions from the National Association of the Remodeling Industry. [NOTE: confirm award details before publishing]

If you’re planning a significant remodel and want to understand whether design-build is the right fit, we’d welcome the conversation, whether you’re still in the early stages or ready to start planning. Call Pat Scales Remodeling at (614) 505-6084 or request a consultation at patscalesremodeling.com.

SEO BLOCK

Title tag: Design-Build vs. Traditional Remodeling Explained (48 chars)

Meta description: Design-build or traditional design-bid-build? Here’s how the two remodeling models differ and what each means for Columbus homeowners. (133 chars)

URL slug: /design-build-vs-traditional-remodeling/

Primary keyword: design-build vs traditional remodeling

Secondary keywords: what is design-build remodeling, design-build contractor Columbus, design-bid-build vs design-build, benefits of design-build

Internal links: About/process page | whole-home remodel service page | consultation/contact page

Service-page opportunities: “design-build remodeler Columbus,” “design-build contractor Dublin OH” are commercial-intent terms for the main service or about page.

Pat Scales Summer 2026 Newsletter

Celebrating Summer 2026

Hope you’re staying cool this summer!

Summer 2026 has been a blast – new and beautiful finished projects, awards we’re super proud of, and the chance to celebrate jobs well done. 

Announcements & Awards

PSR Recognized for Excellence with Two Award-Winning Kitchens

An incredible week at the National Association of the Remodeling Industry National Level-Up Conference in Tempe, Arizona!

Throughout the week, we connected with industry professionals from across the country, explored emerging trends, and gained valuable insights into business and leadership. To finish off the conference, our team attended the Evening of Excellence and national awards ceremony. We are so honored to have been recognized for two national awards during this ceremony!

✨Residential Kitchen Under $50,000

✨Residential Kitchen $100,000 – $150,000

We’re incredibly proud of the craftsmanship, collaboration, and dedication that went into these projects. A huge thank you to our team, trade partners, and clients who make work like this possible. This recognition truly reflects all of your hard work and trust.

See the Winners

⭐Residential Kitchen Under $50k

⭐Residential Kitchen $50-100k

A Space Worth Celebrating

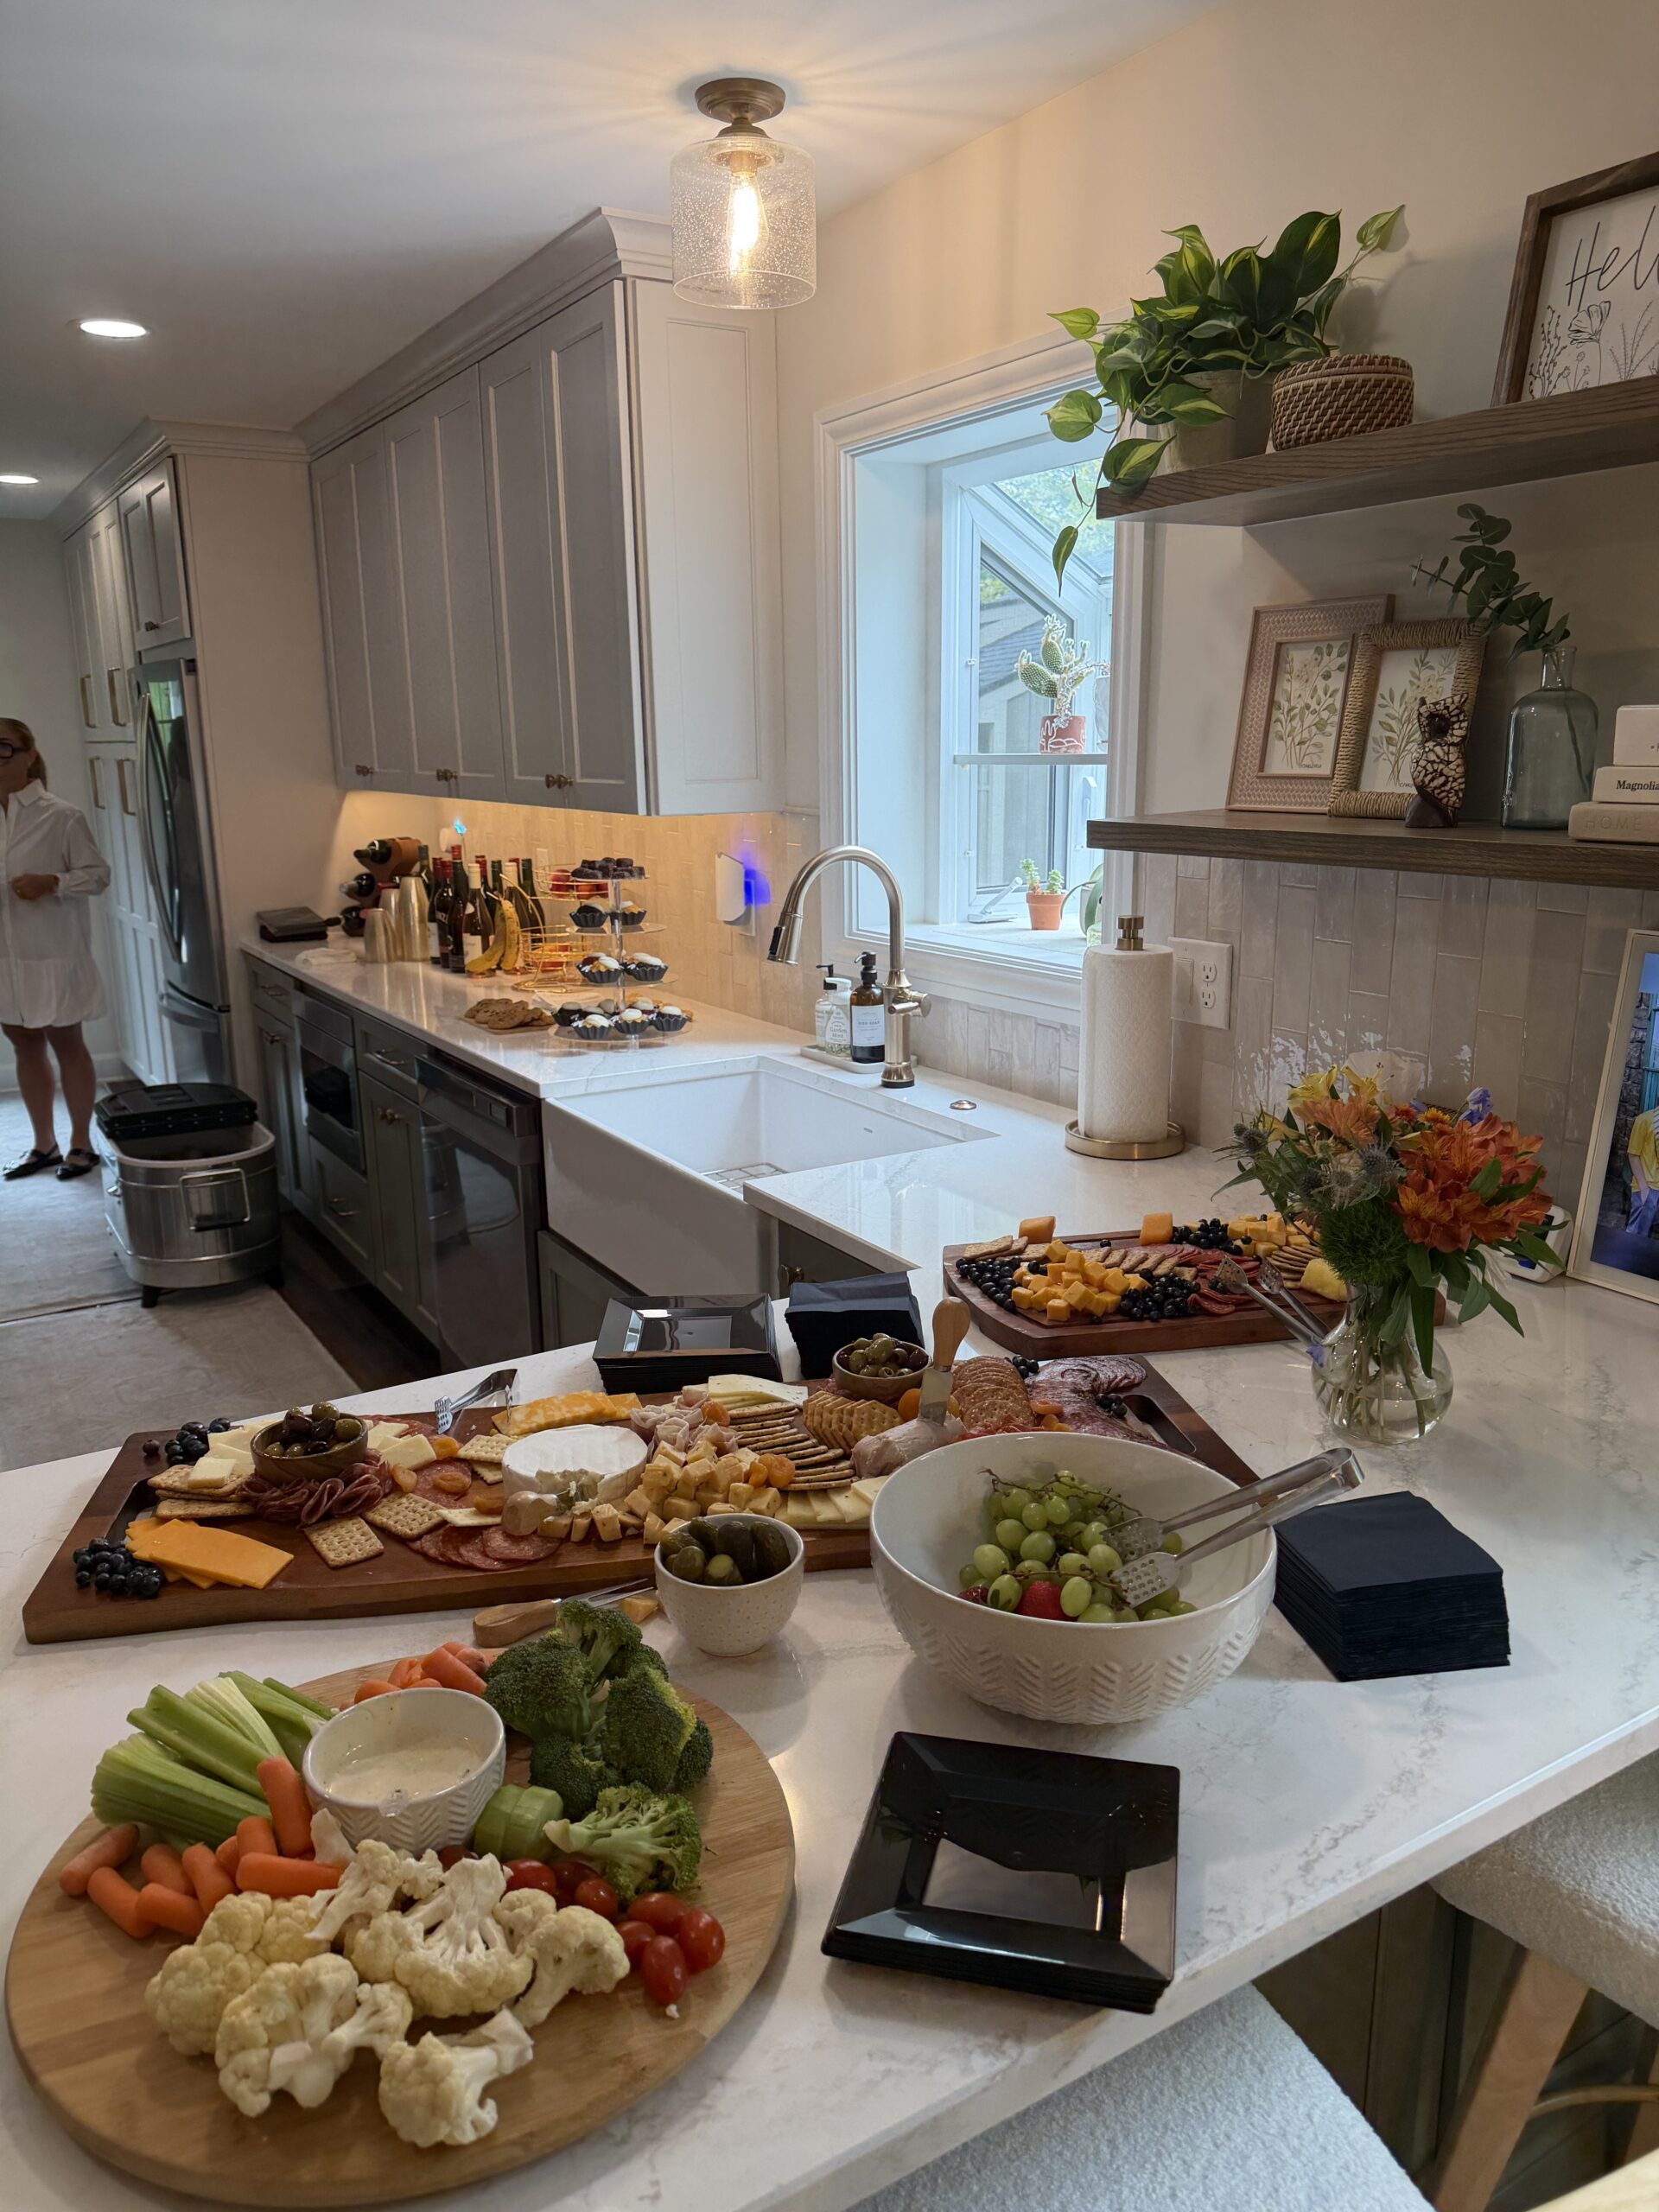
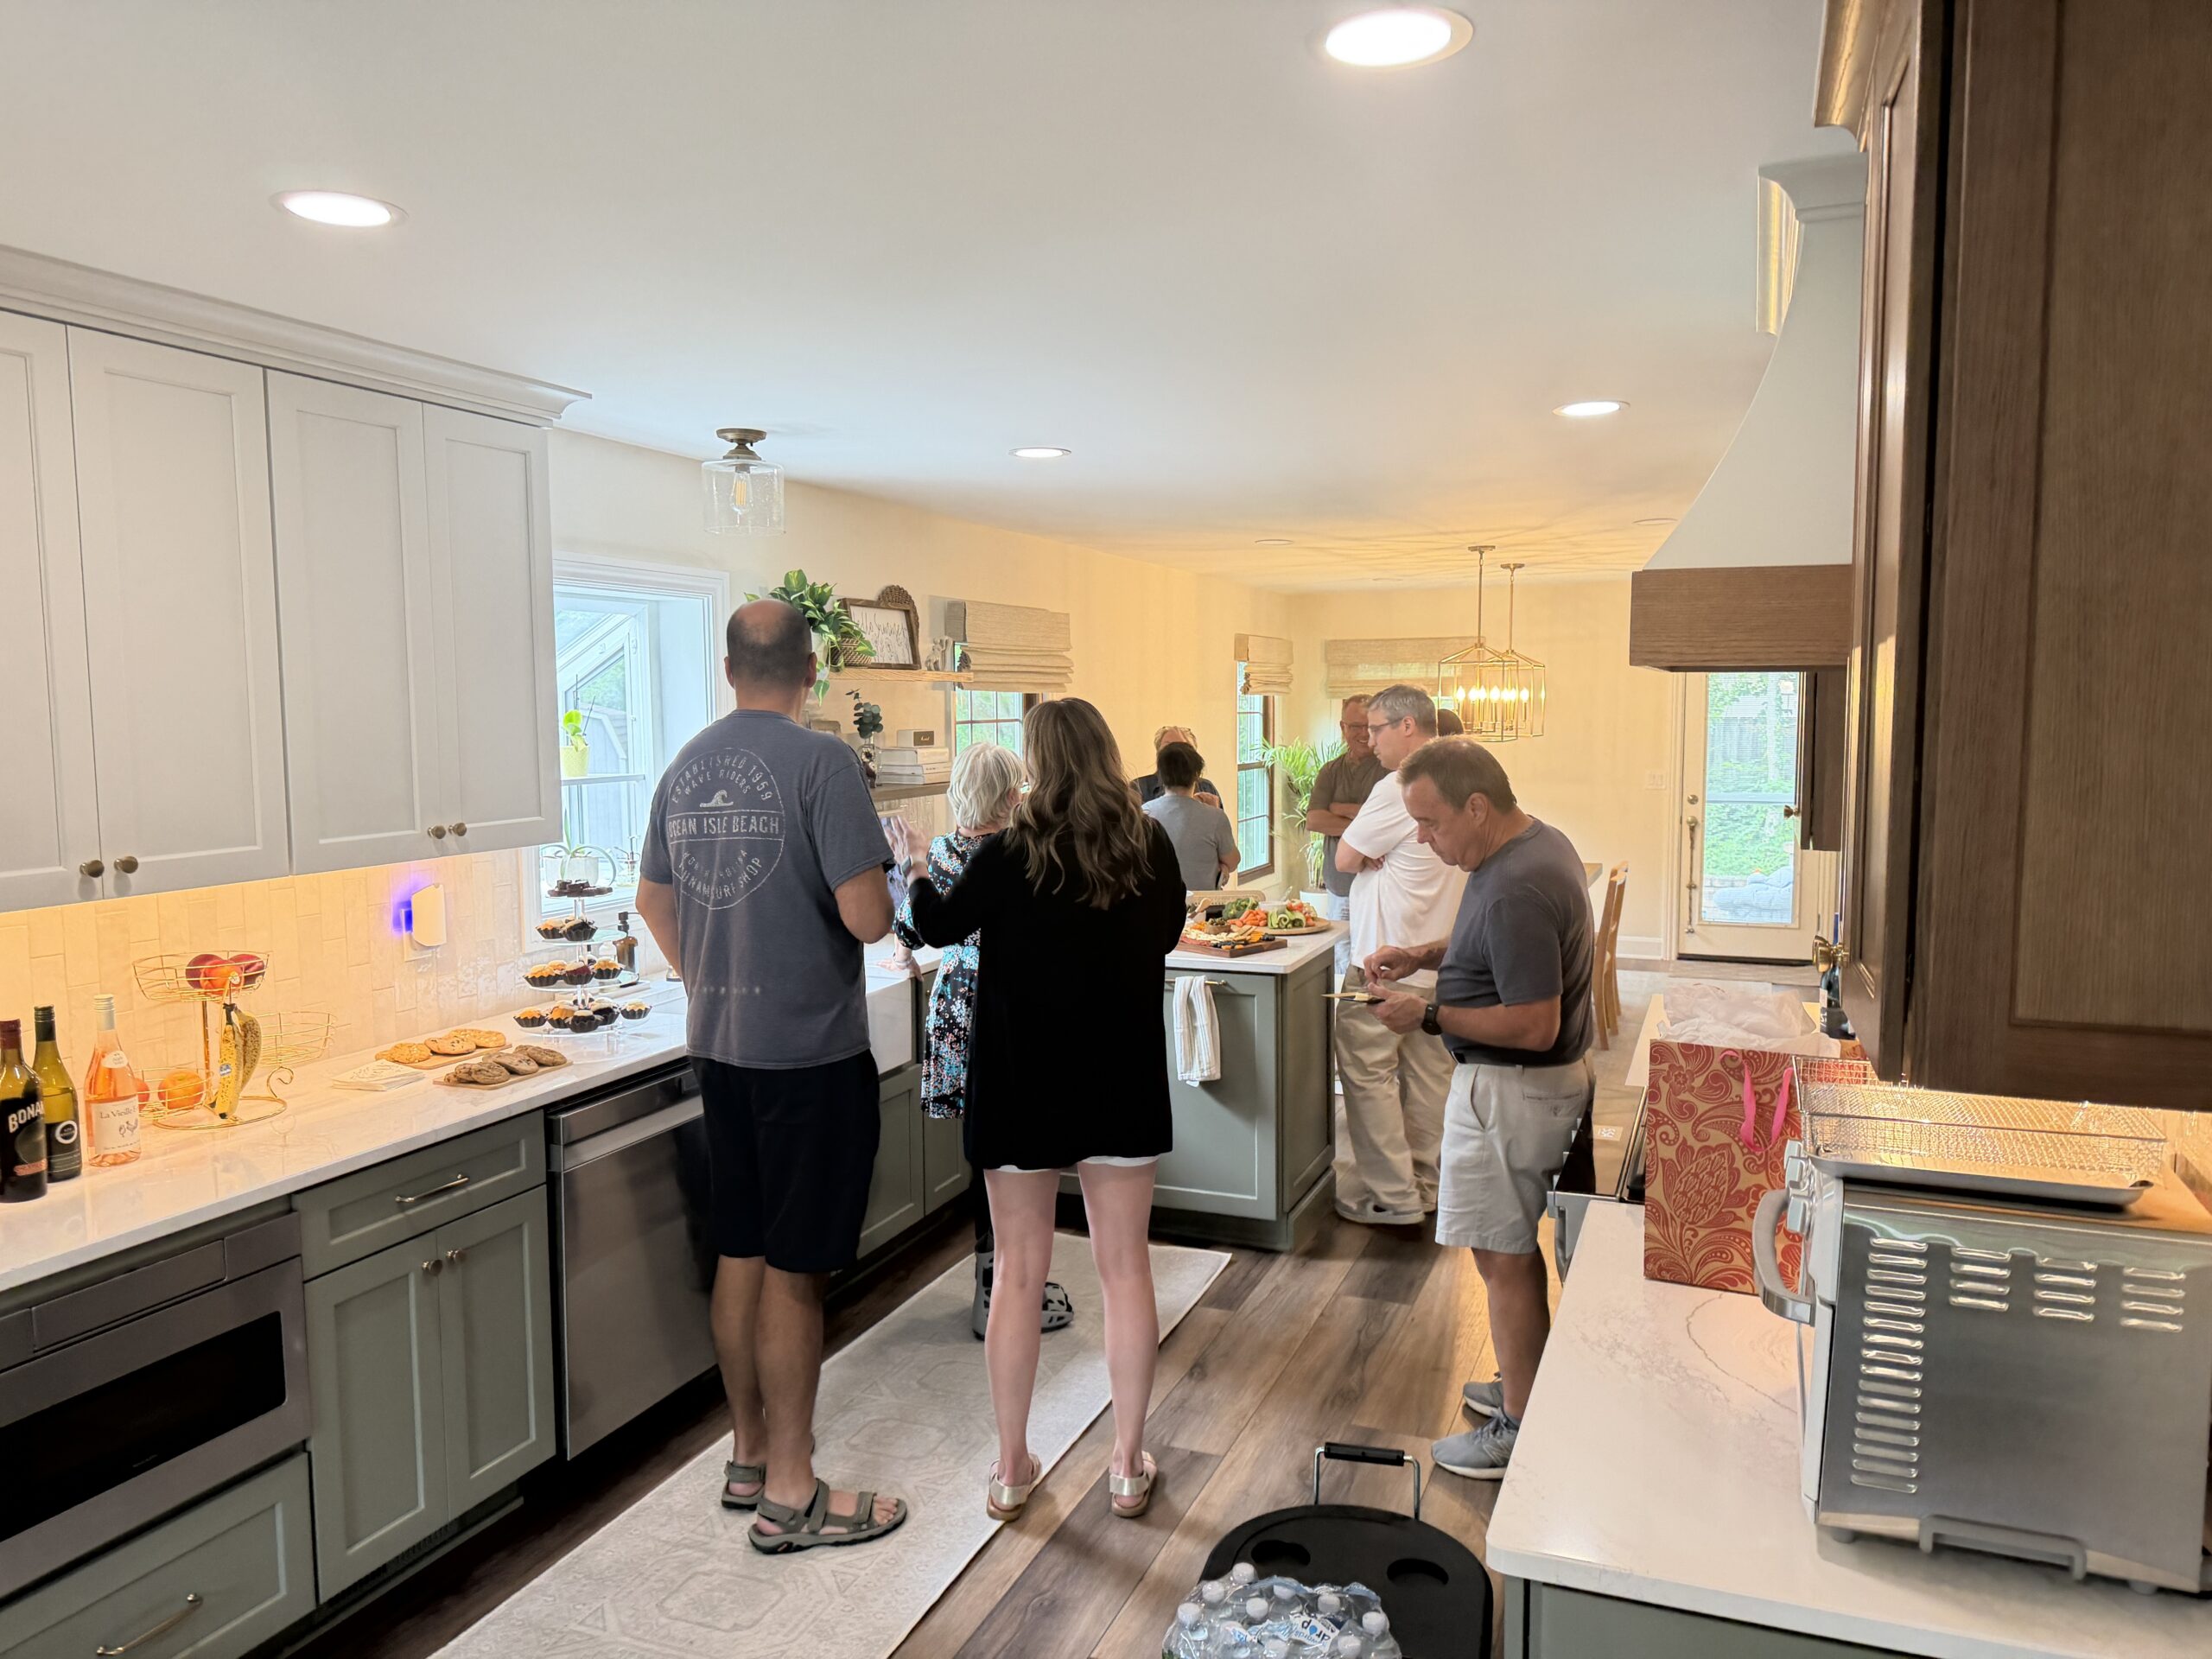
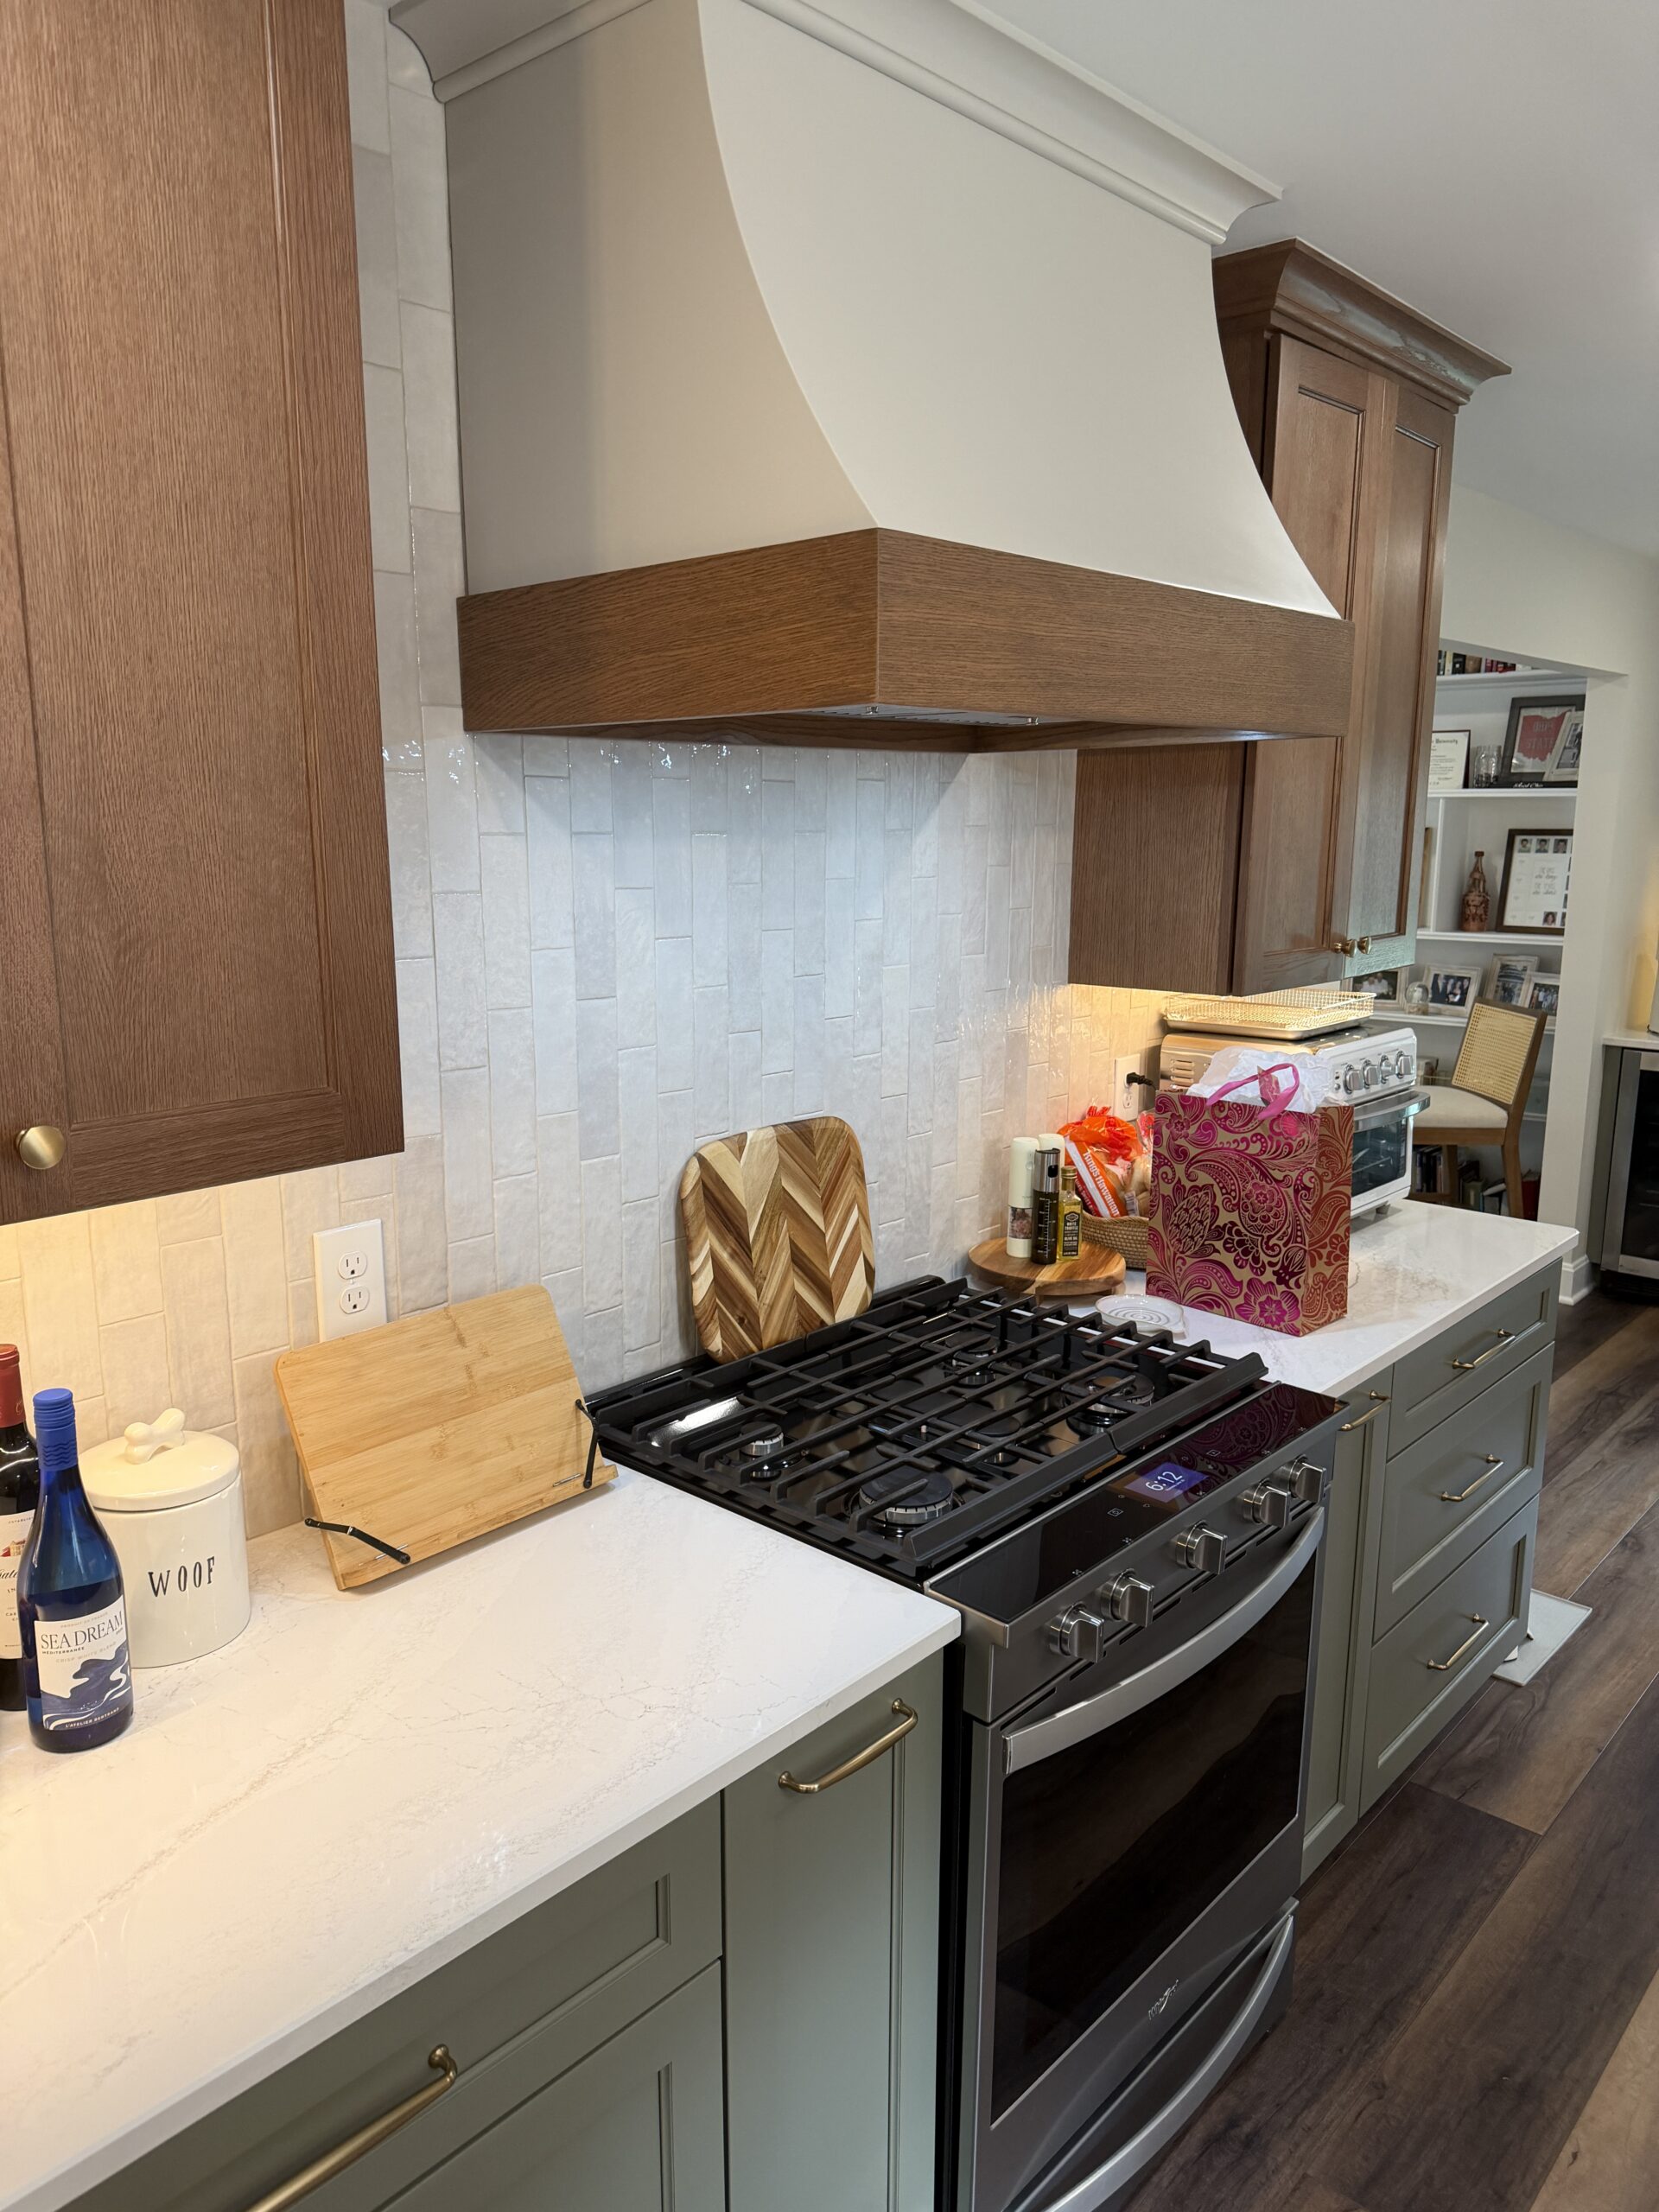
Reveal Party for Home Remodel

One of the most rewarding moments of any remodeling project is seeing our clients truly enjoy their newly transformed home.

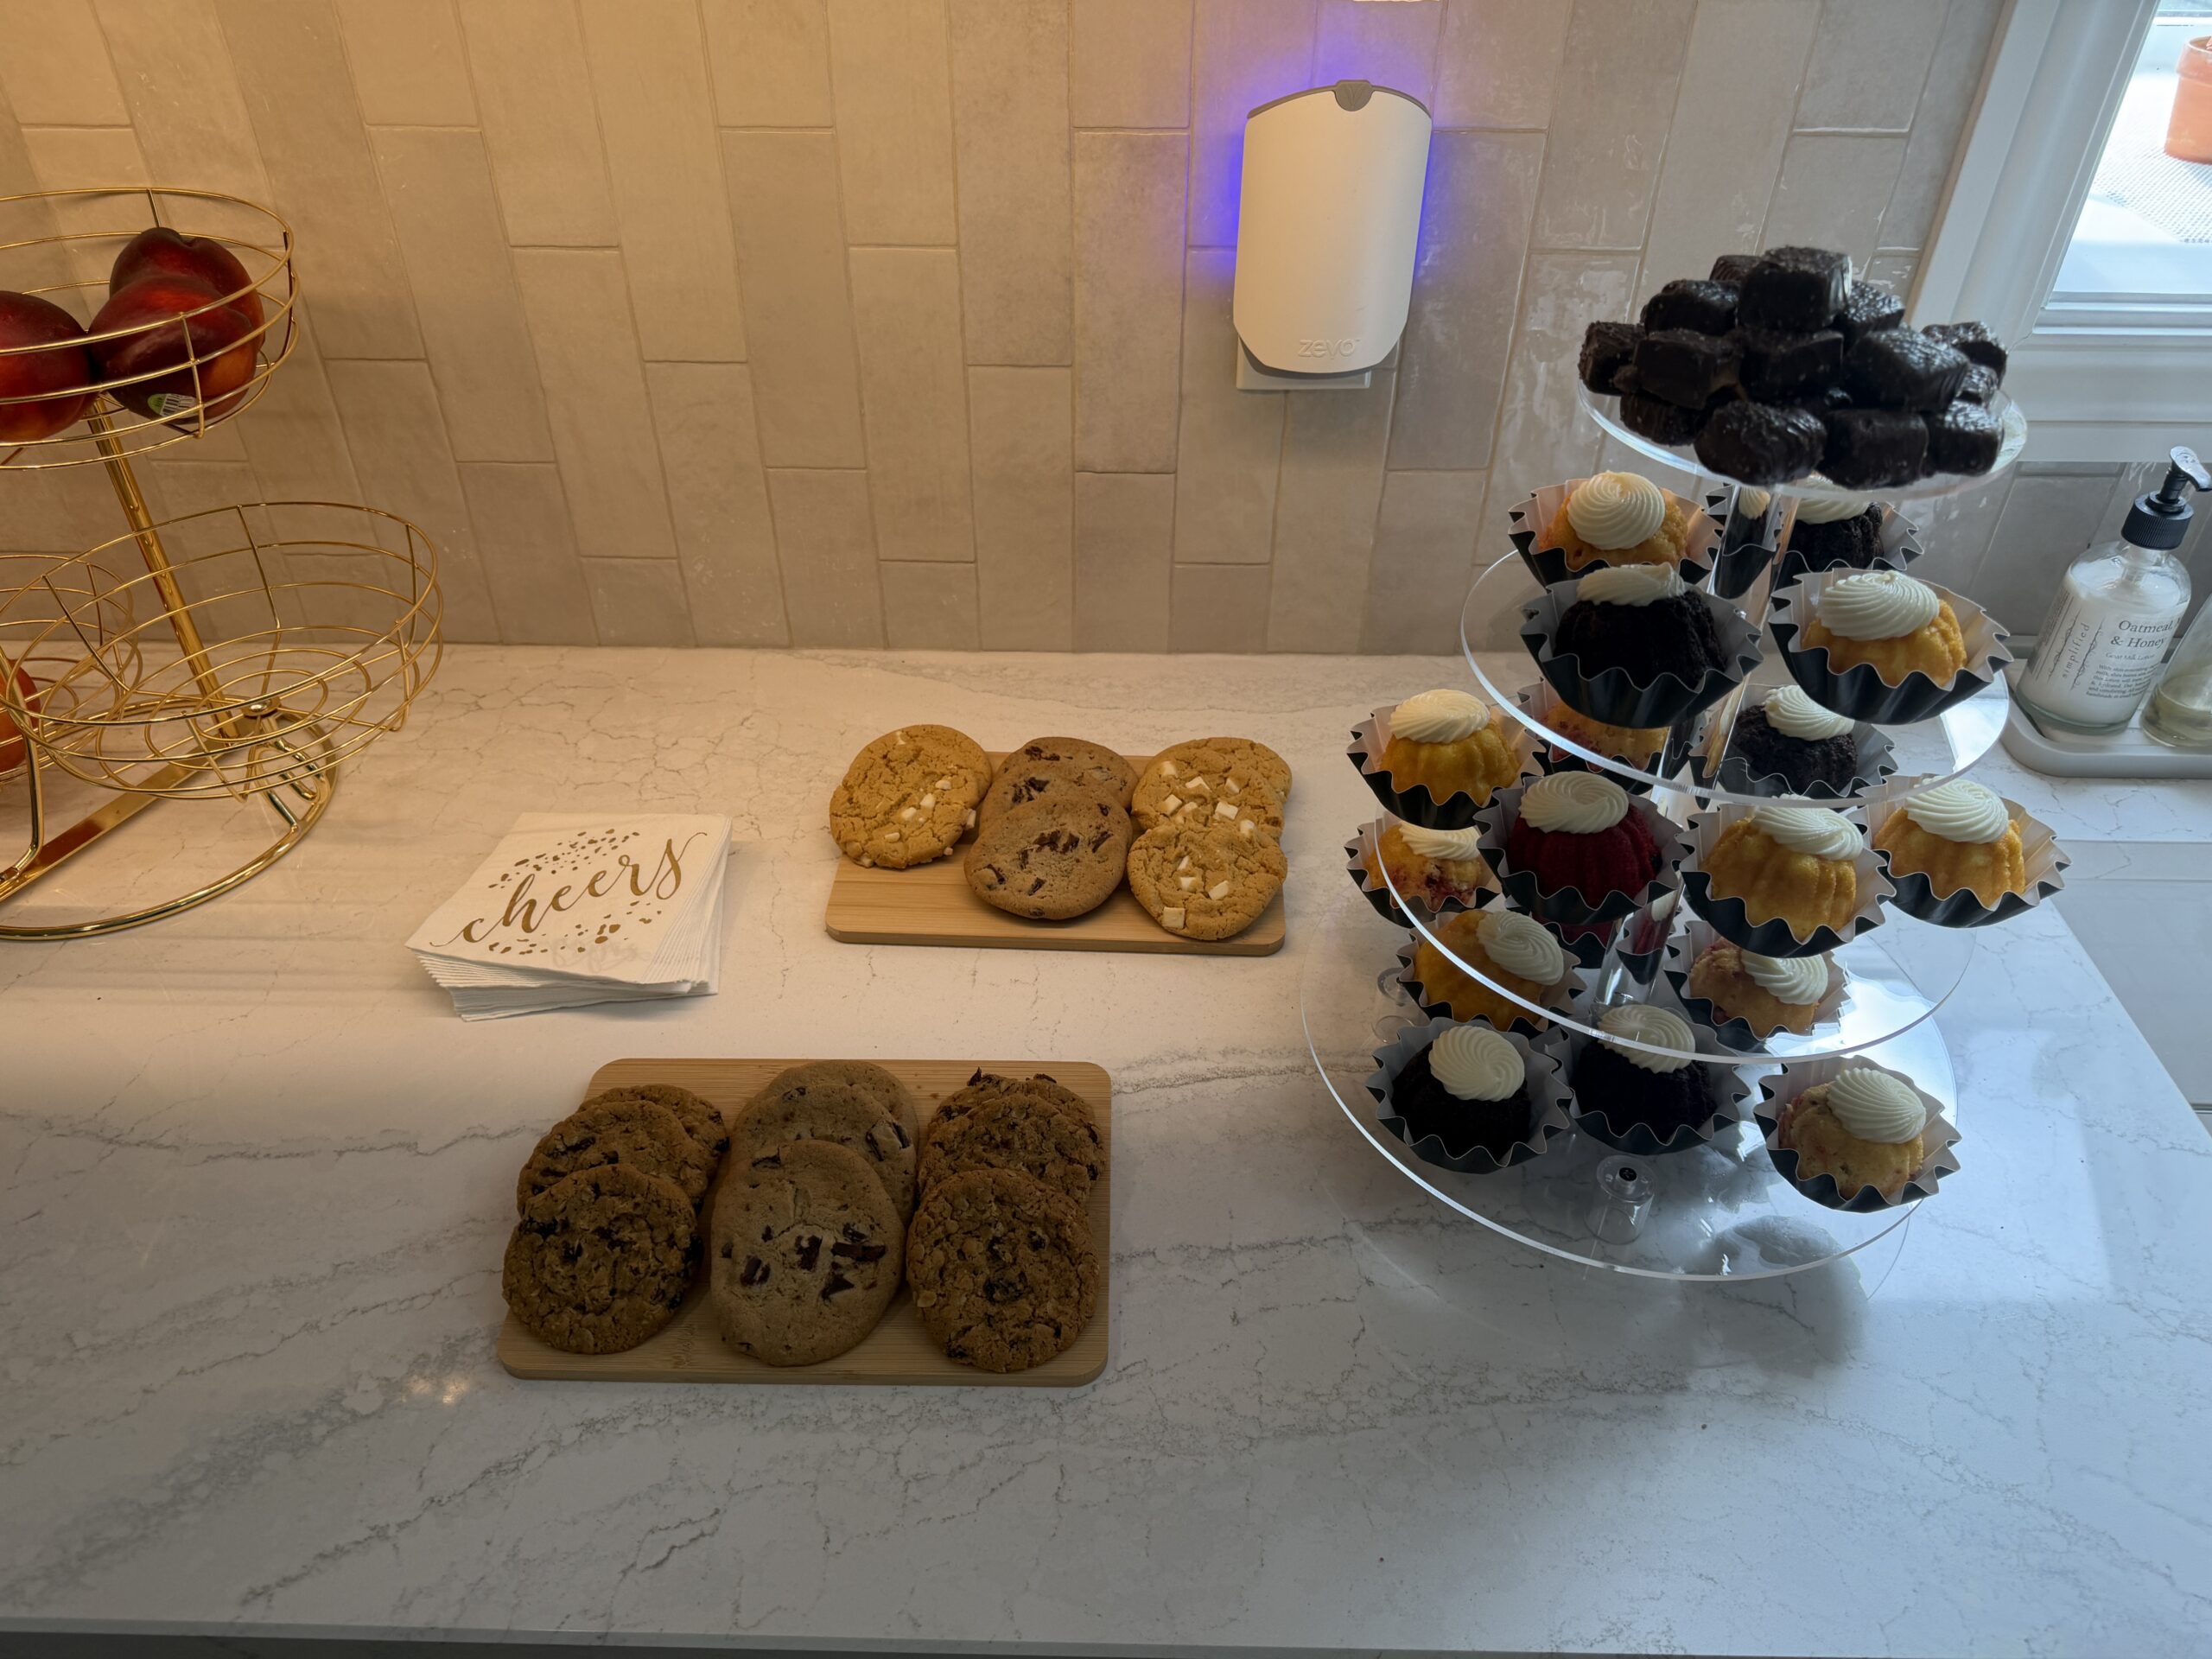
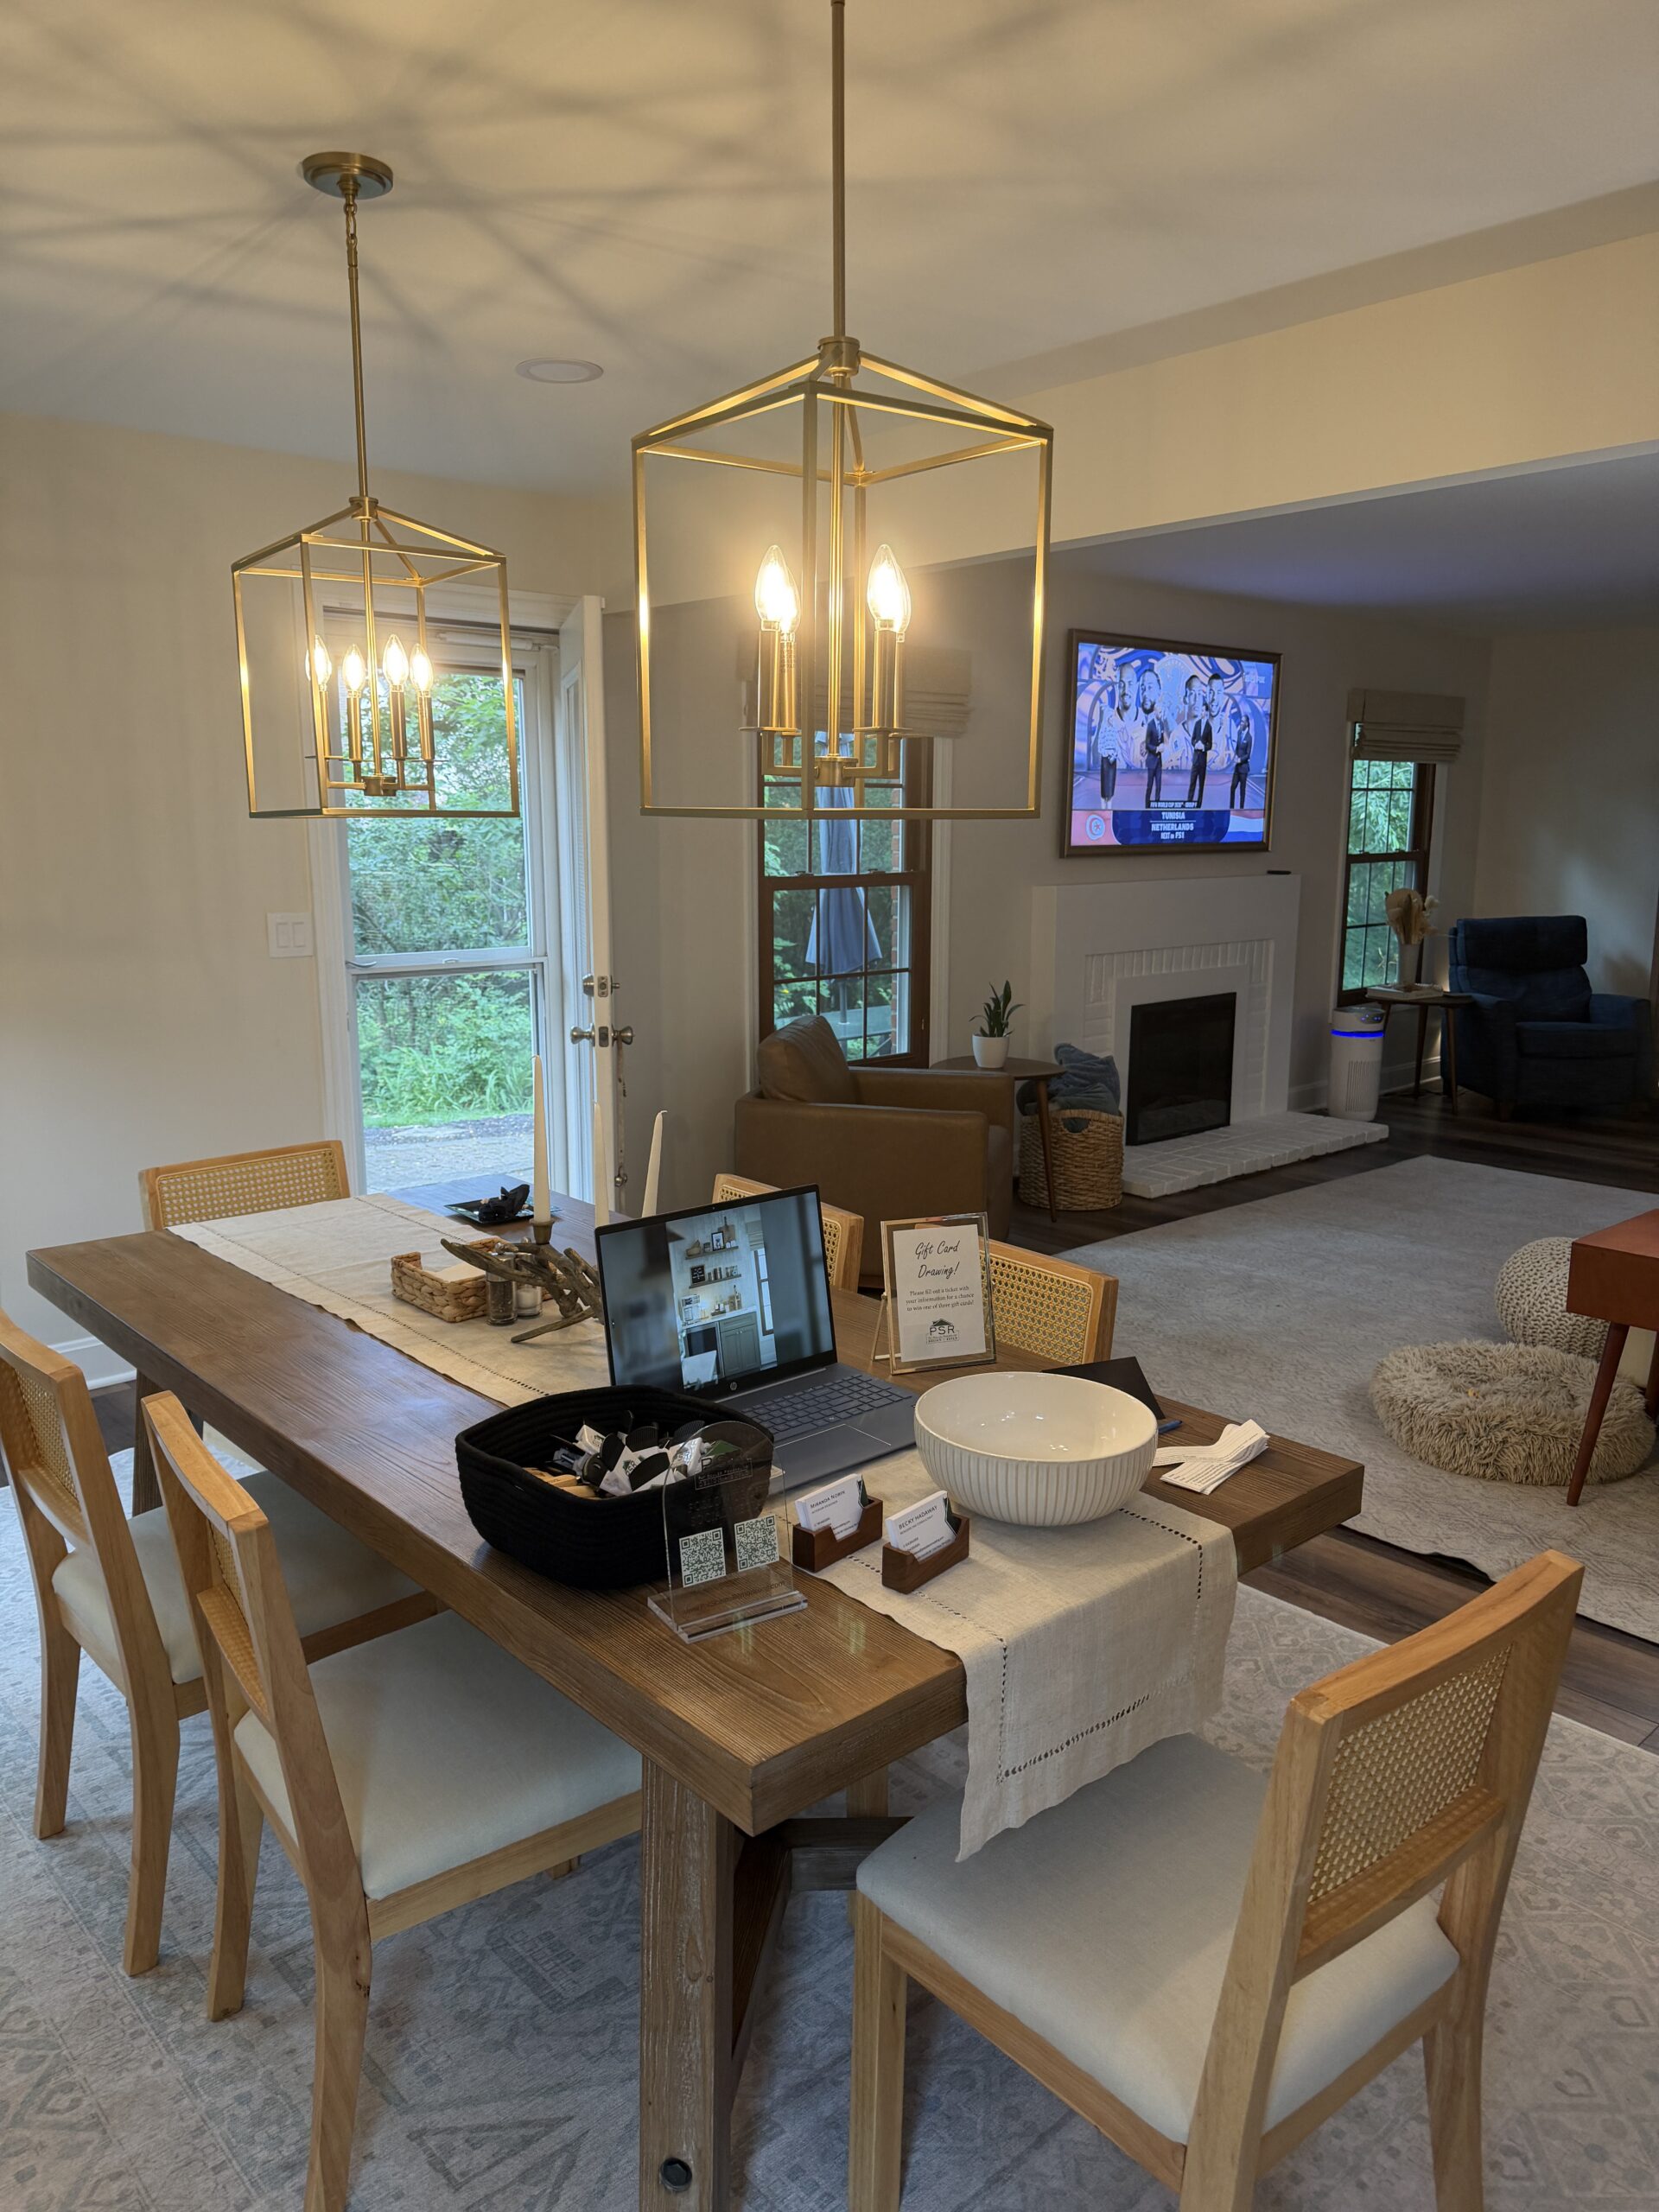
After completing this beautiful first-floor remodel, we had the pleasure of celebrating with a reveal party as the homeowners welcomed family and friends into their refreshed space for the very first time. Watching them create new memories in a home designed to fit their lifestyle made the occasion even more meaningful.

We are grateful they trusted us with their vision and honored to have been part of such a special milestone. Congratulations on your beautiful new space. We wish you many happy years and unforgettable memories ahead!

From meaningful conversations to a few fun prize wins along the way, it was an enjoyable and energizing night for everyone who attended. We’re always grateful for opportunities like this to learn, connect, and celebrate the work we’re all passionate about.

  • IMG_0988

  • IMG_0987

  • IMG_0983

  • IMG_0989

  • IMG_0981

  • IMG_0990

Recent Projects ~ Summer 2026

Primary Bath

Clintonville

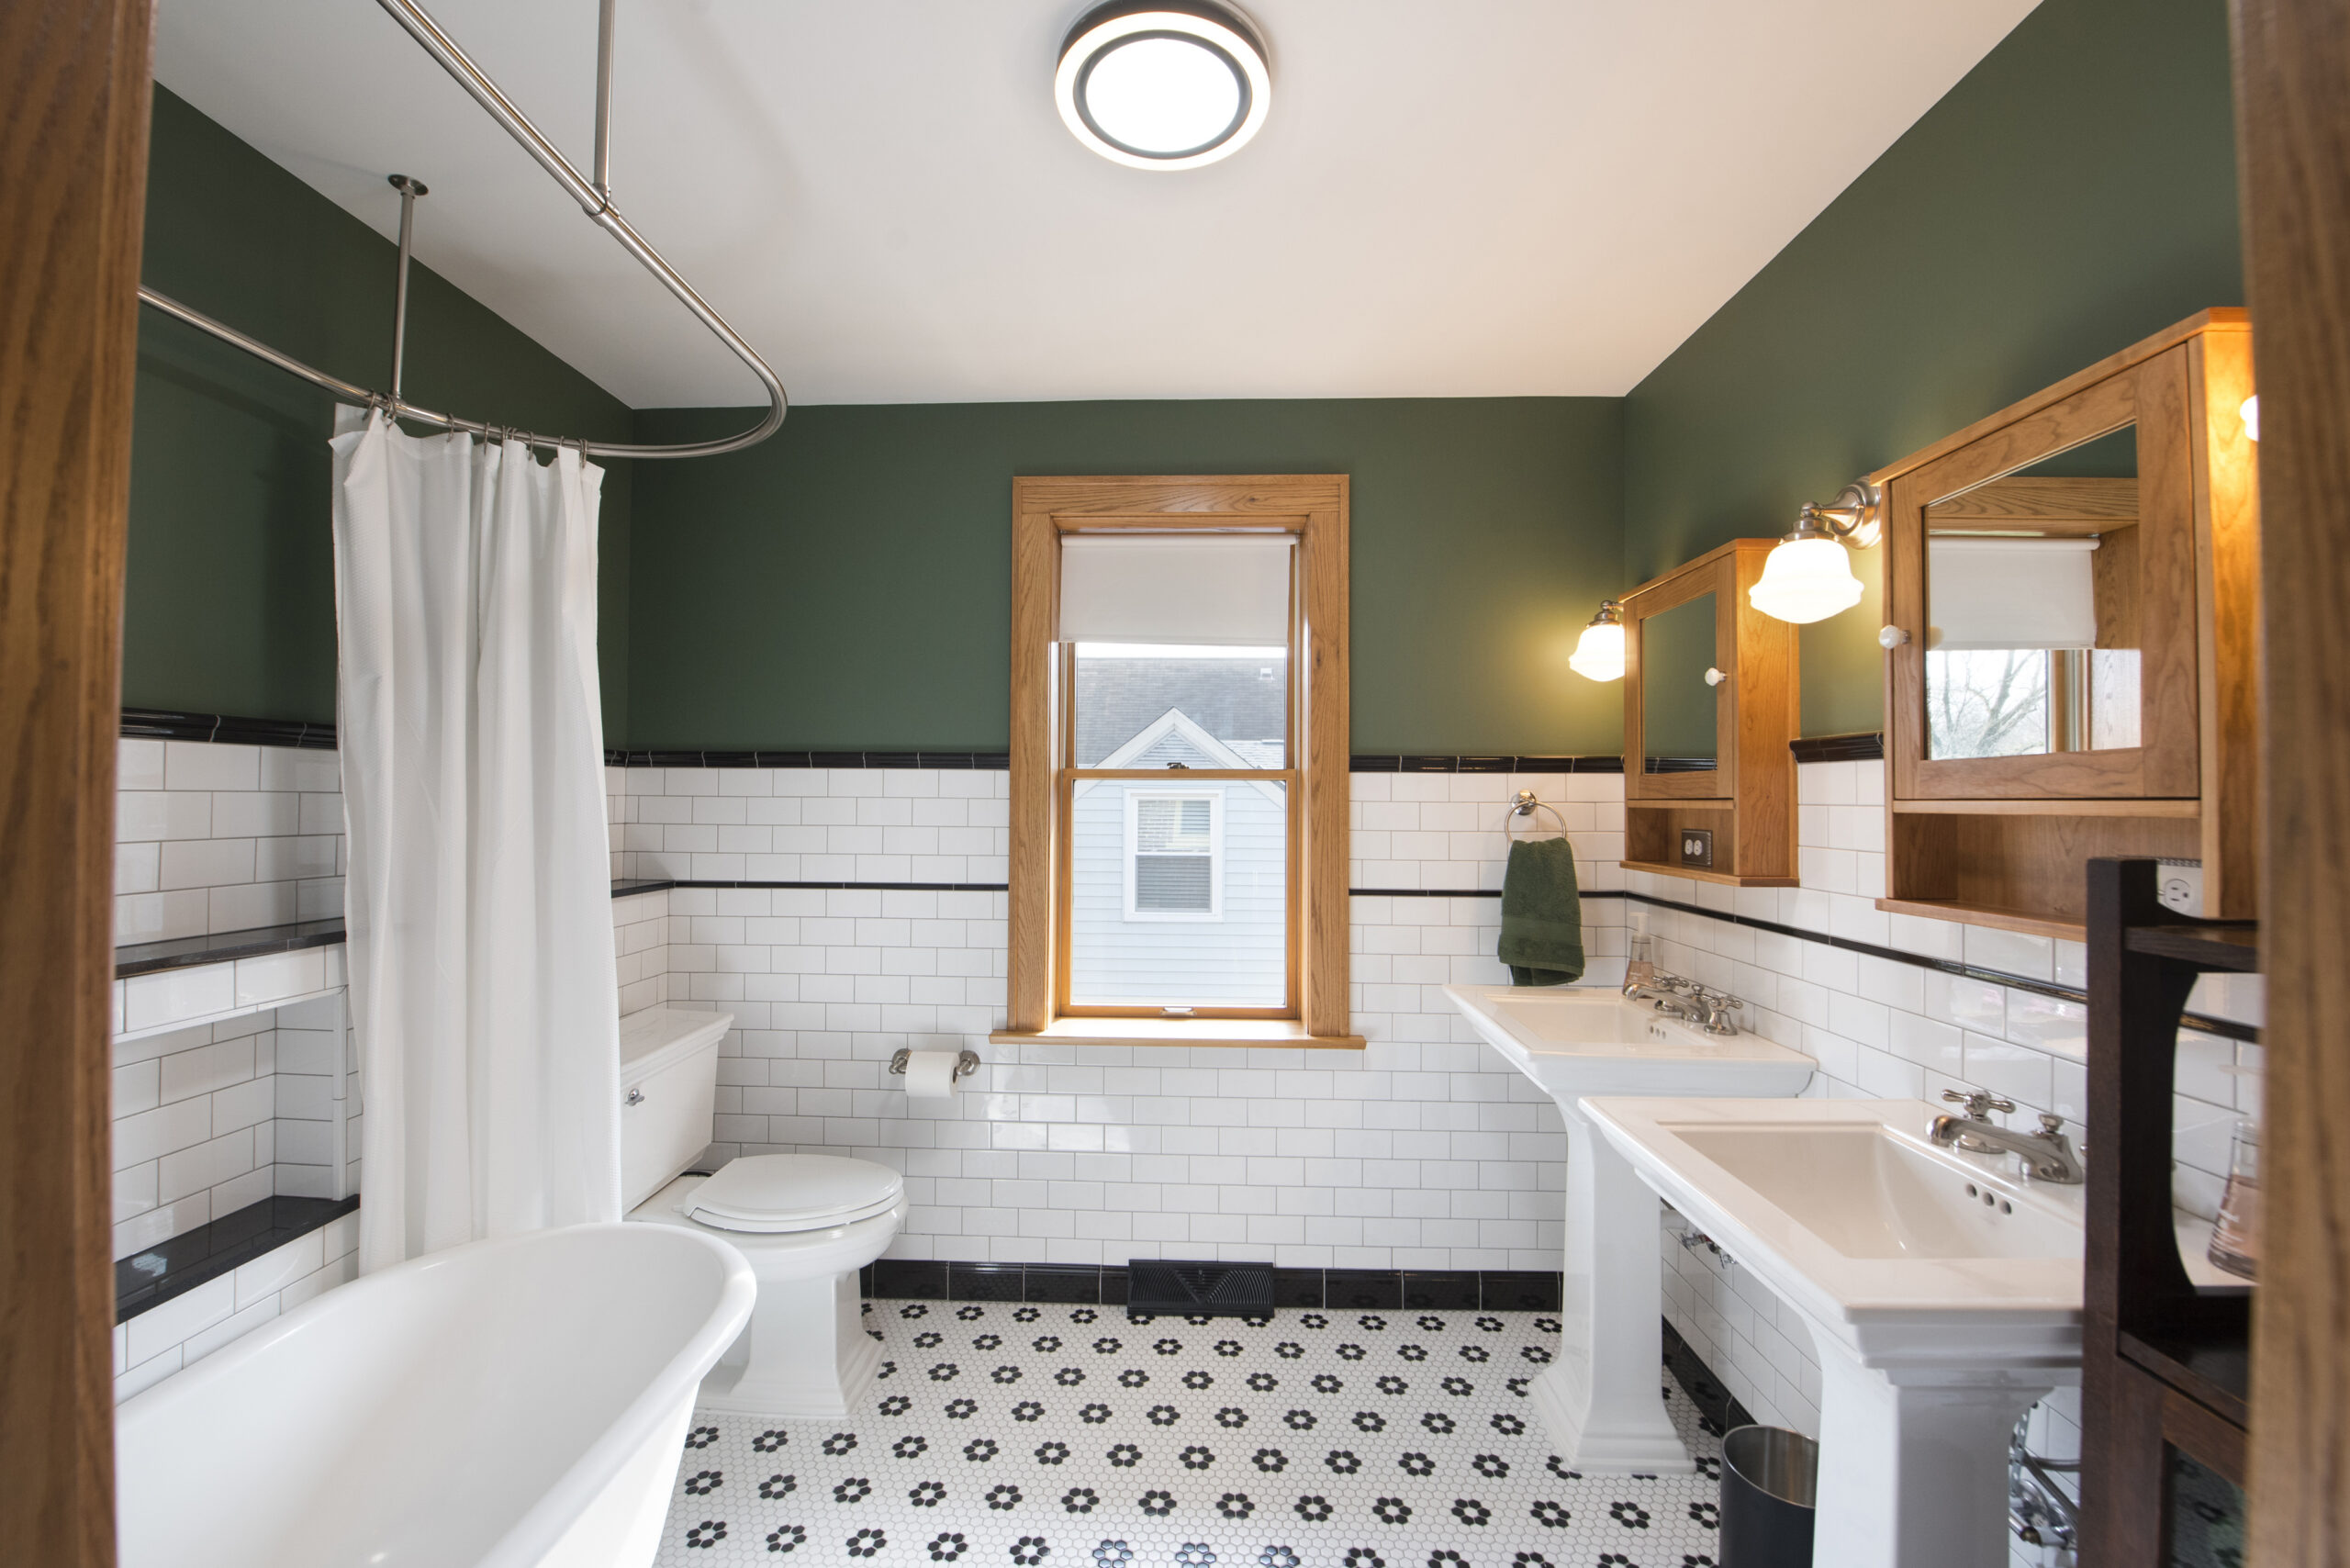
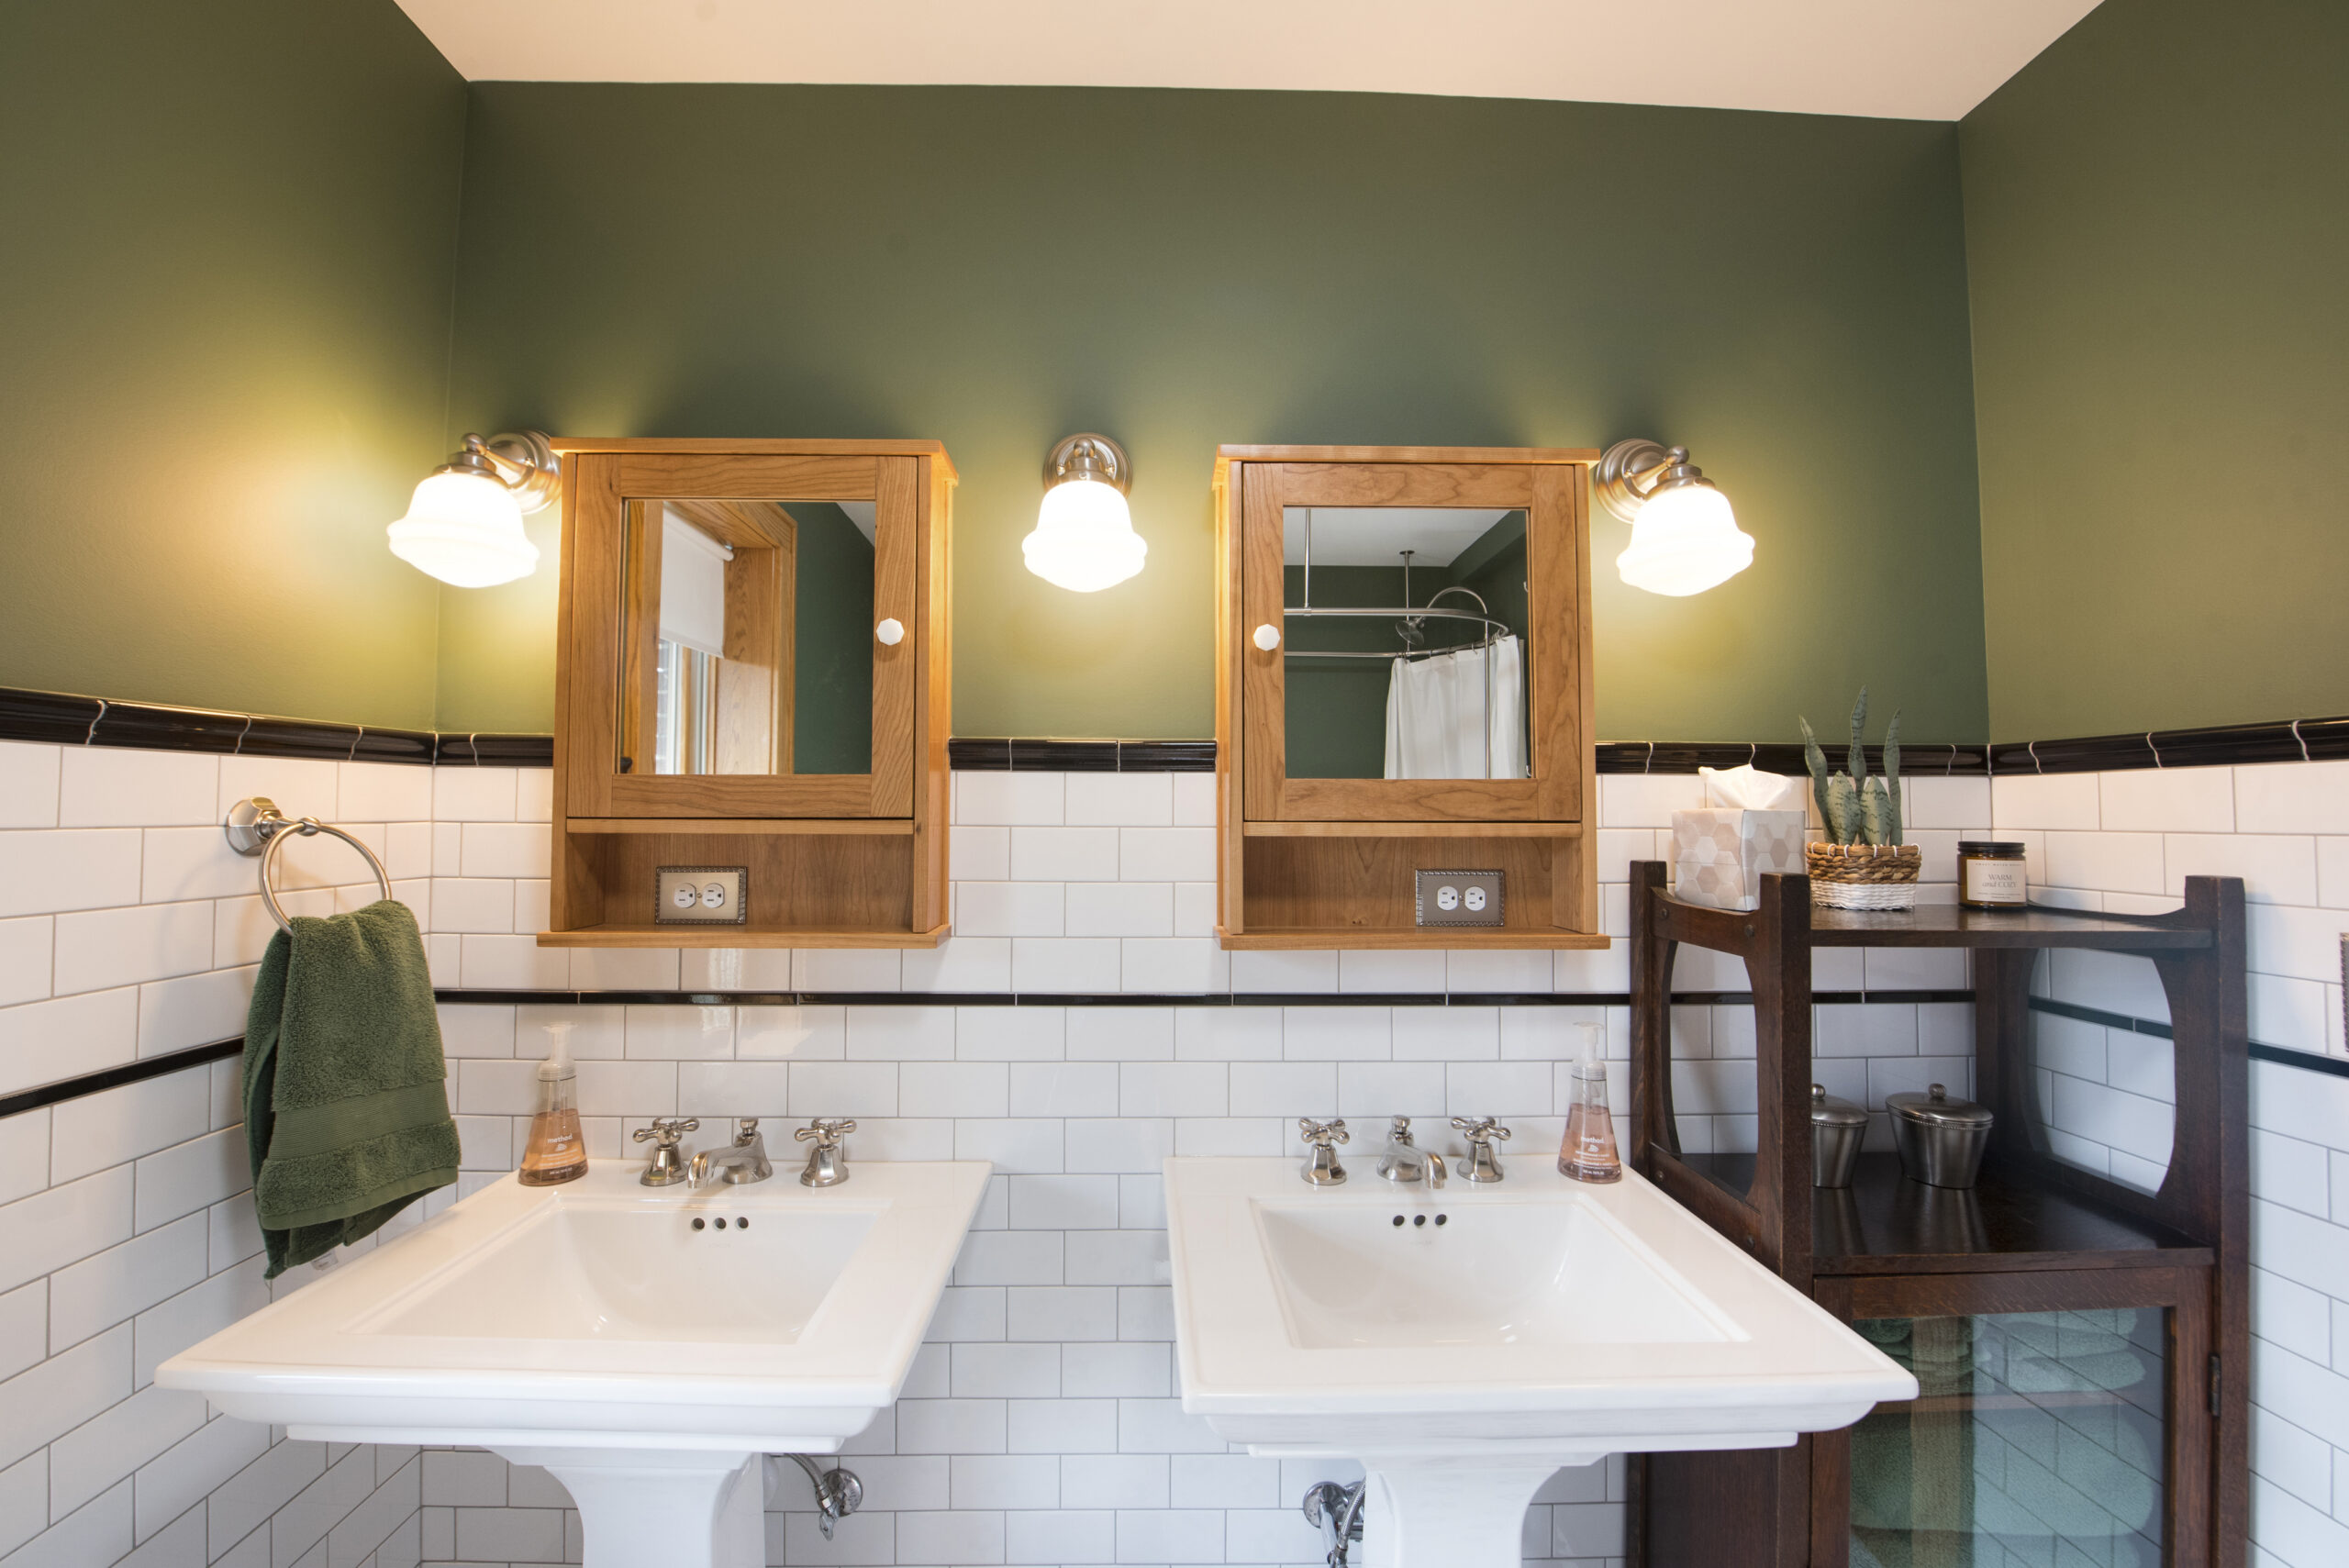
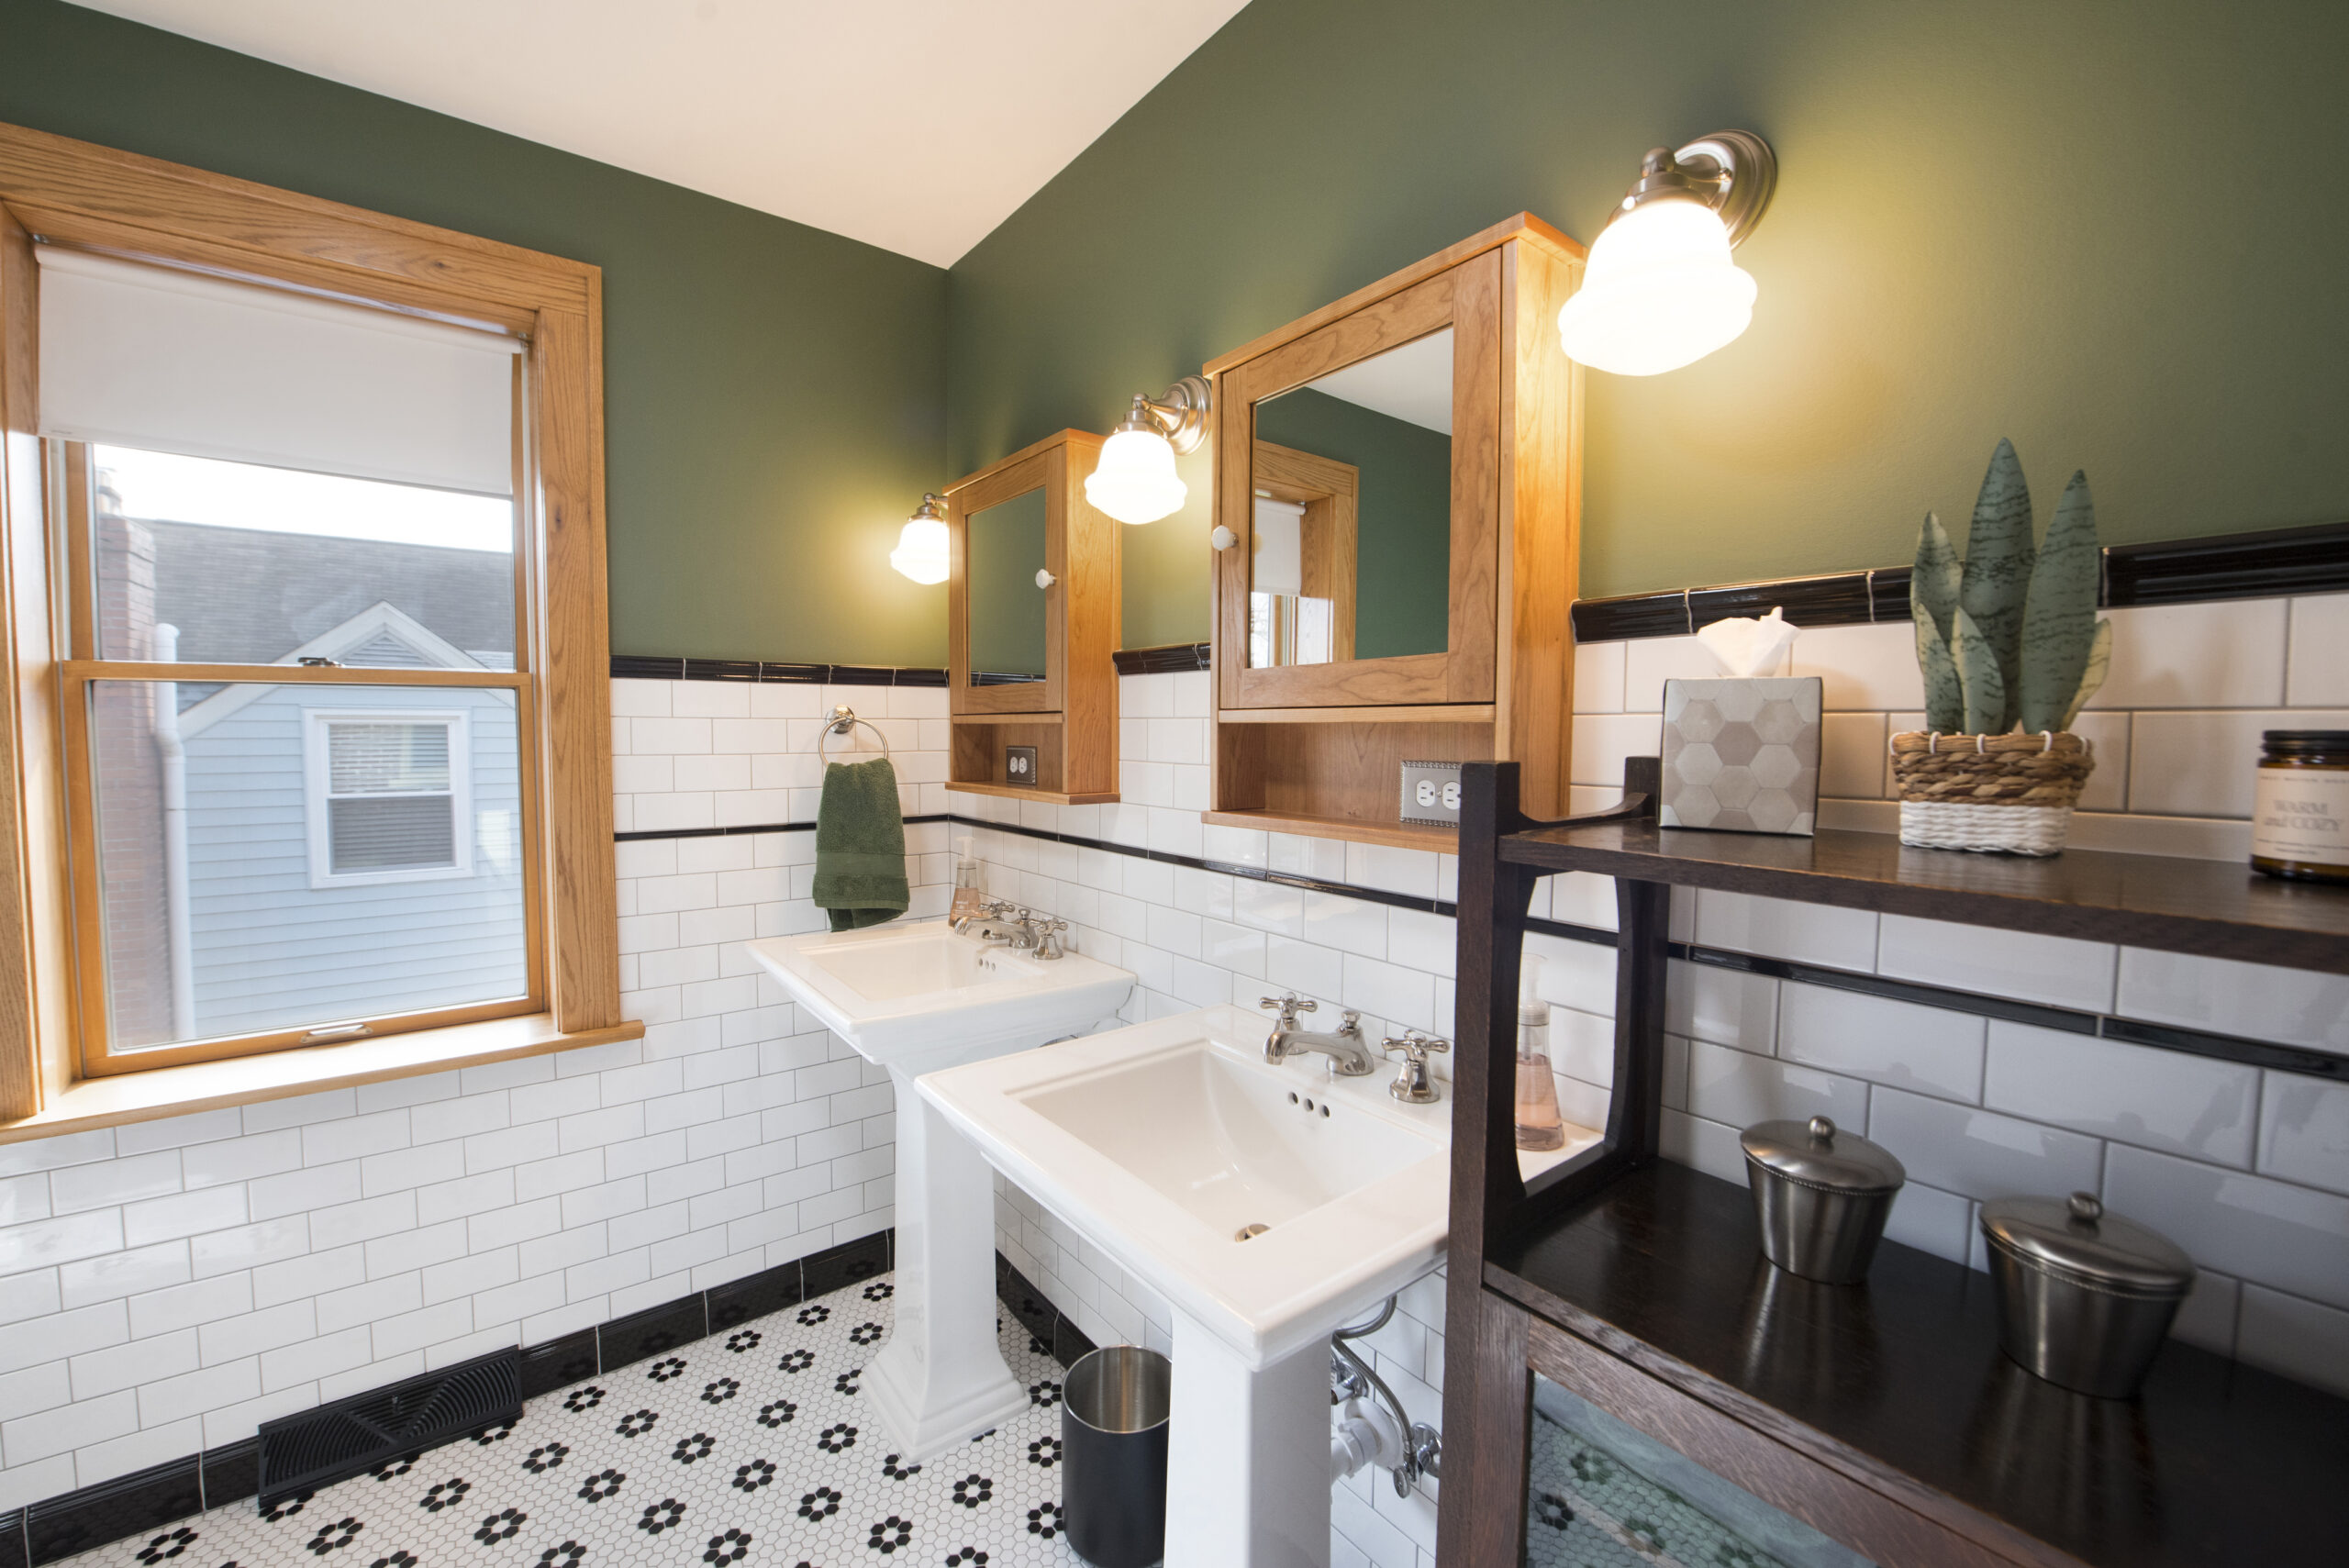
When remodeling a historic home, the goal isn’t to recreate the past, it’s to respect it.

For this 1920s bathroom renovation, we carefully incorporated traditional construction methods and design details that feel authentic to the home’s original era. From the craftsmanship behind the installation to the selection of fixtures and finishes, every element was chosen to complement the home’s existing character.

We paid close attention to the details, coordinating new materials with original architectural features and even selecting period-appropriate light switches to create a seamless connection between old and new. This bathroom feels as though it has always been part of the home. A new space that is timeless, functional, and full of character.

See Full Gallery


Home Addition

Columbus

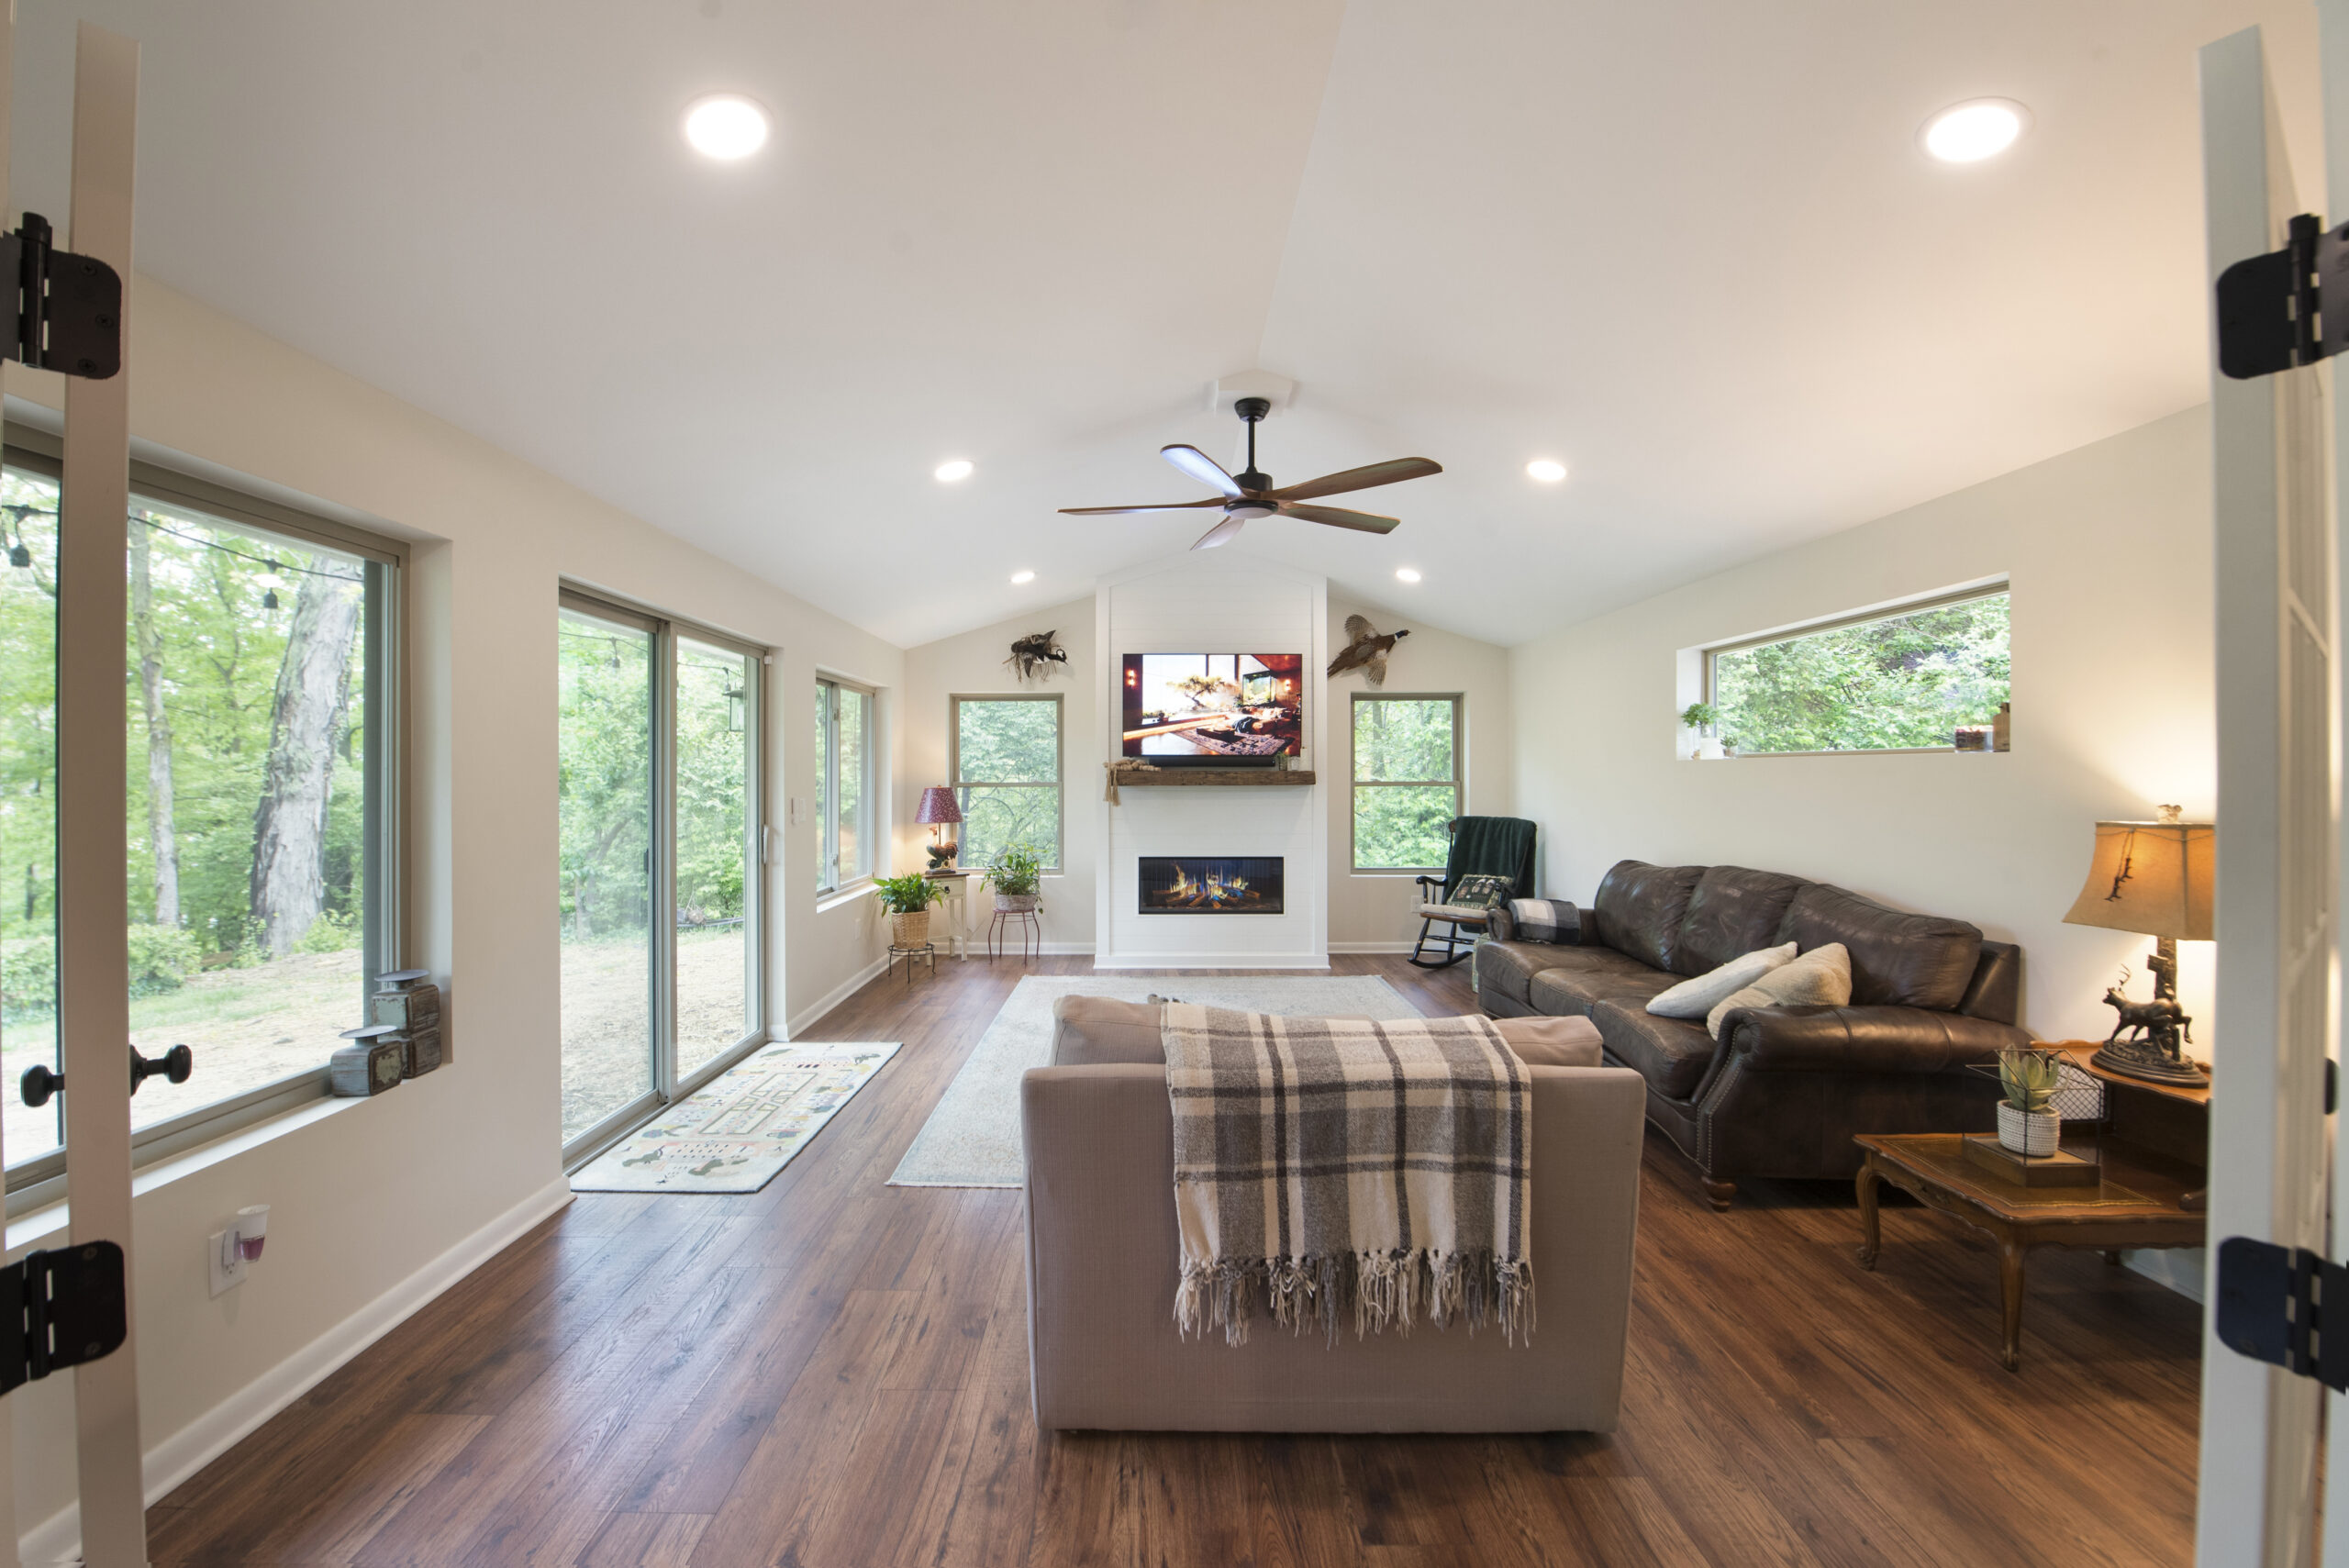
When a home starts to feel a little tight, the right solution isn’t just more space, it’s better space.

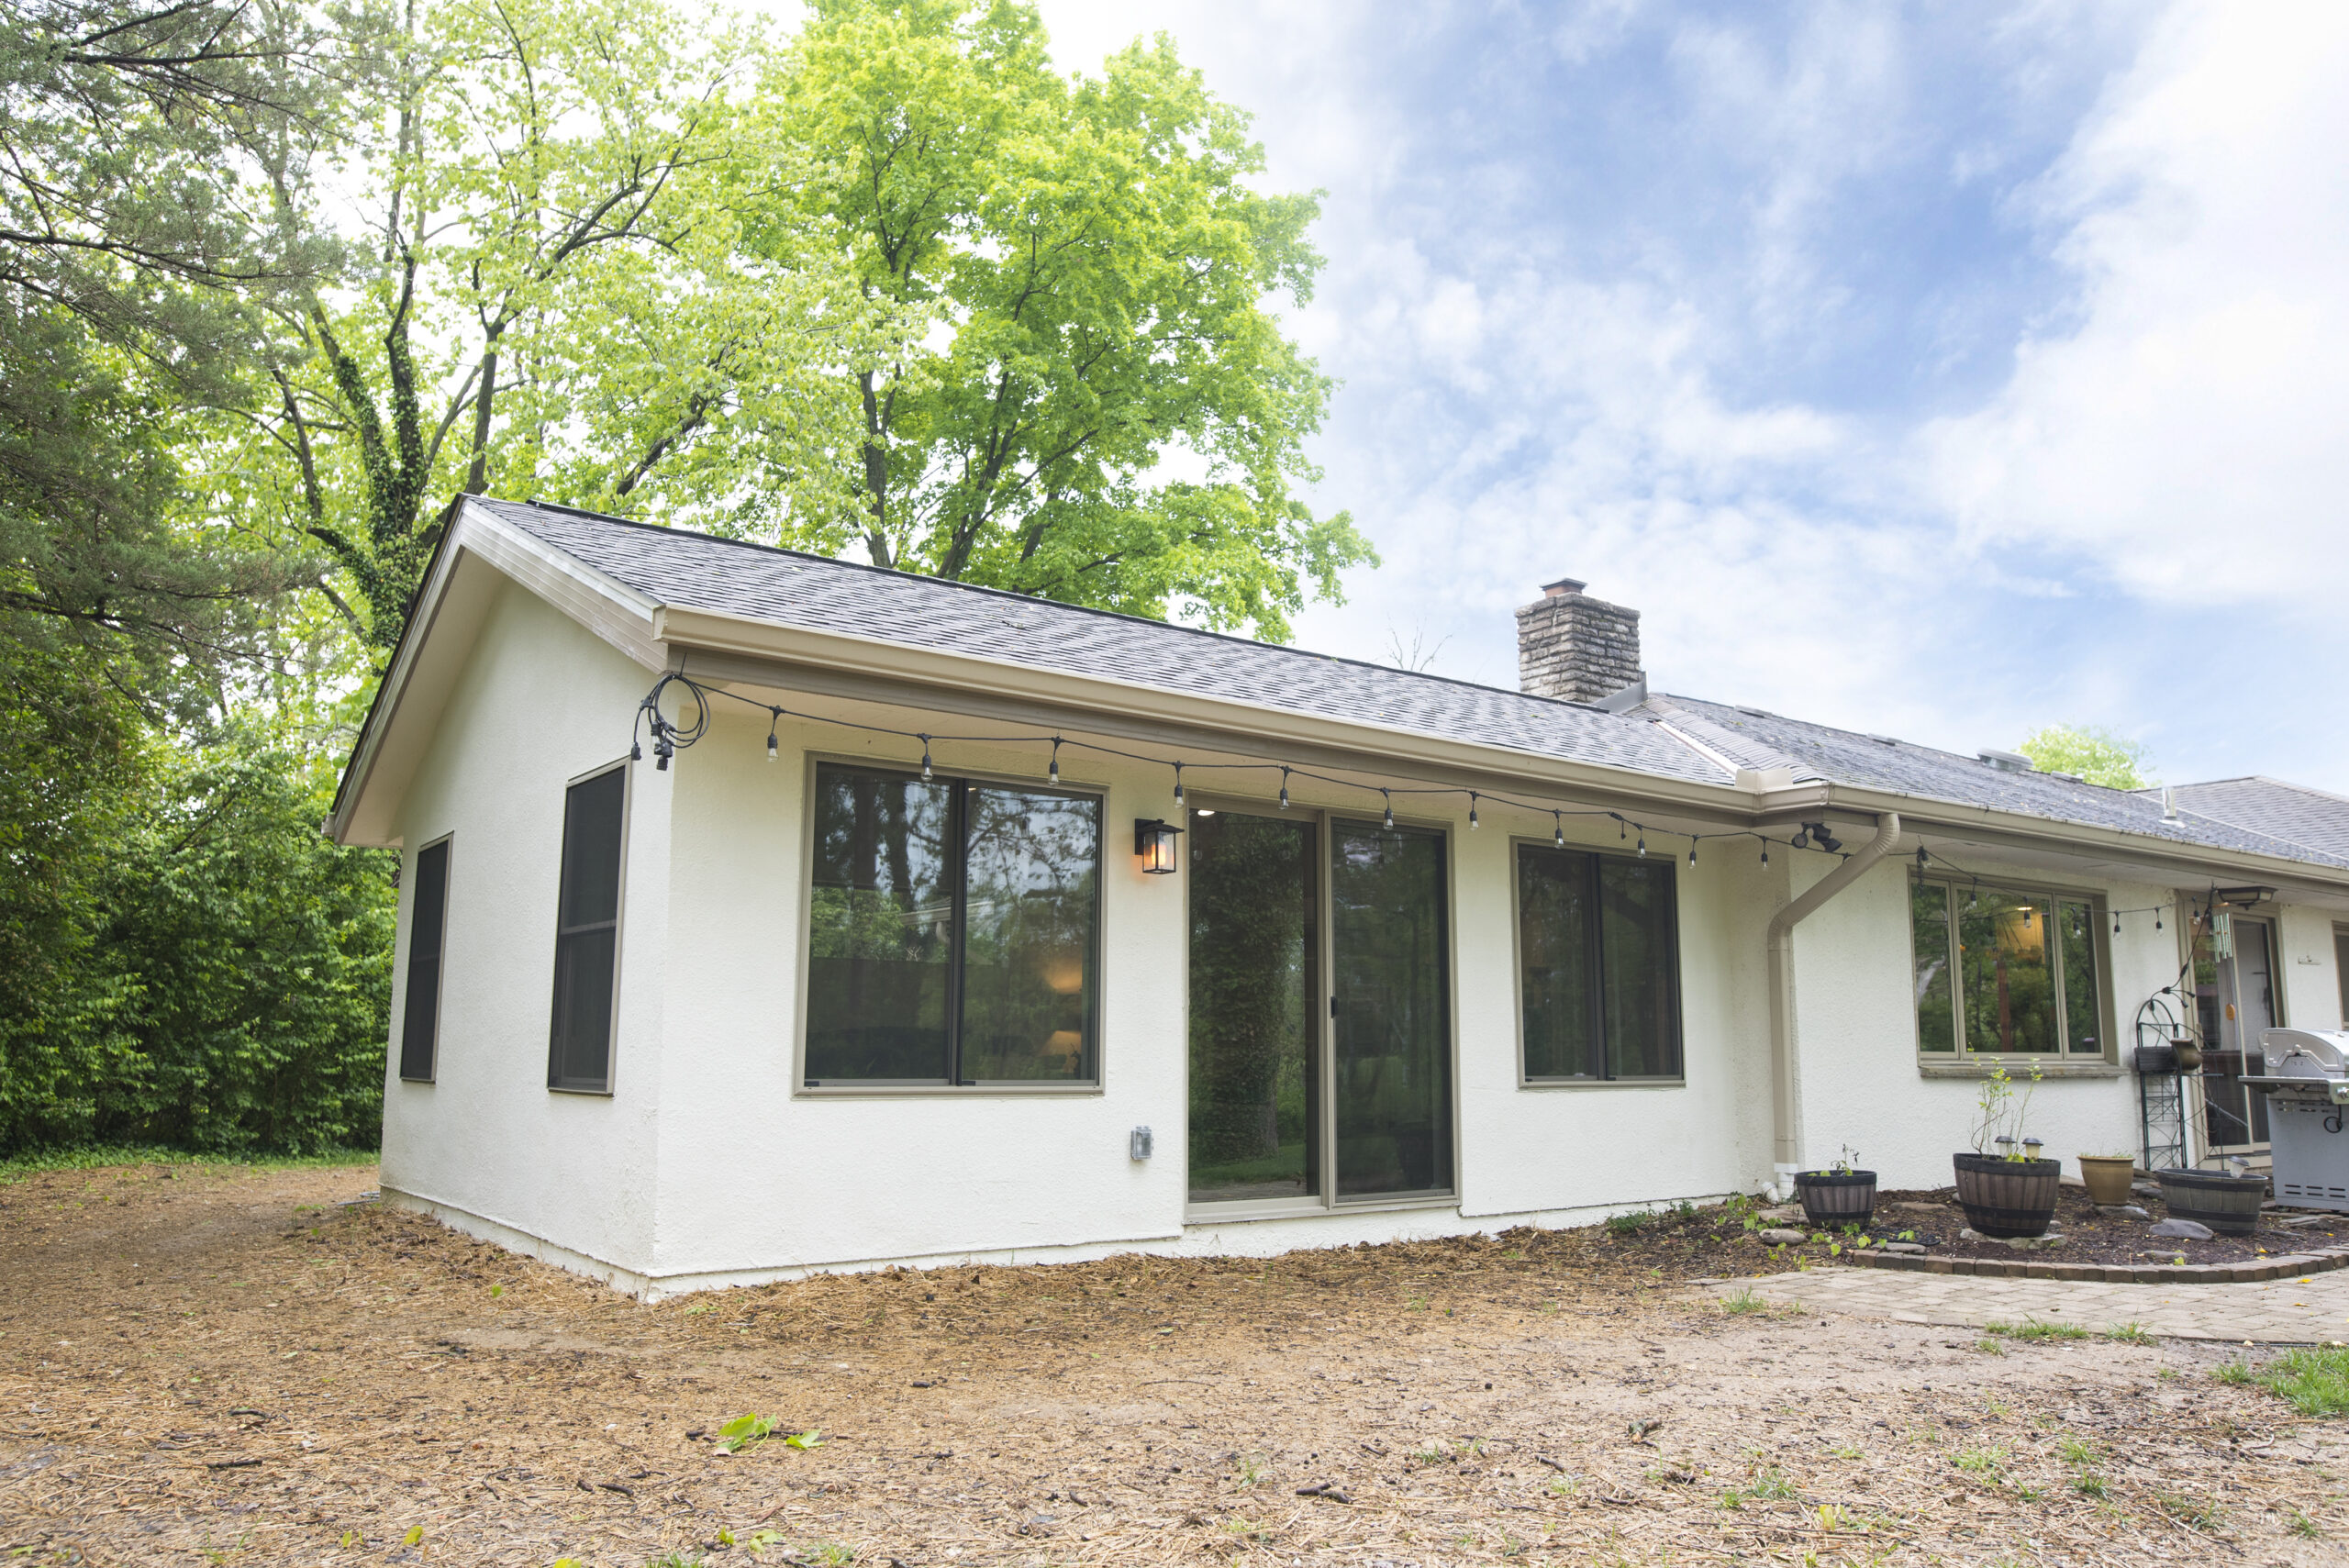
This addition was designed to give the family the extra living area they needed for everyday life, while staying completely cohesive with the rest of their home. The goal was a seamless extension that feels like it has always belonged there.

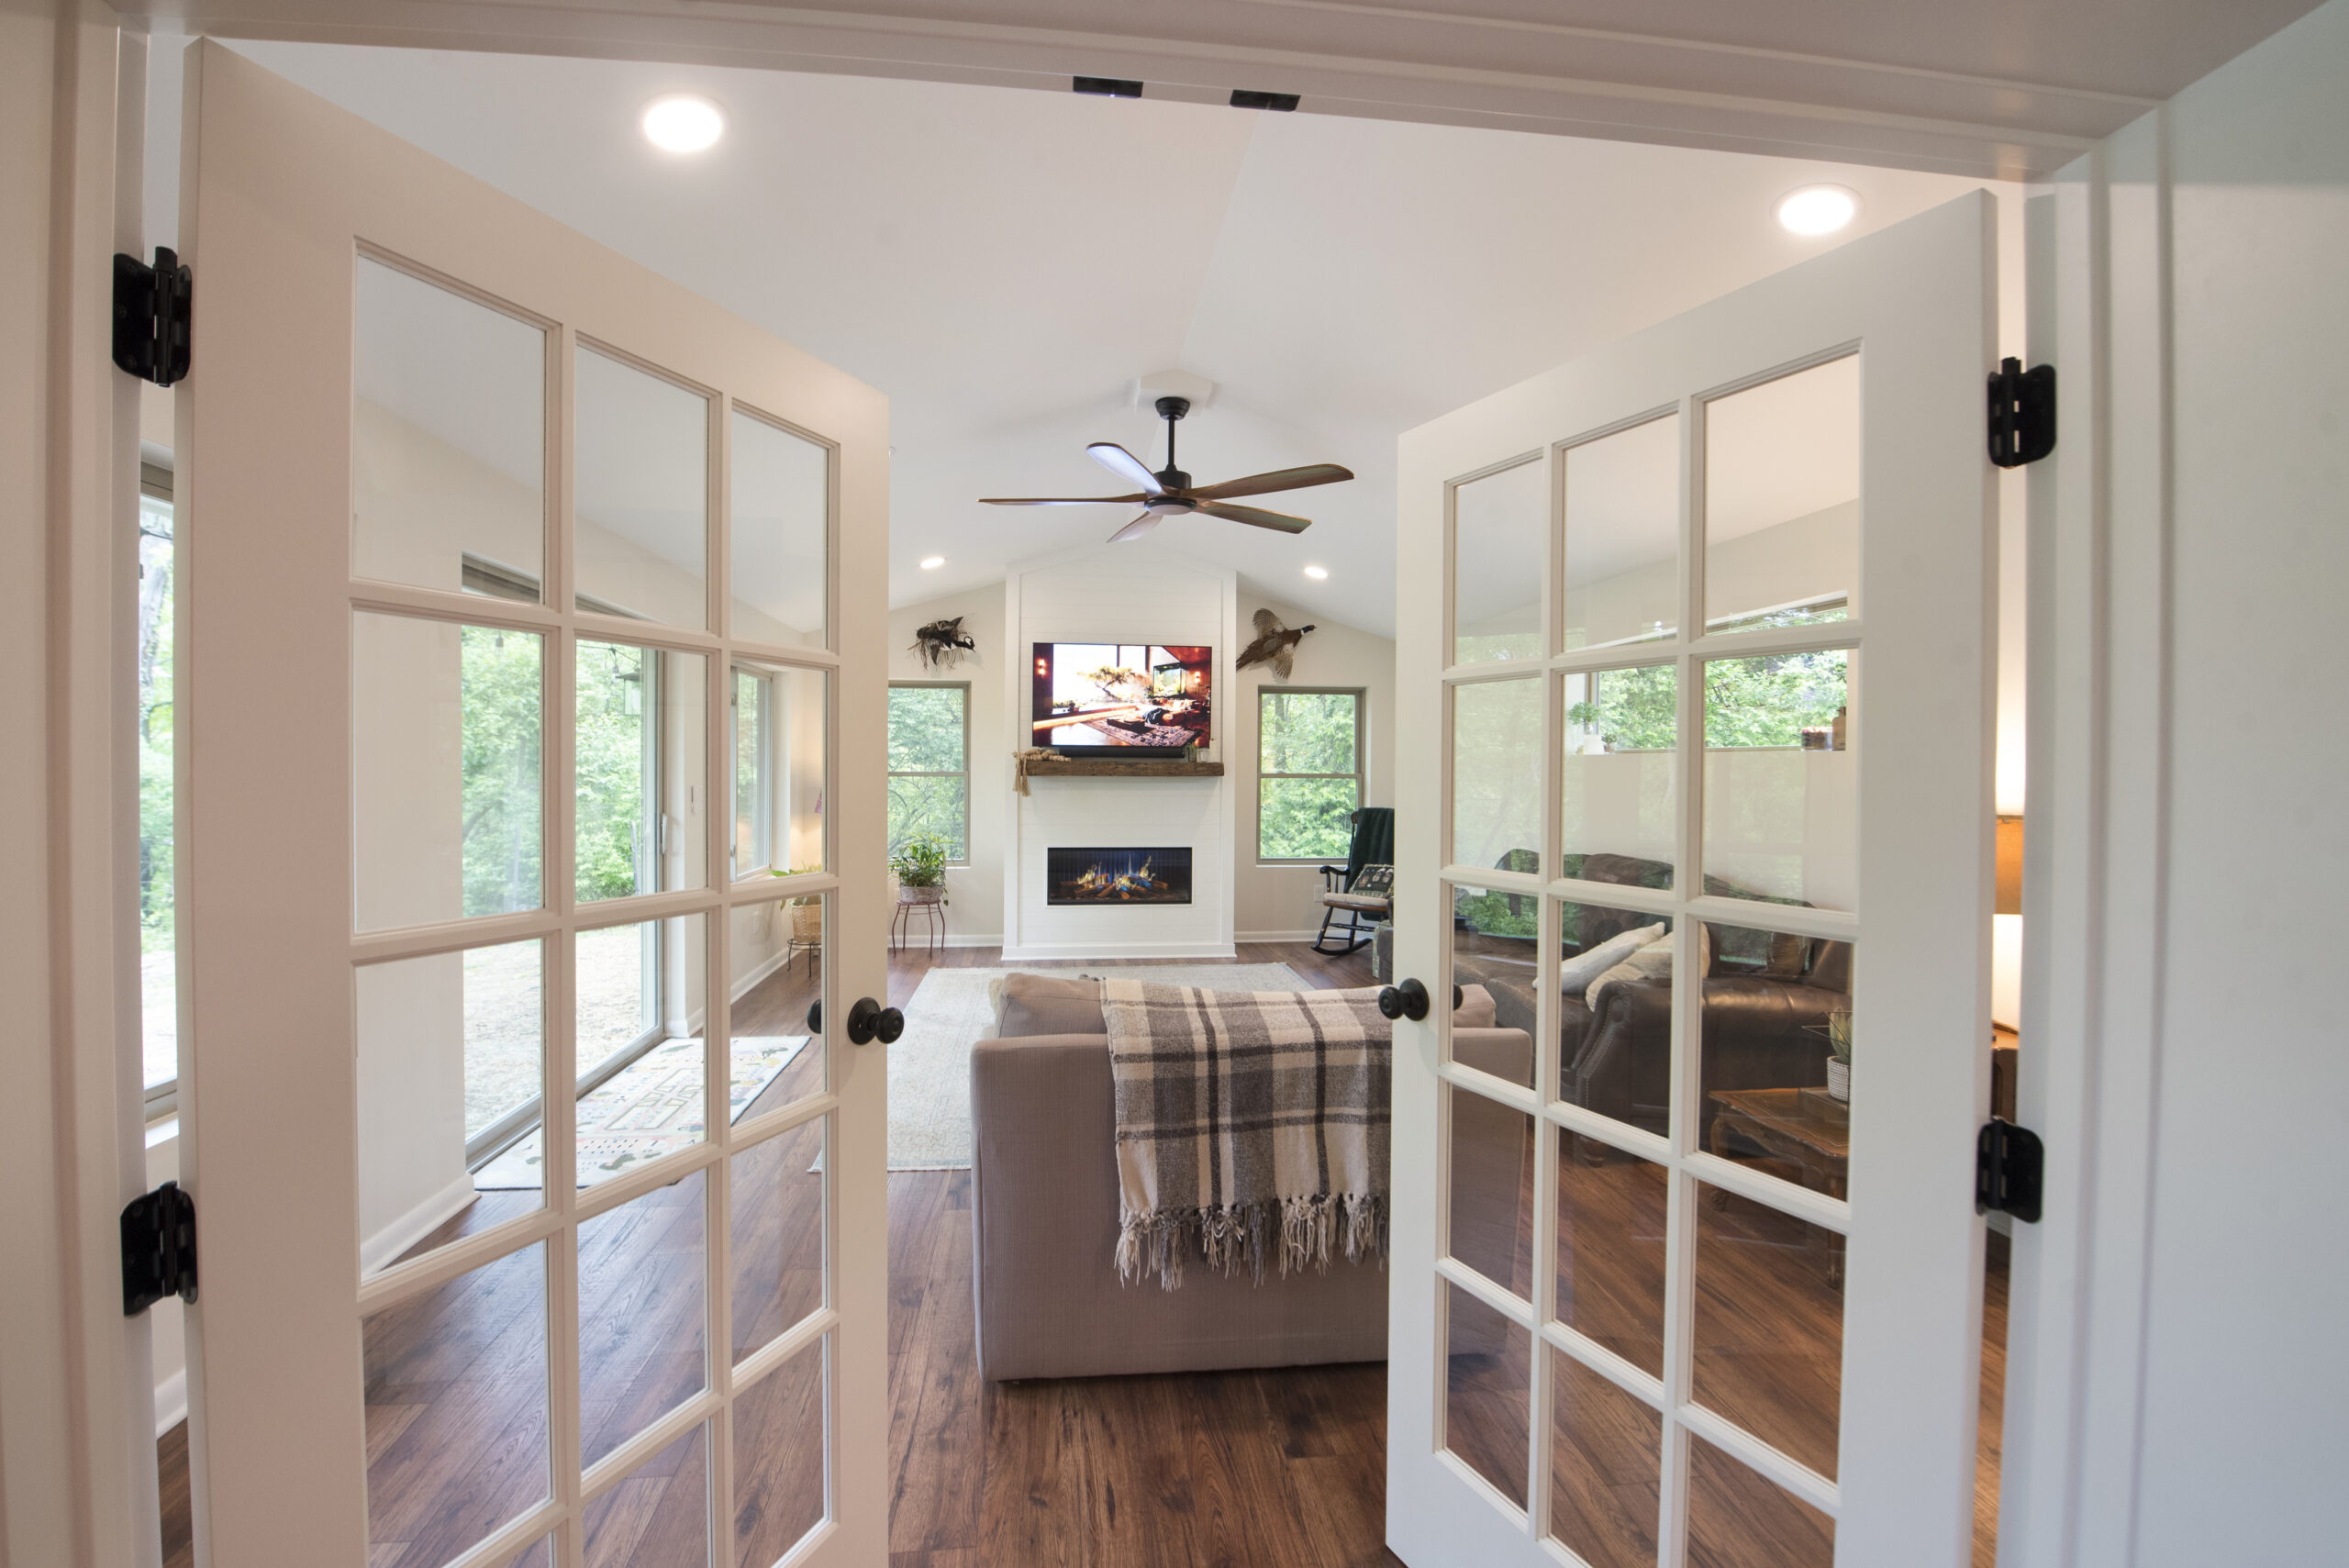
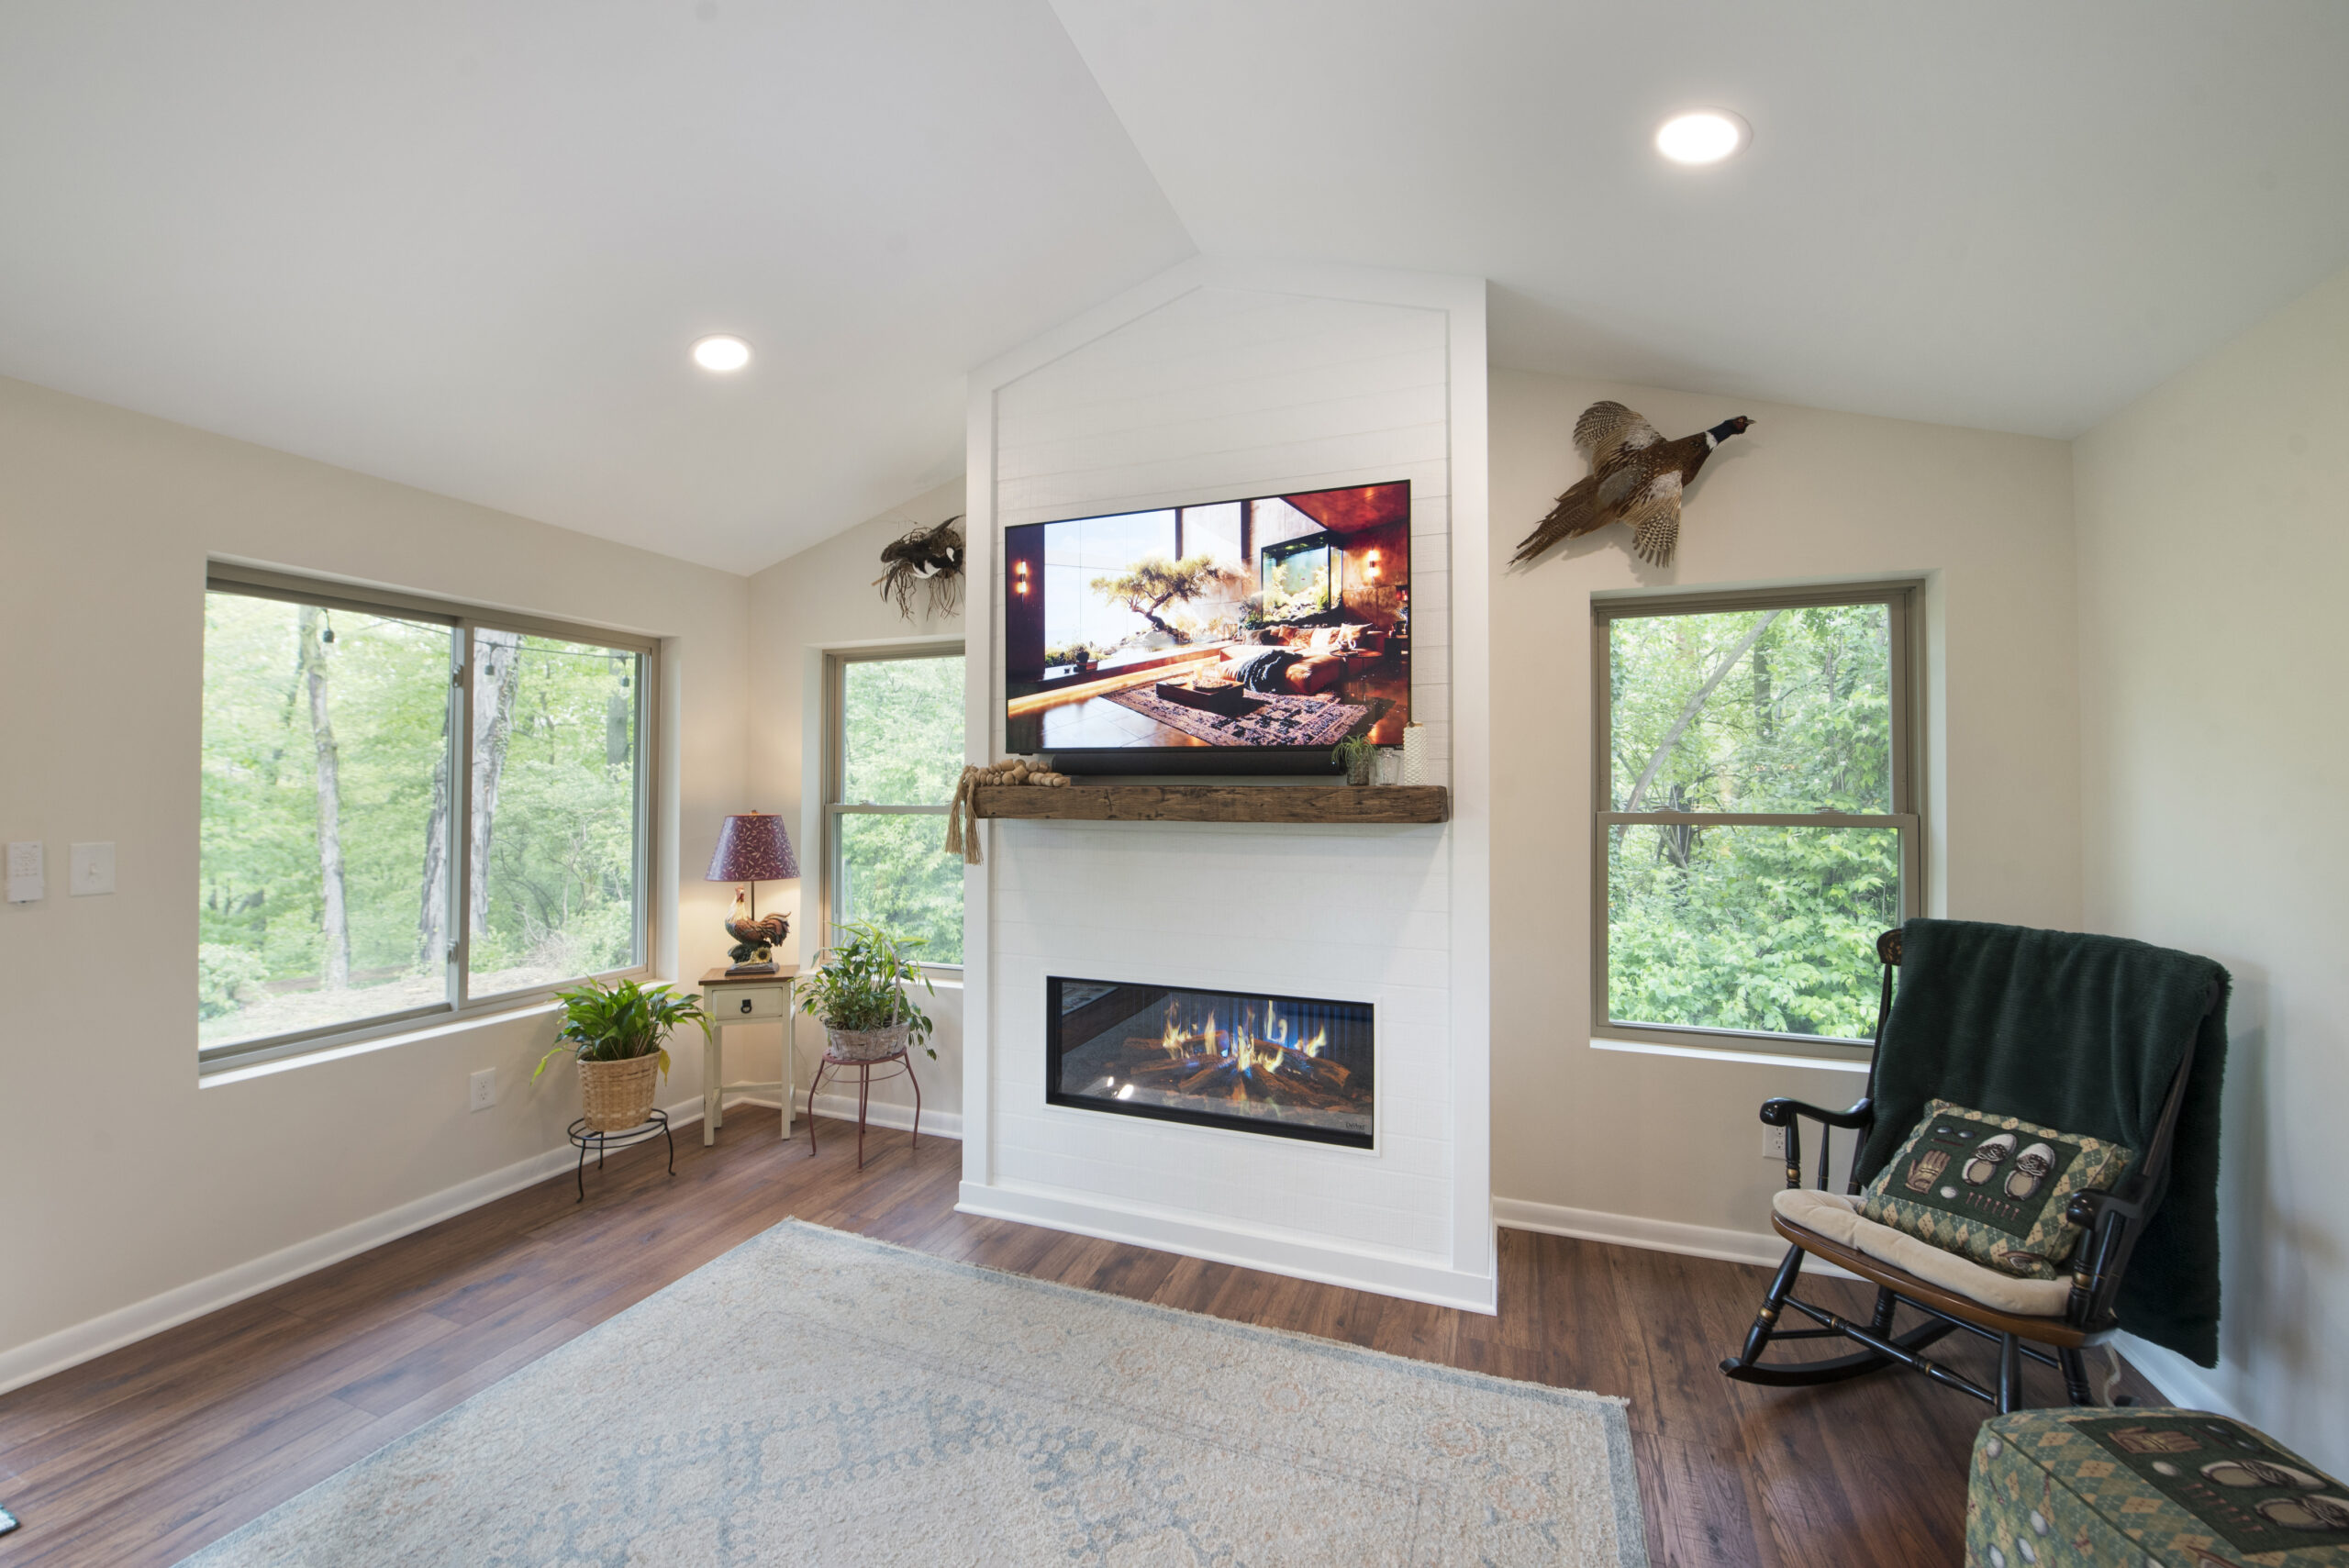
Wood LVP flooring was selected to beautifully complement the home’s original wood parquet, creating a smooth flow from old to new. A cozy fireplace adds instant warmth and a natural gathering point, making the space feel inviting in every season. Overhead, the wood detail on the ceiling fan brings in a subtle touch of natural character that ties everything together. Large windows fill the room with bright, natural light, thoughtfully placed to balance openness with privacy. A warm, welcoming addition that feels connected, comfortable, and right at home from the moment you step inside.

See Full Gallery


First Floor

Dublin

This first-floor transformation was all about creating a home that feels brighter, more functional, and beautifully connected.

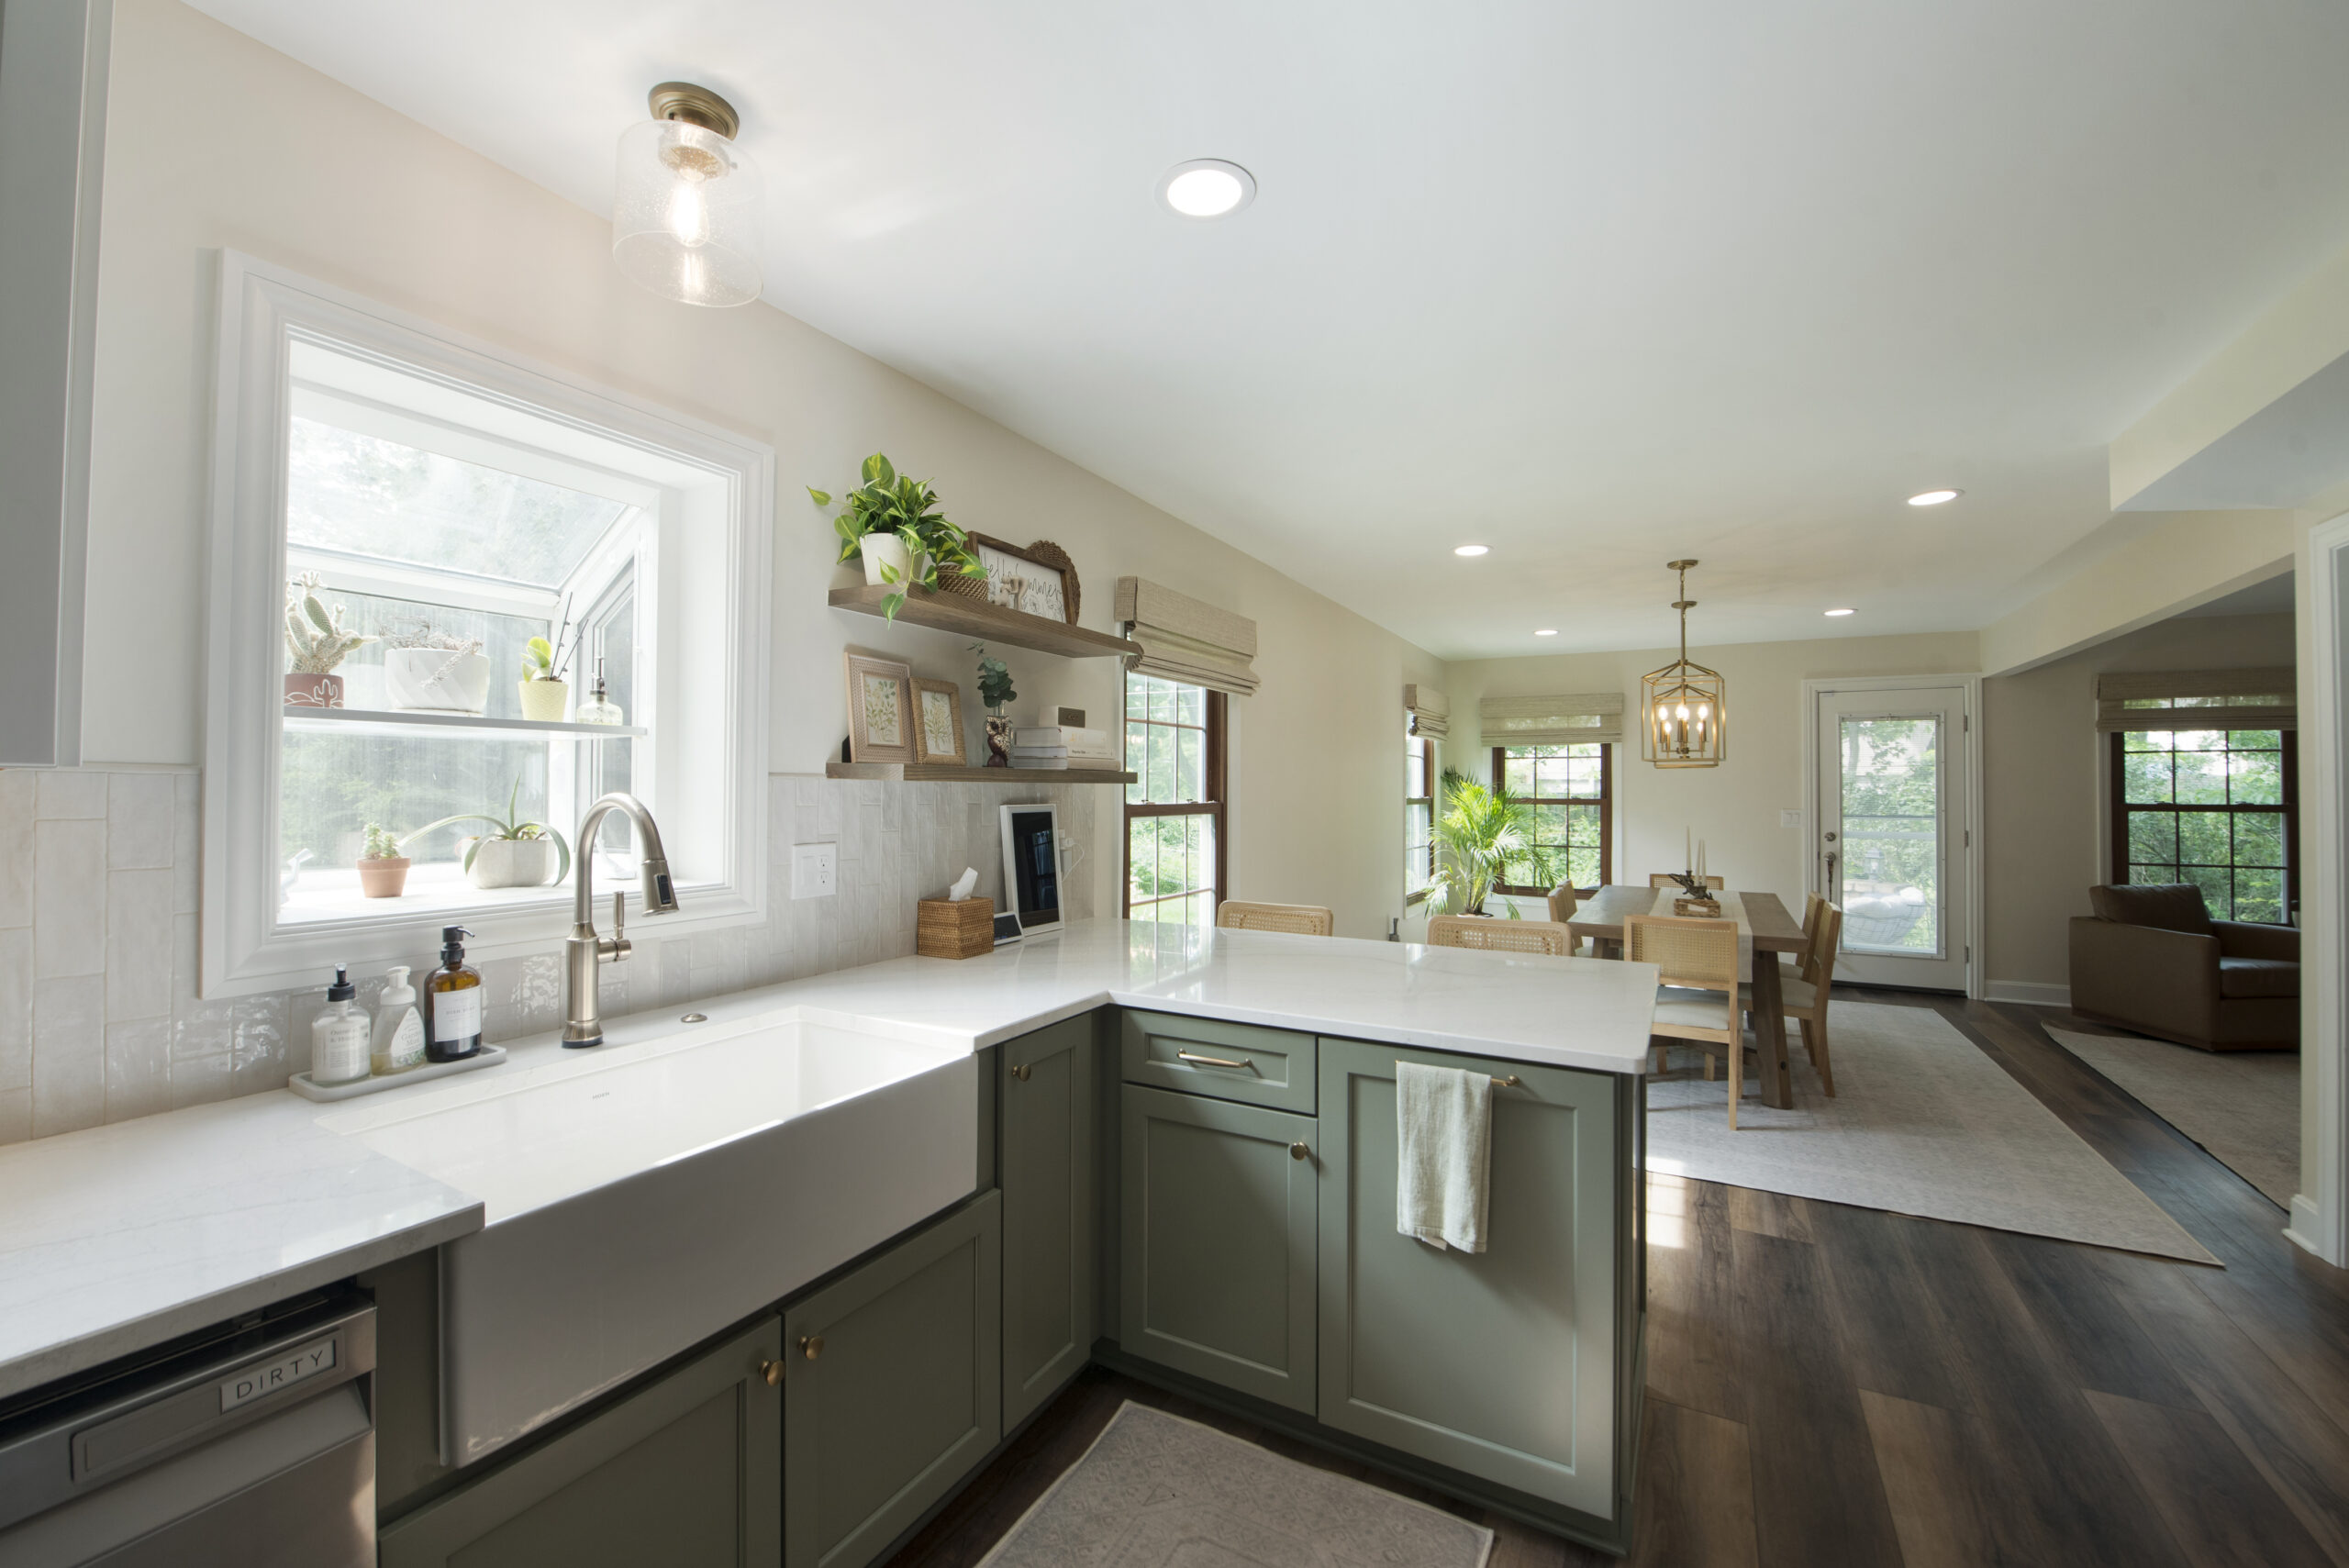
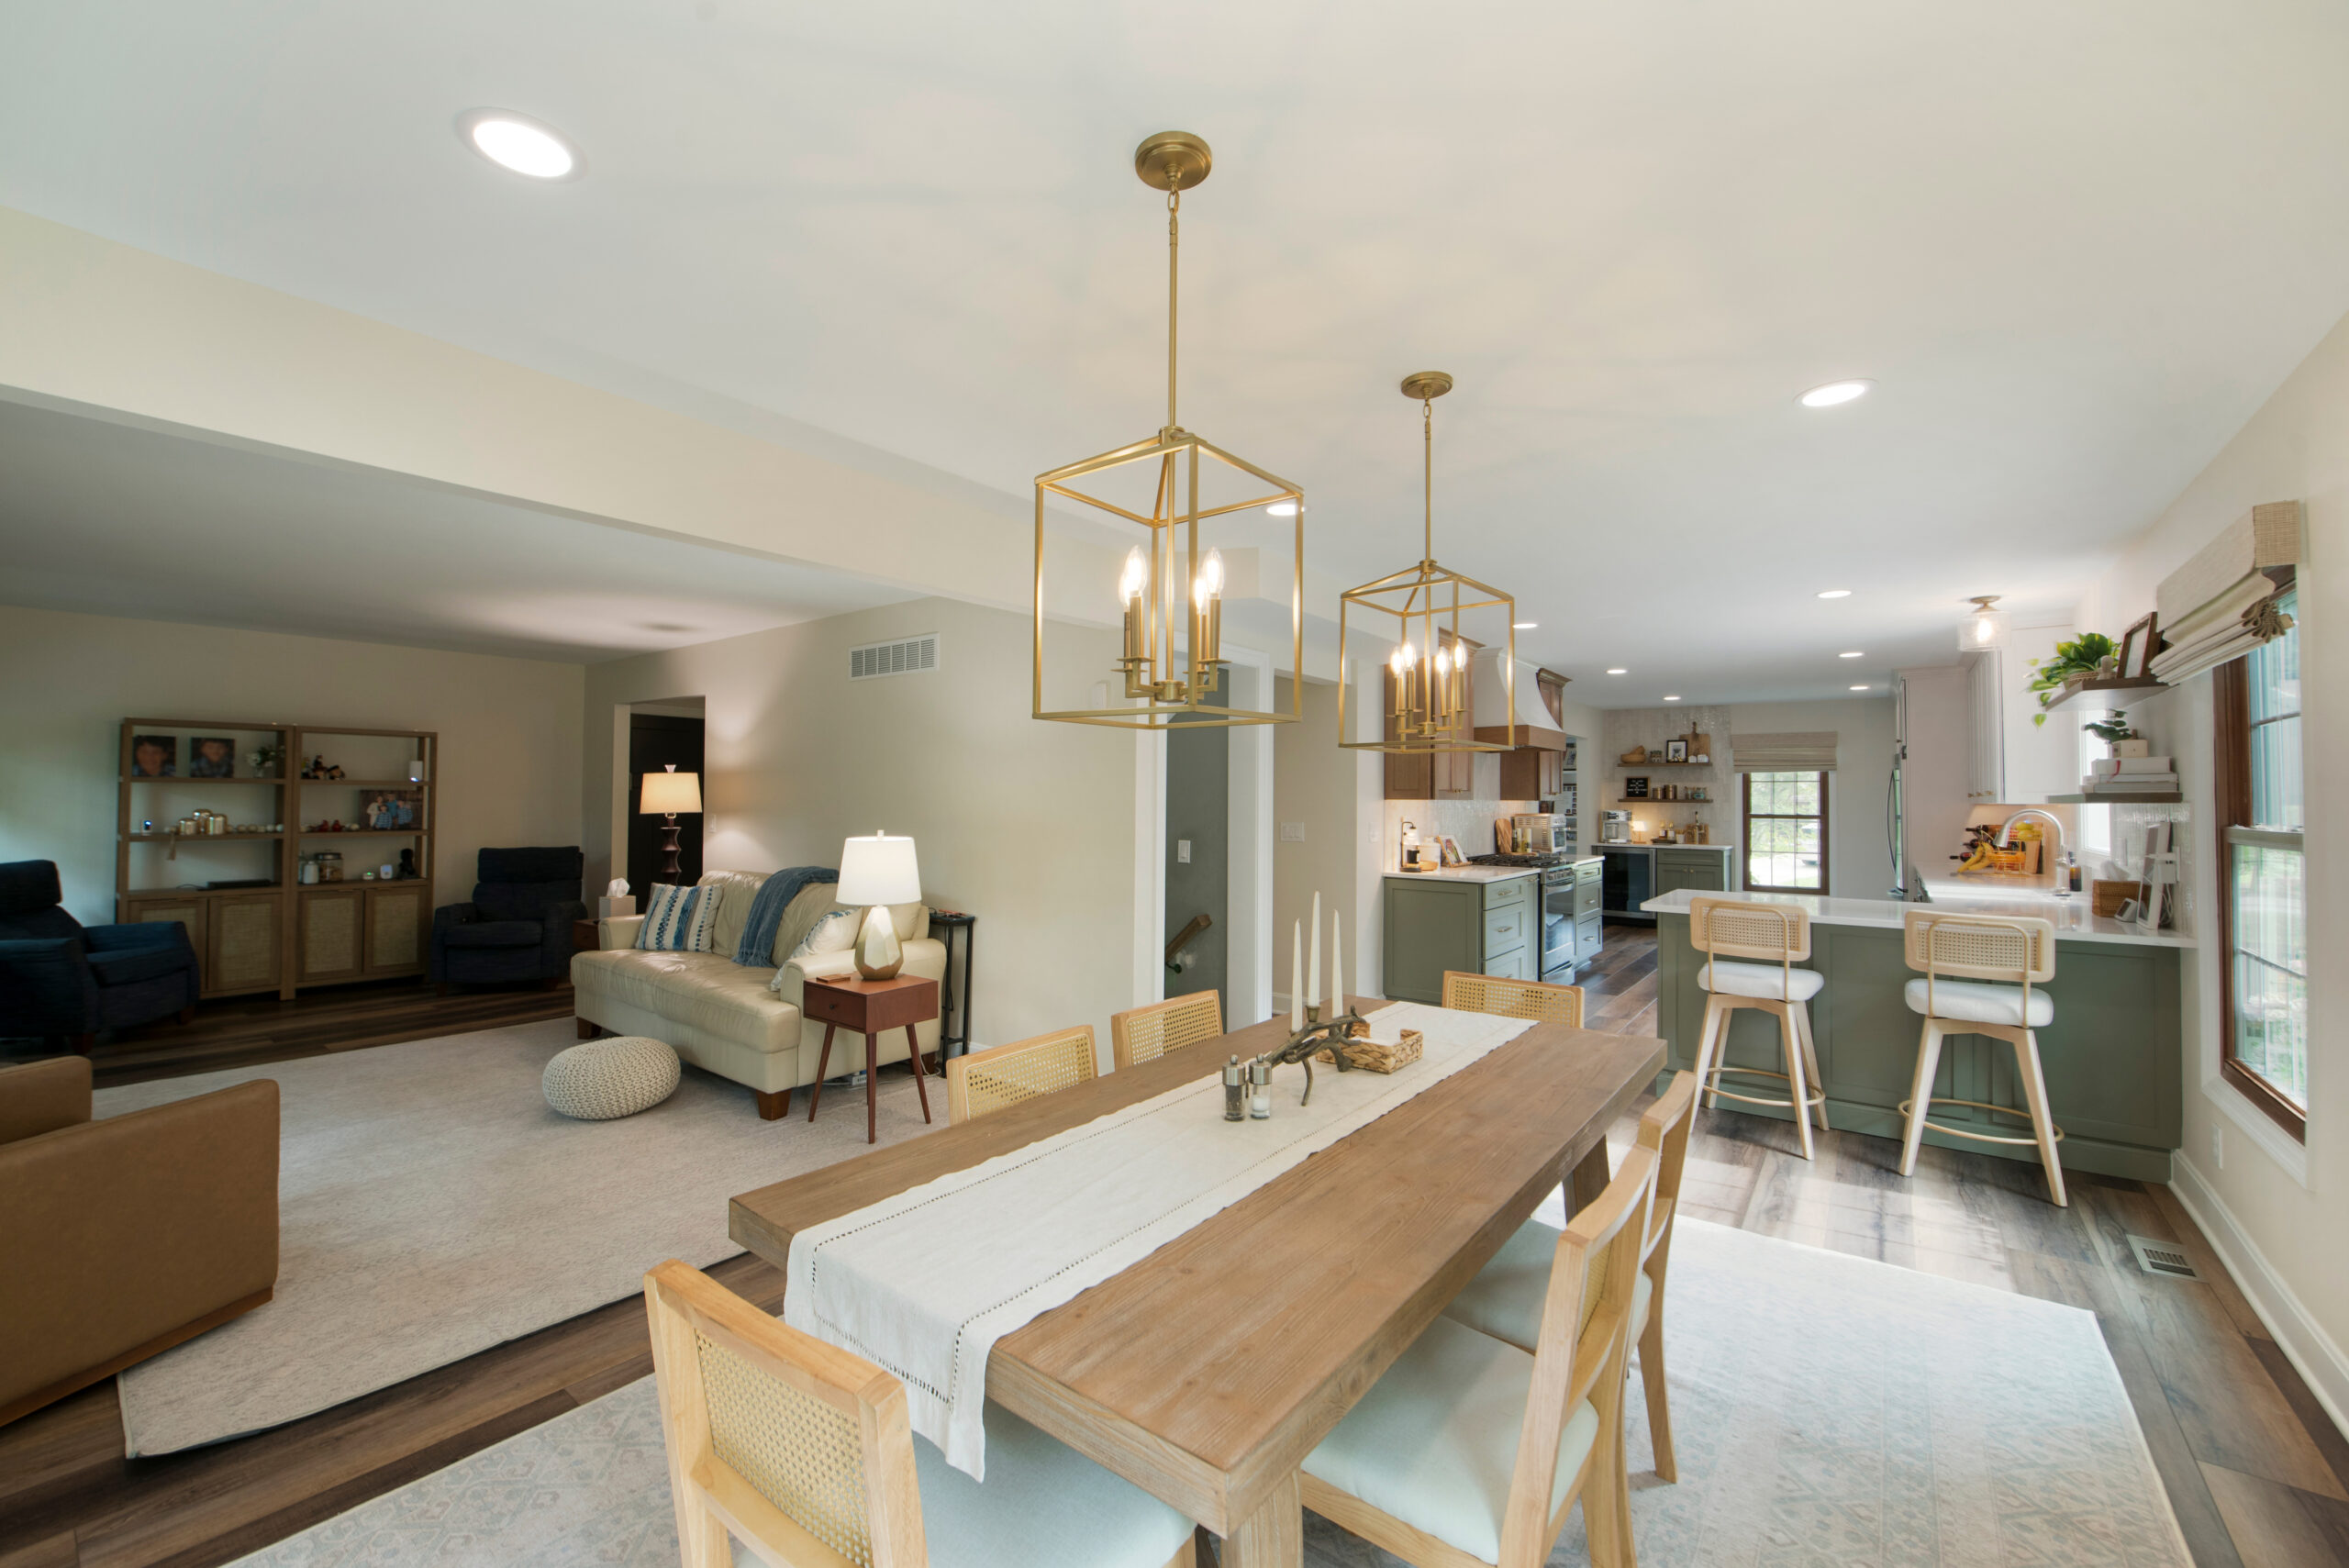
By removing a wall between the kitchen and dining room, we completely opened up the layout, creating a space that feels larger, lighter, and better suited for everyday living and entertaining. The kitchen now steals the show with stunning three-tone cabinetry featuring soft whites, sage green, and warm oak accents, all topped with Cambria Everleigh countertops. Gold fixtures add just the right touch of elegance. Durable LVP flooring throughout the main level ties everything together seamlessly.

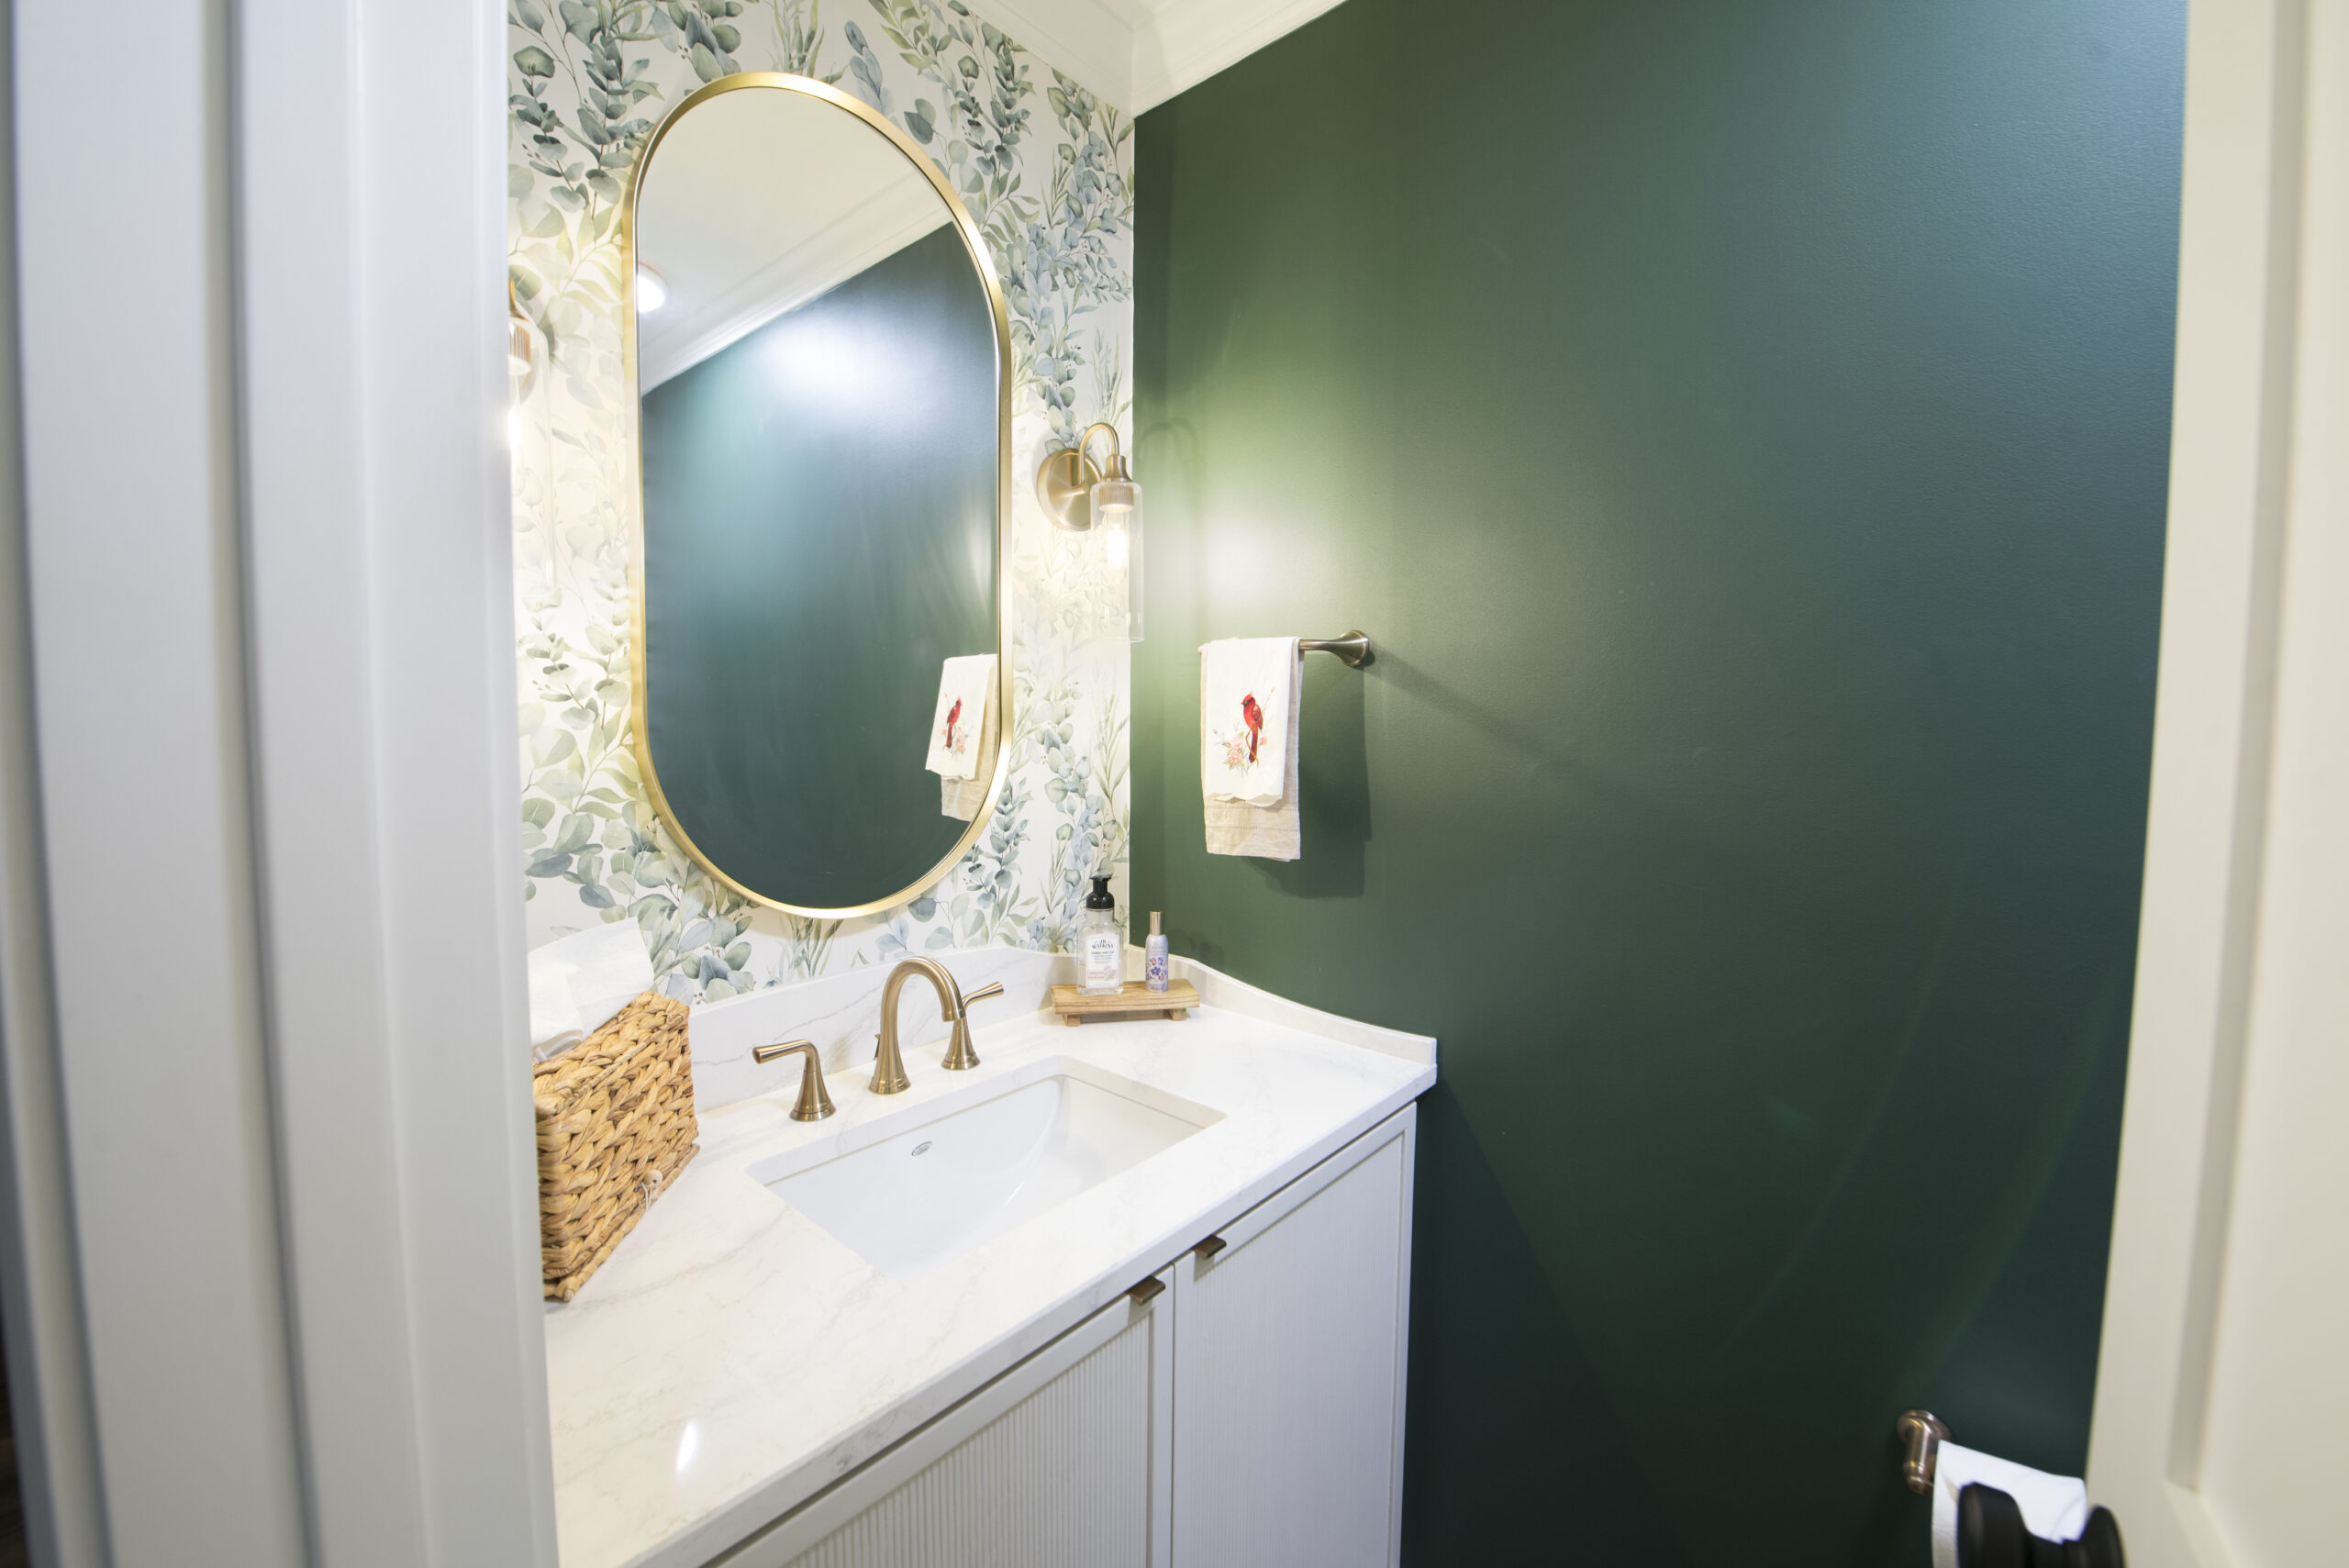
Beyond the kitchen, the home received a refreshed powder room with reeded cabinetry, wallpaper, and custom Cambria backsplash detail. These elevated finishes make a big impact in a small space. The entry was also given a touch of personality with wallpaper, and modernized with a sleek new handrail to create a warm and welcoming first impression.

Every detail was carefully selected to bring warmth, character, and functionality to this beautifully transformed home, creating spaces our homeowners will enjoy for years to come.

See Full Gallery


Primary Bath, Closet, & Wet Bar

Worthington

A primary bathroom designed to feel open, elevated, and effortlessly functional.

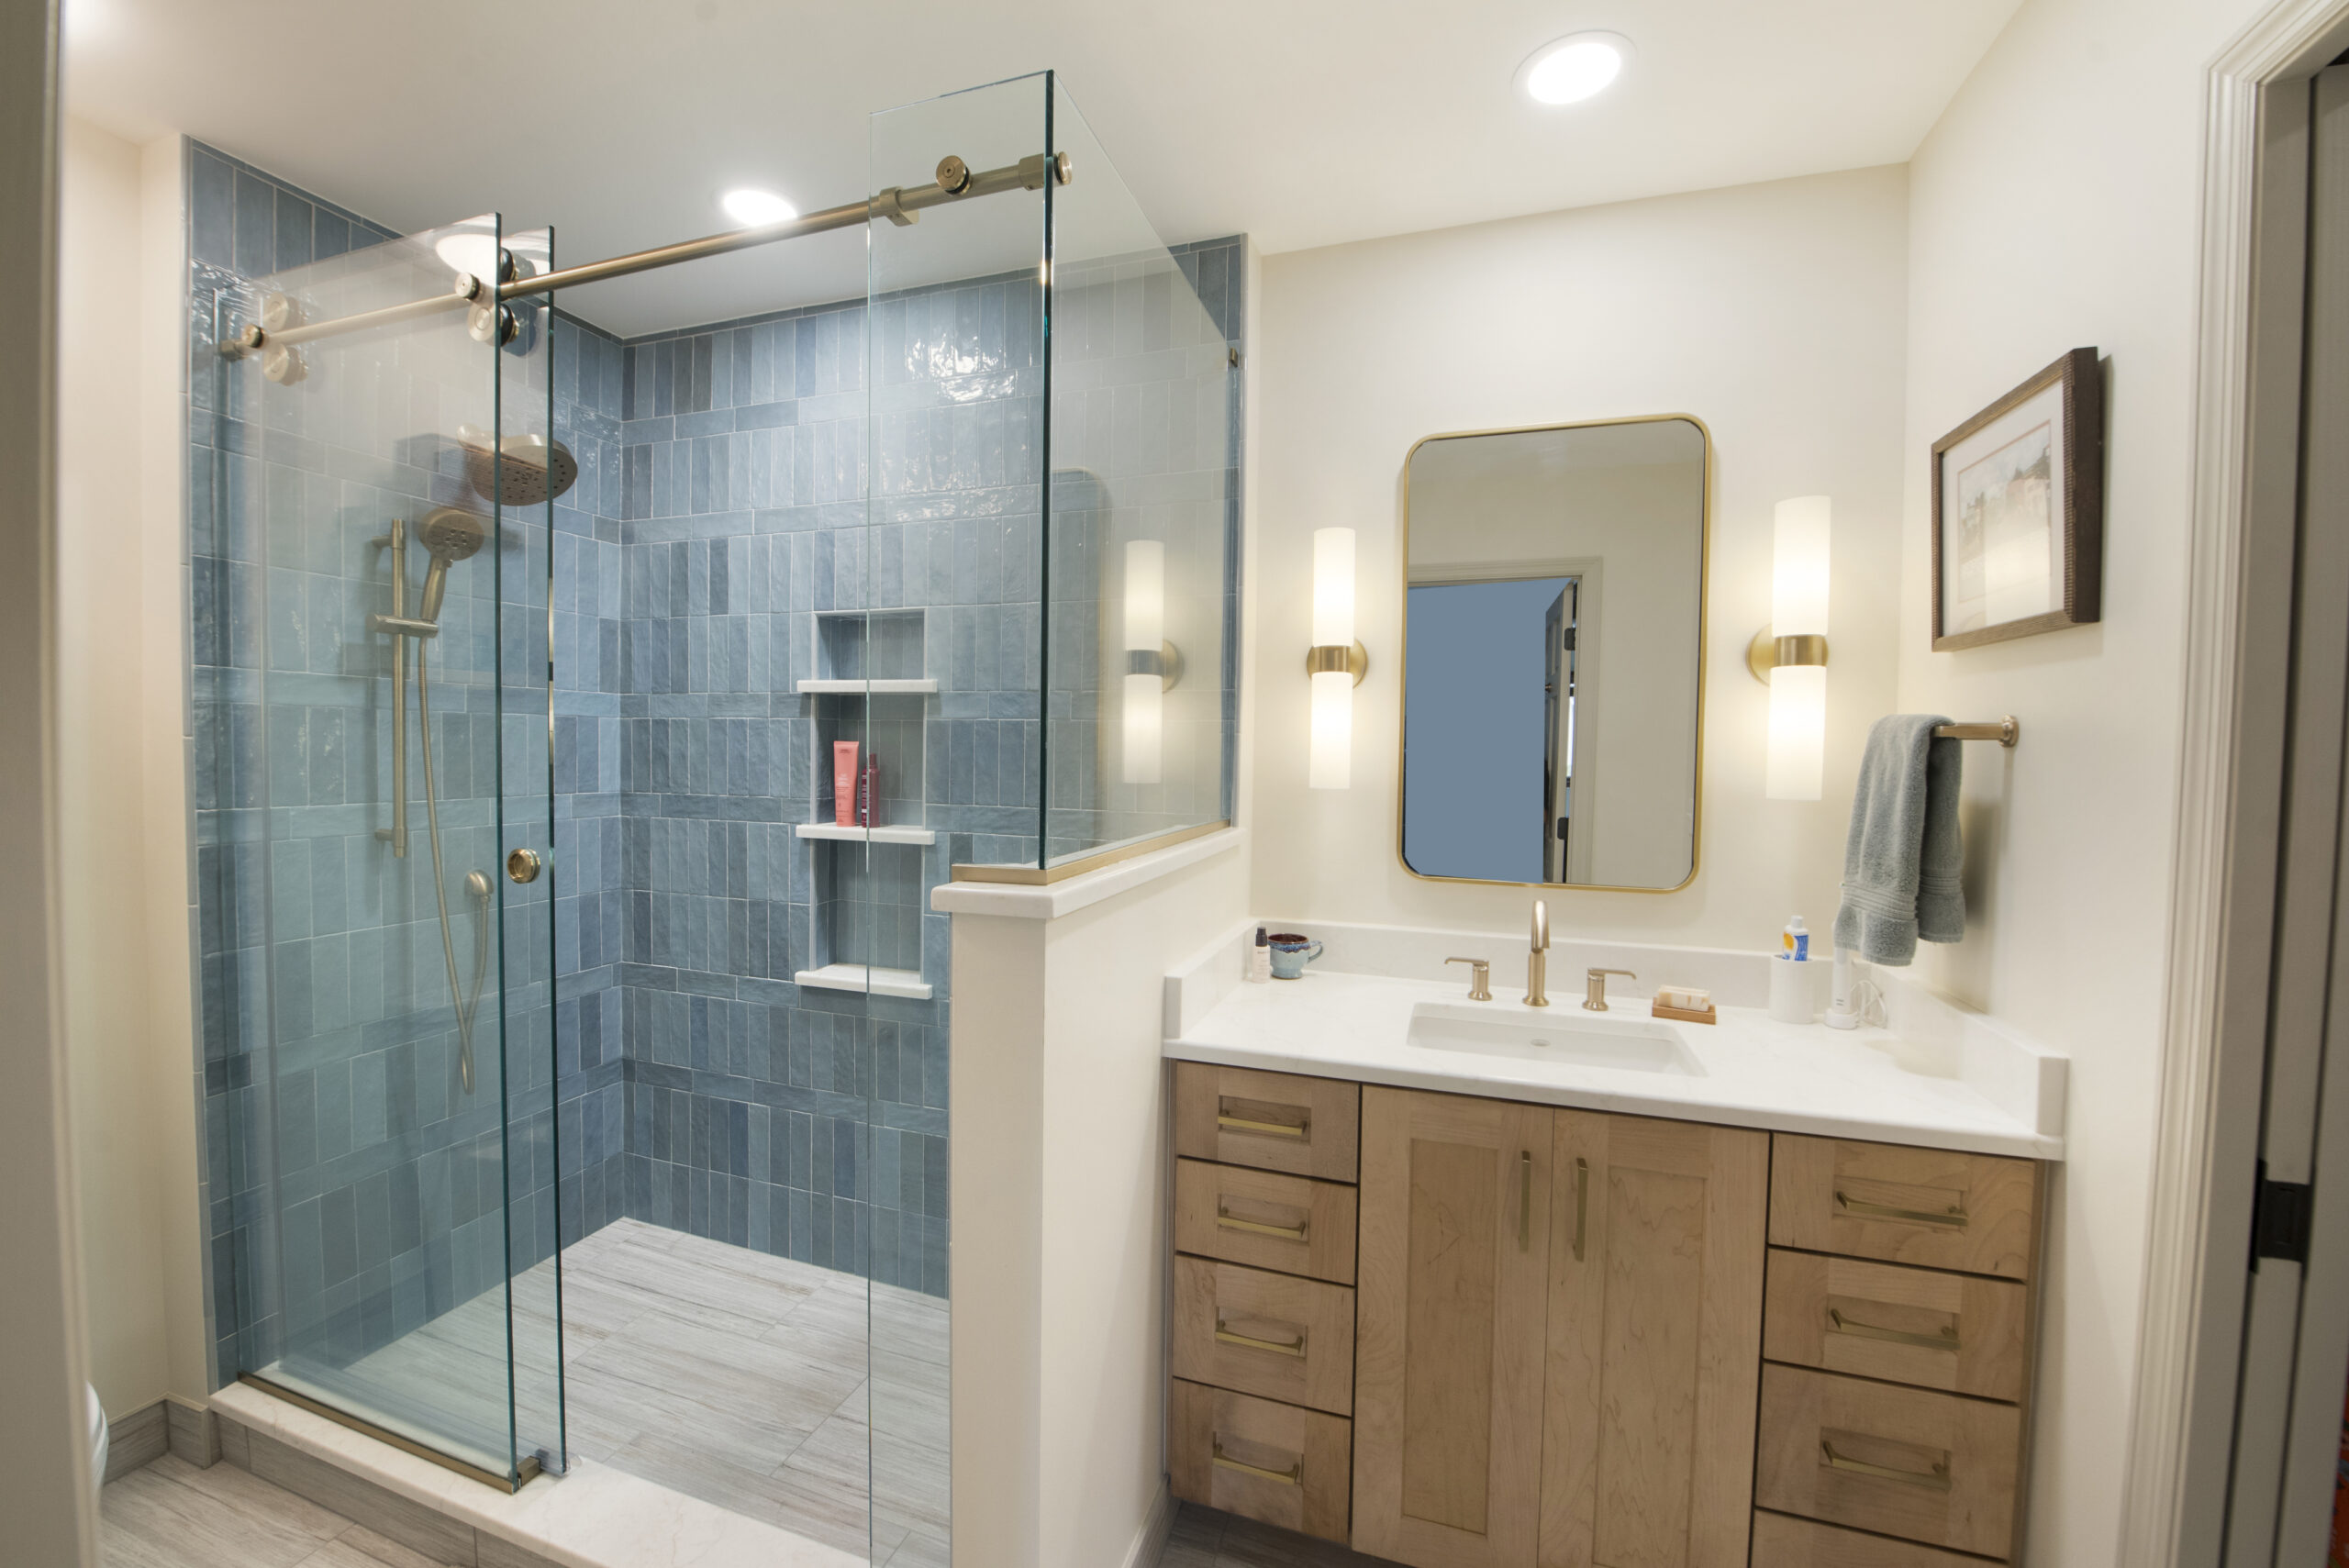
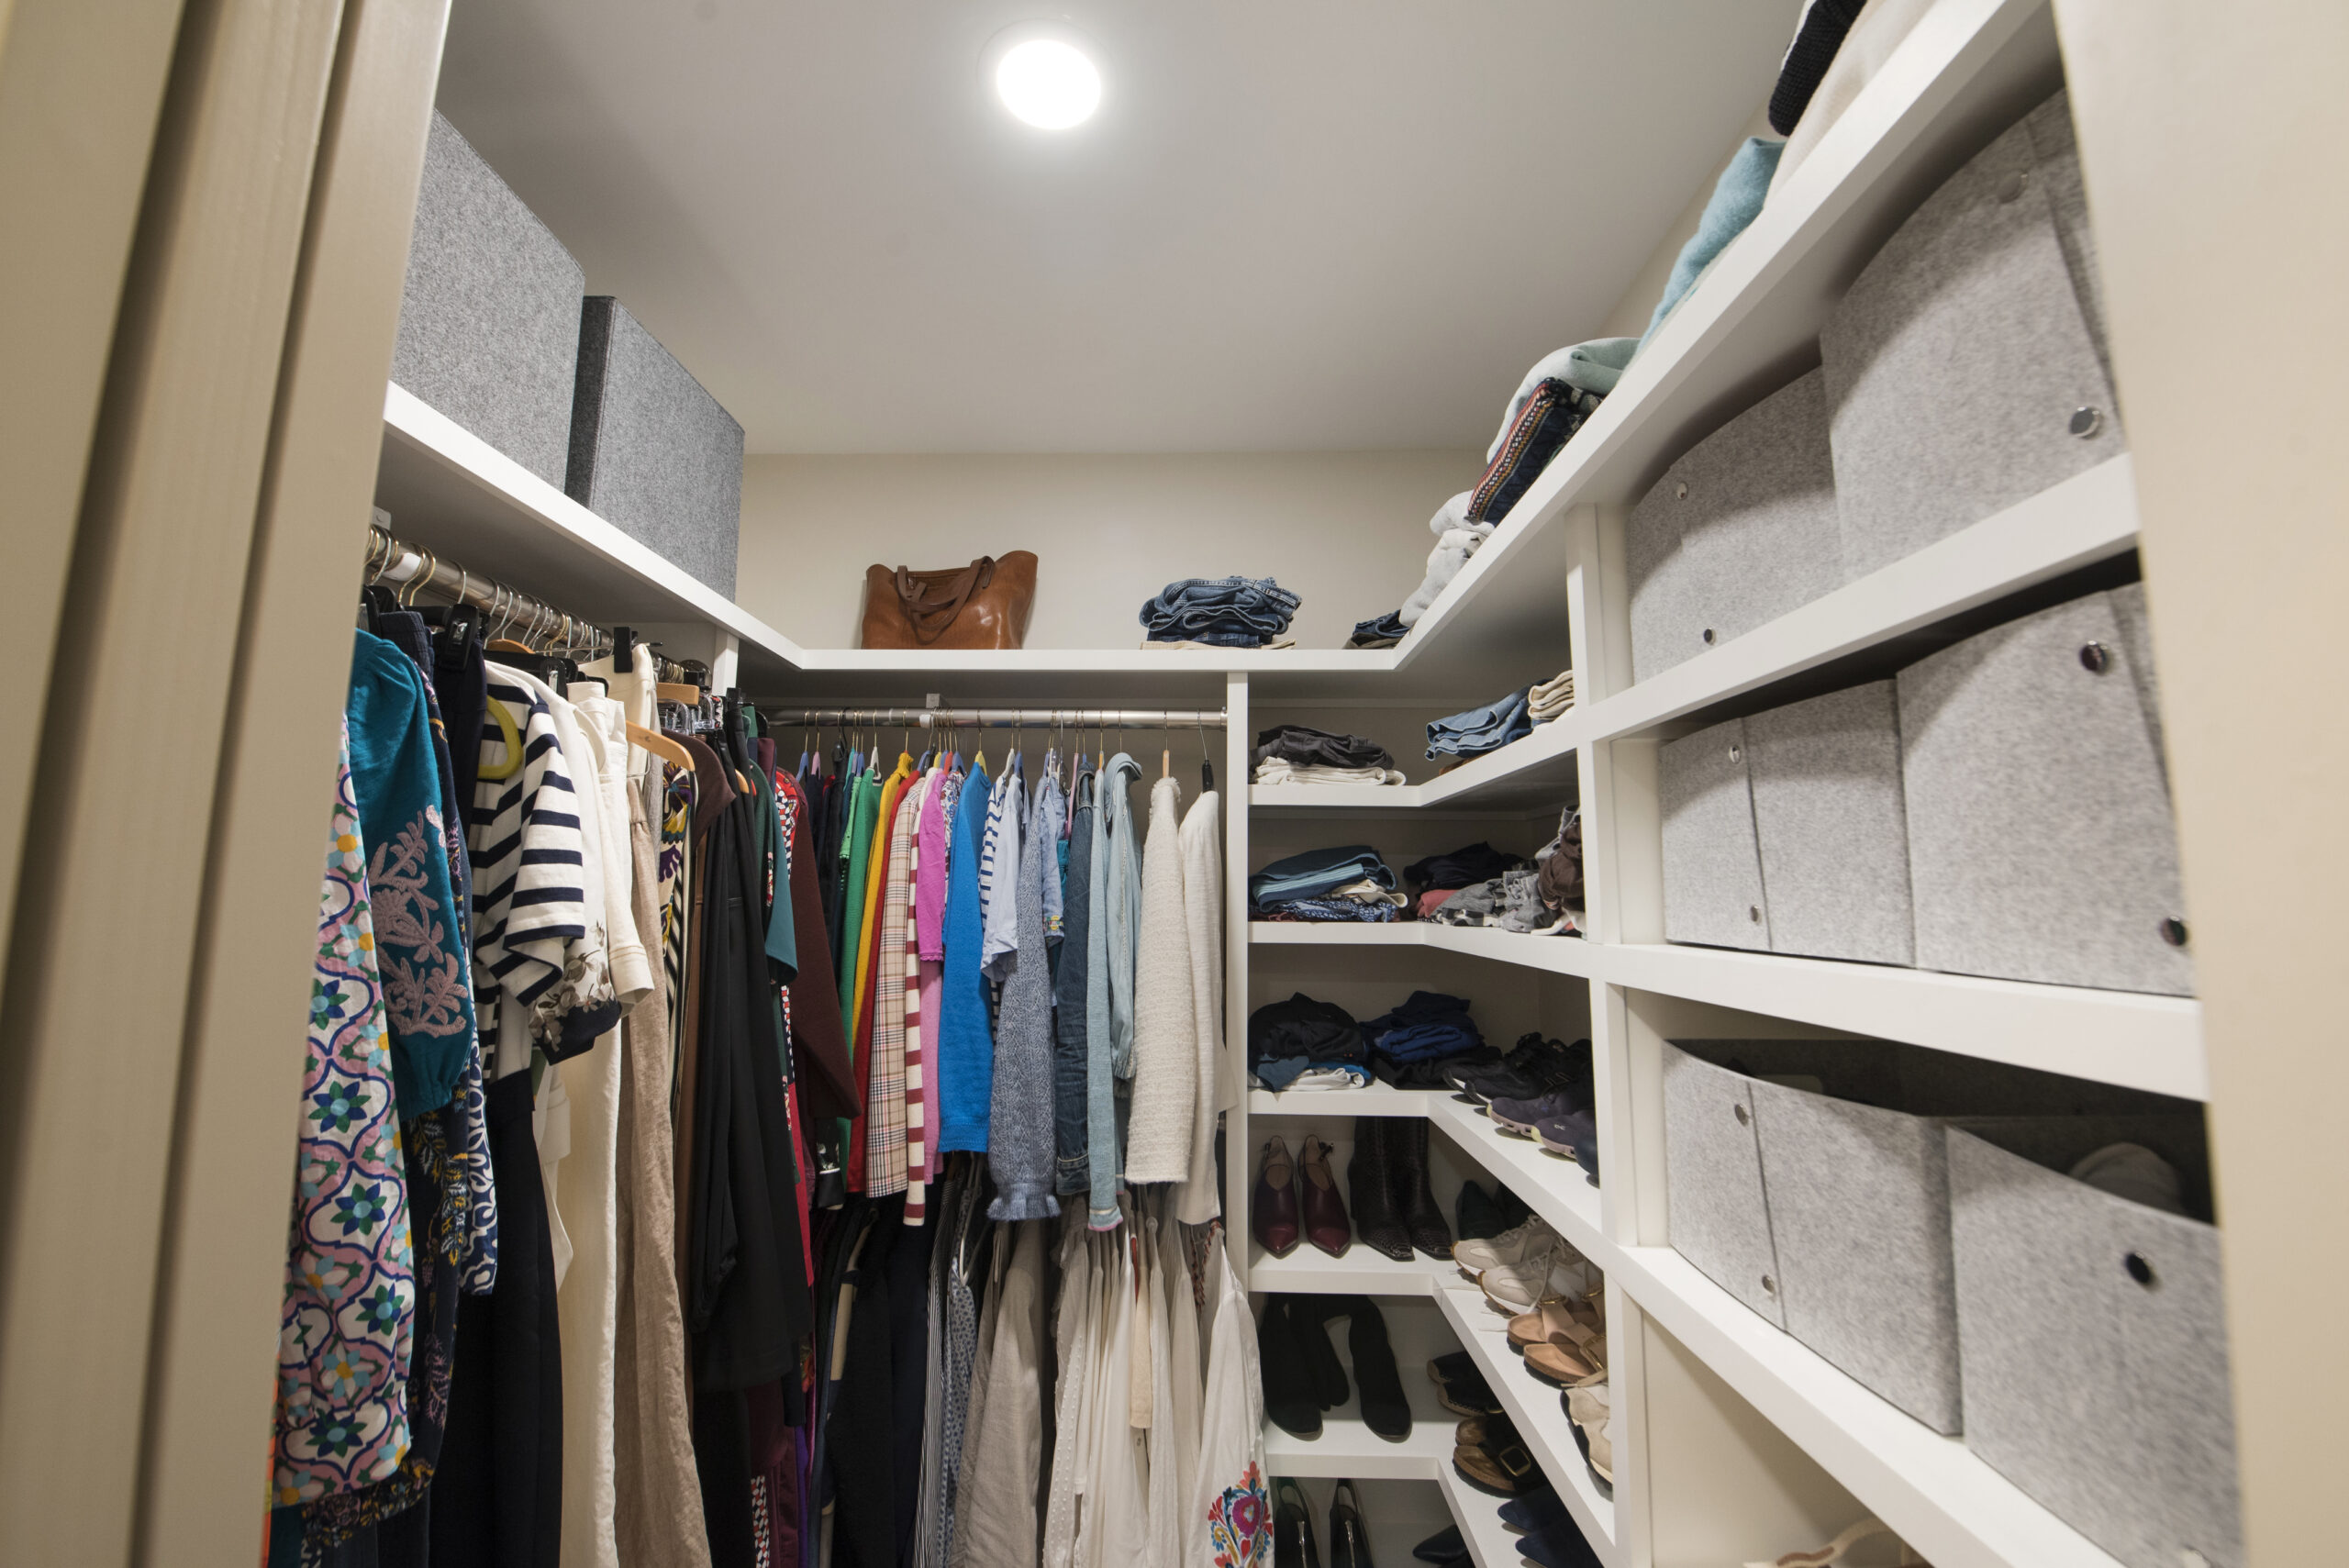
In this remodel, we opened up the space by removing a wall between the vanity and shower areas, allowing the two spaces to finally connect. The space instantly felt bigger, brighter, and now a primary bath that feels more like a retreat than a collection of separate zones.The shower was refreshed with new tile in a custom layout that adds and visual interest and a pop of color, creating a focal point without overpowering the space. A warm wood vanity anchors the room, bringing in natural texture and balance. New tile flooring runs seamlessly through the bathroom and into the closet, visually linking the two spaces and making the entire suite feel cohesive. With a variation of colors, it pulls in color from each of the surrounding finishes. Every selection was made to feel timeless while still adding personality and warmth to the space. To complete the suite, a custom closet system was designed for both beauty and function; maximizing storage while maintaining a clean, tailored feel that aligns perfectly with the new bathroom design.

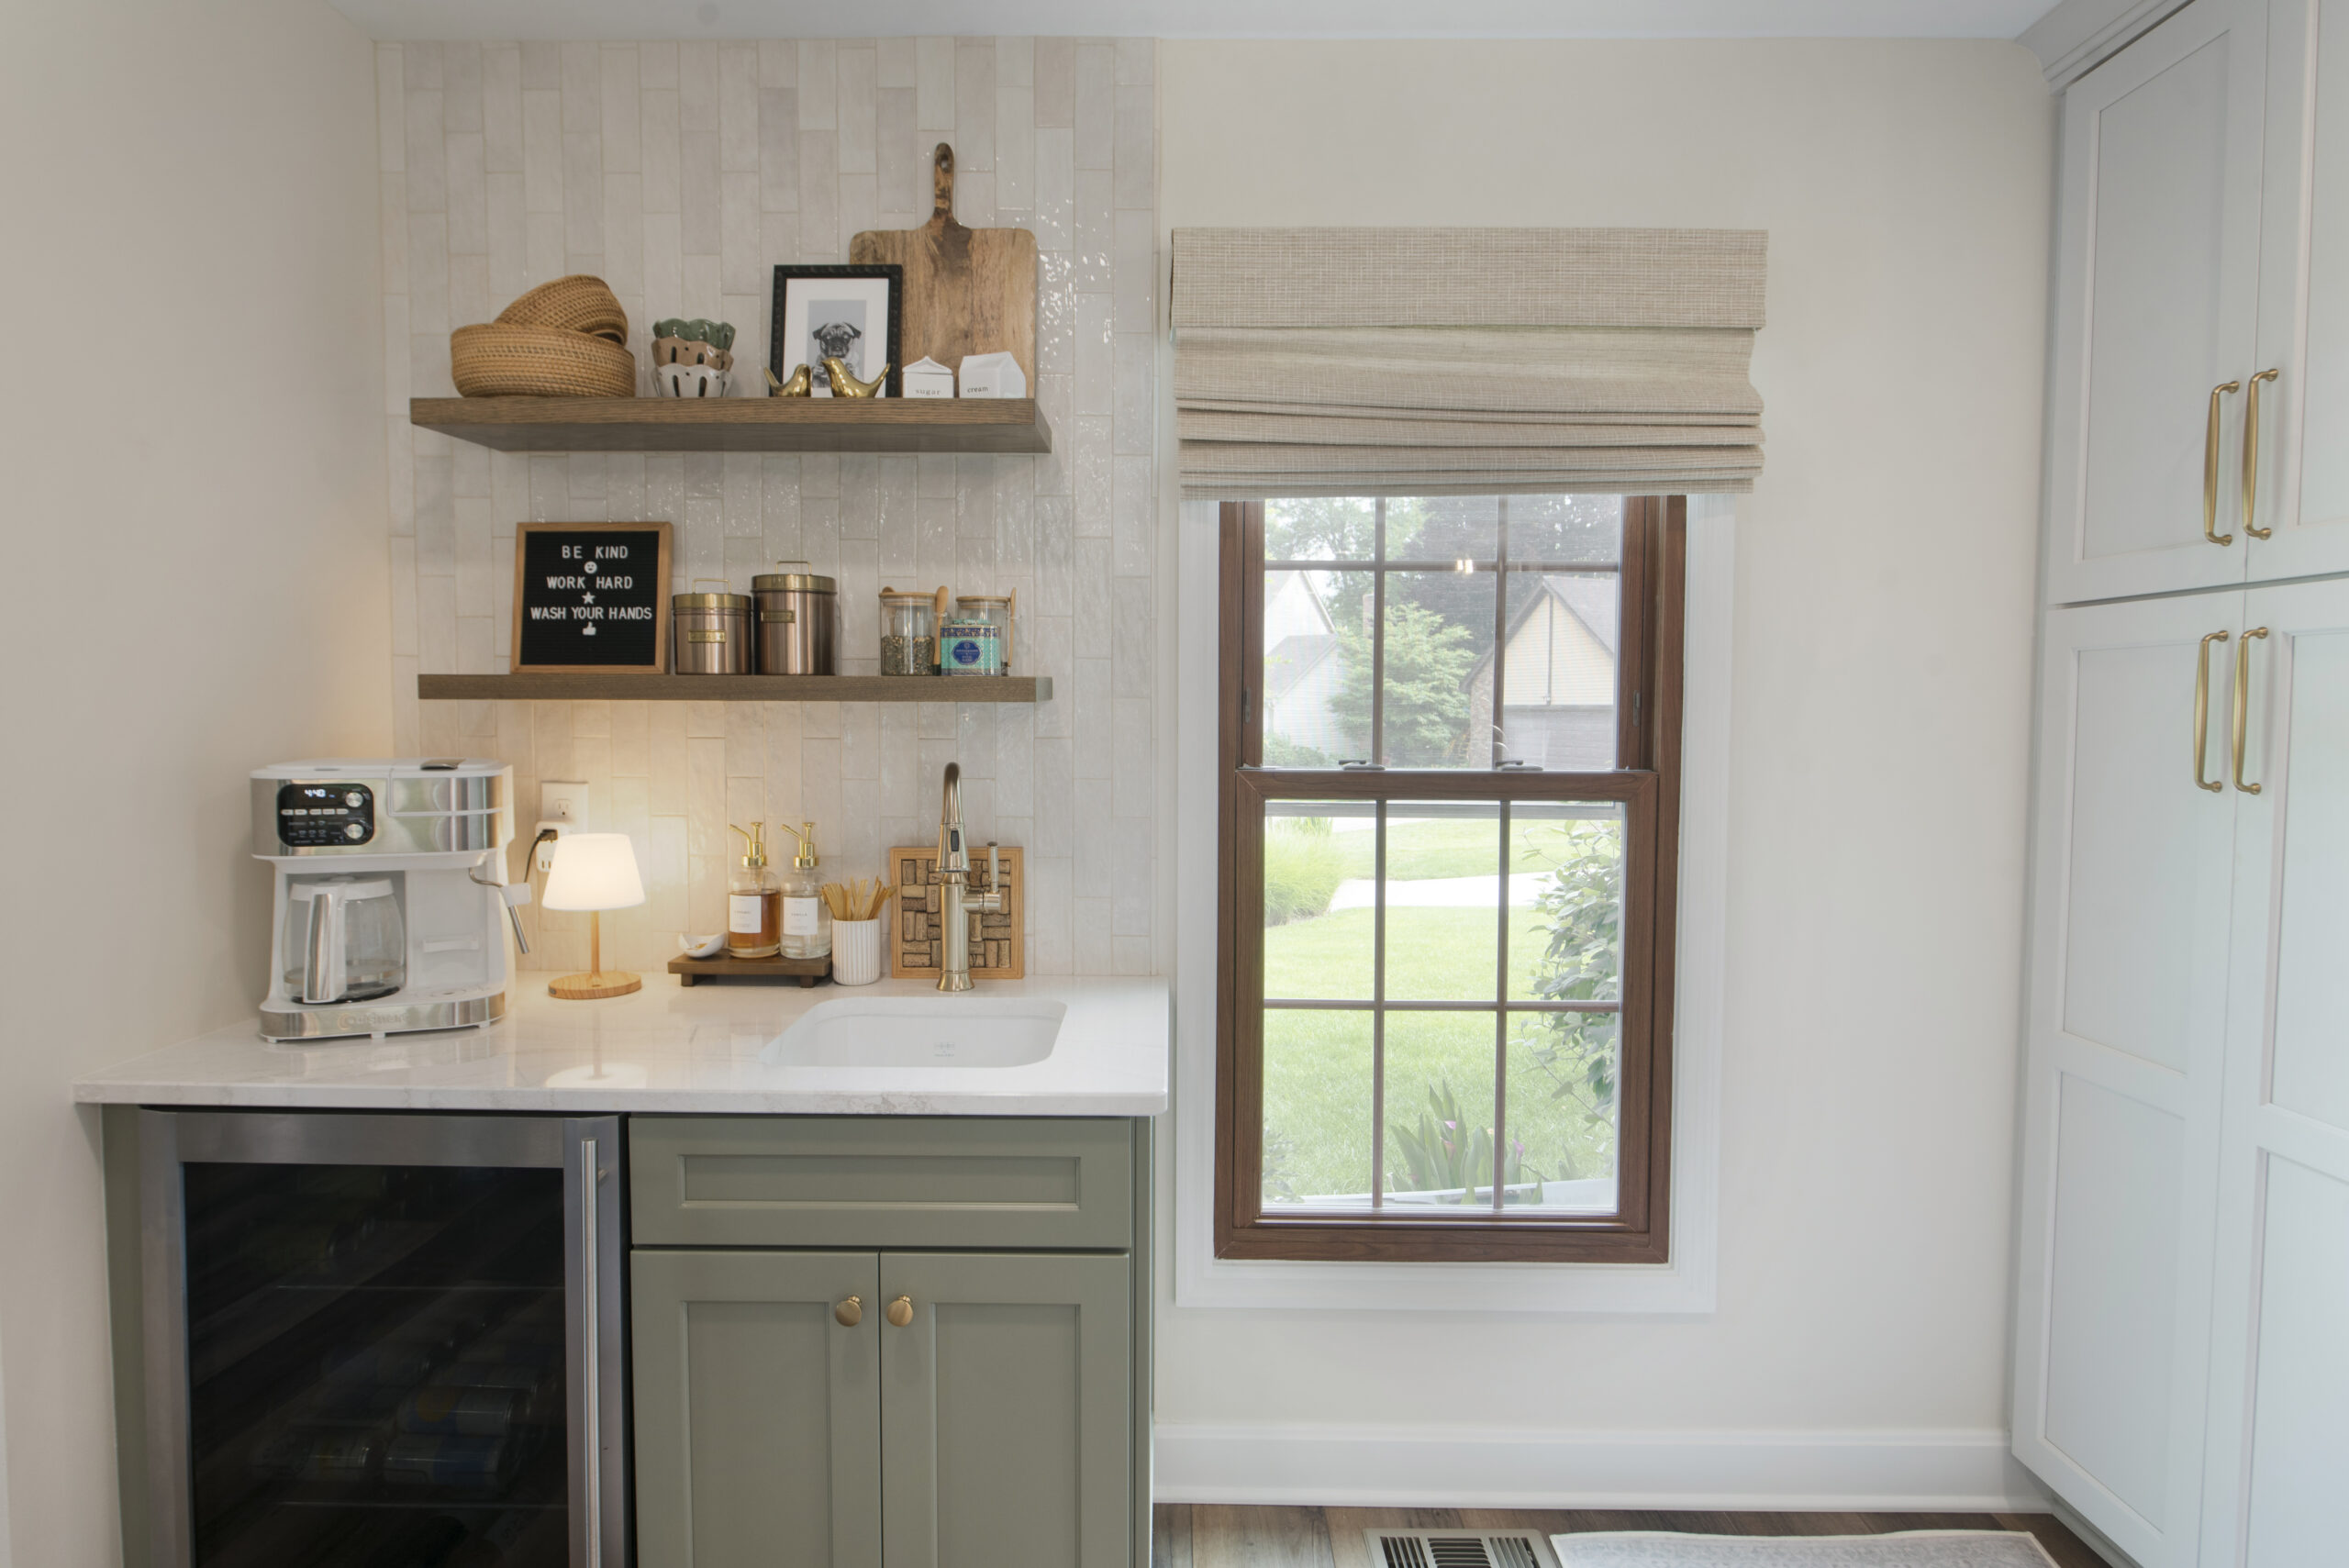
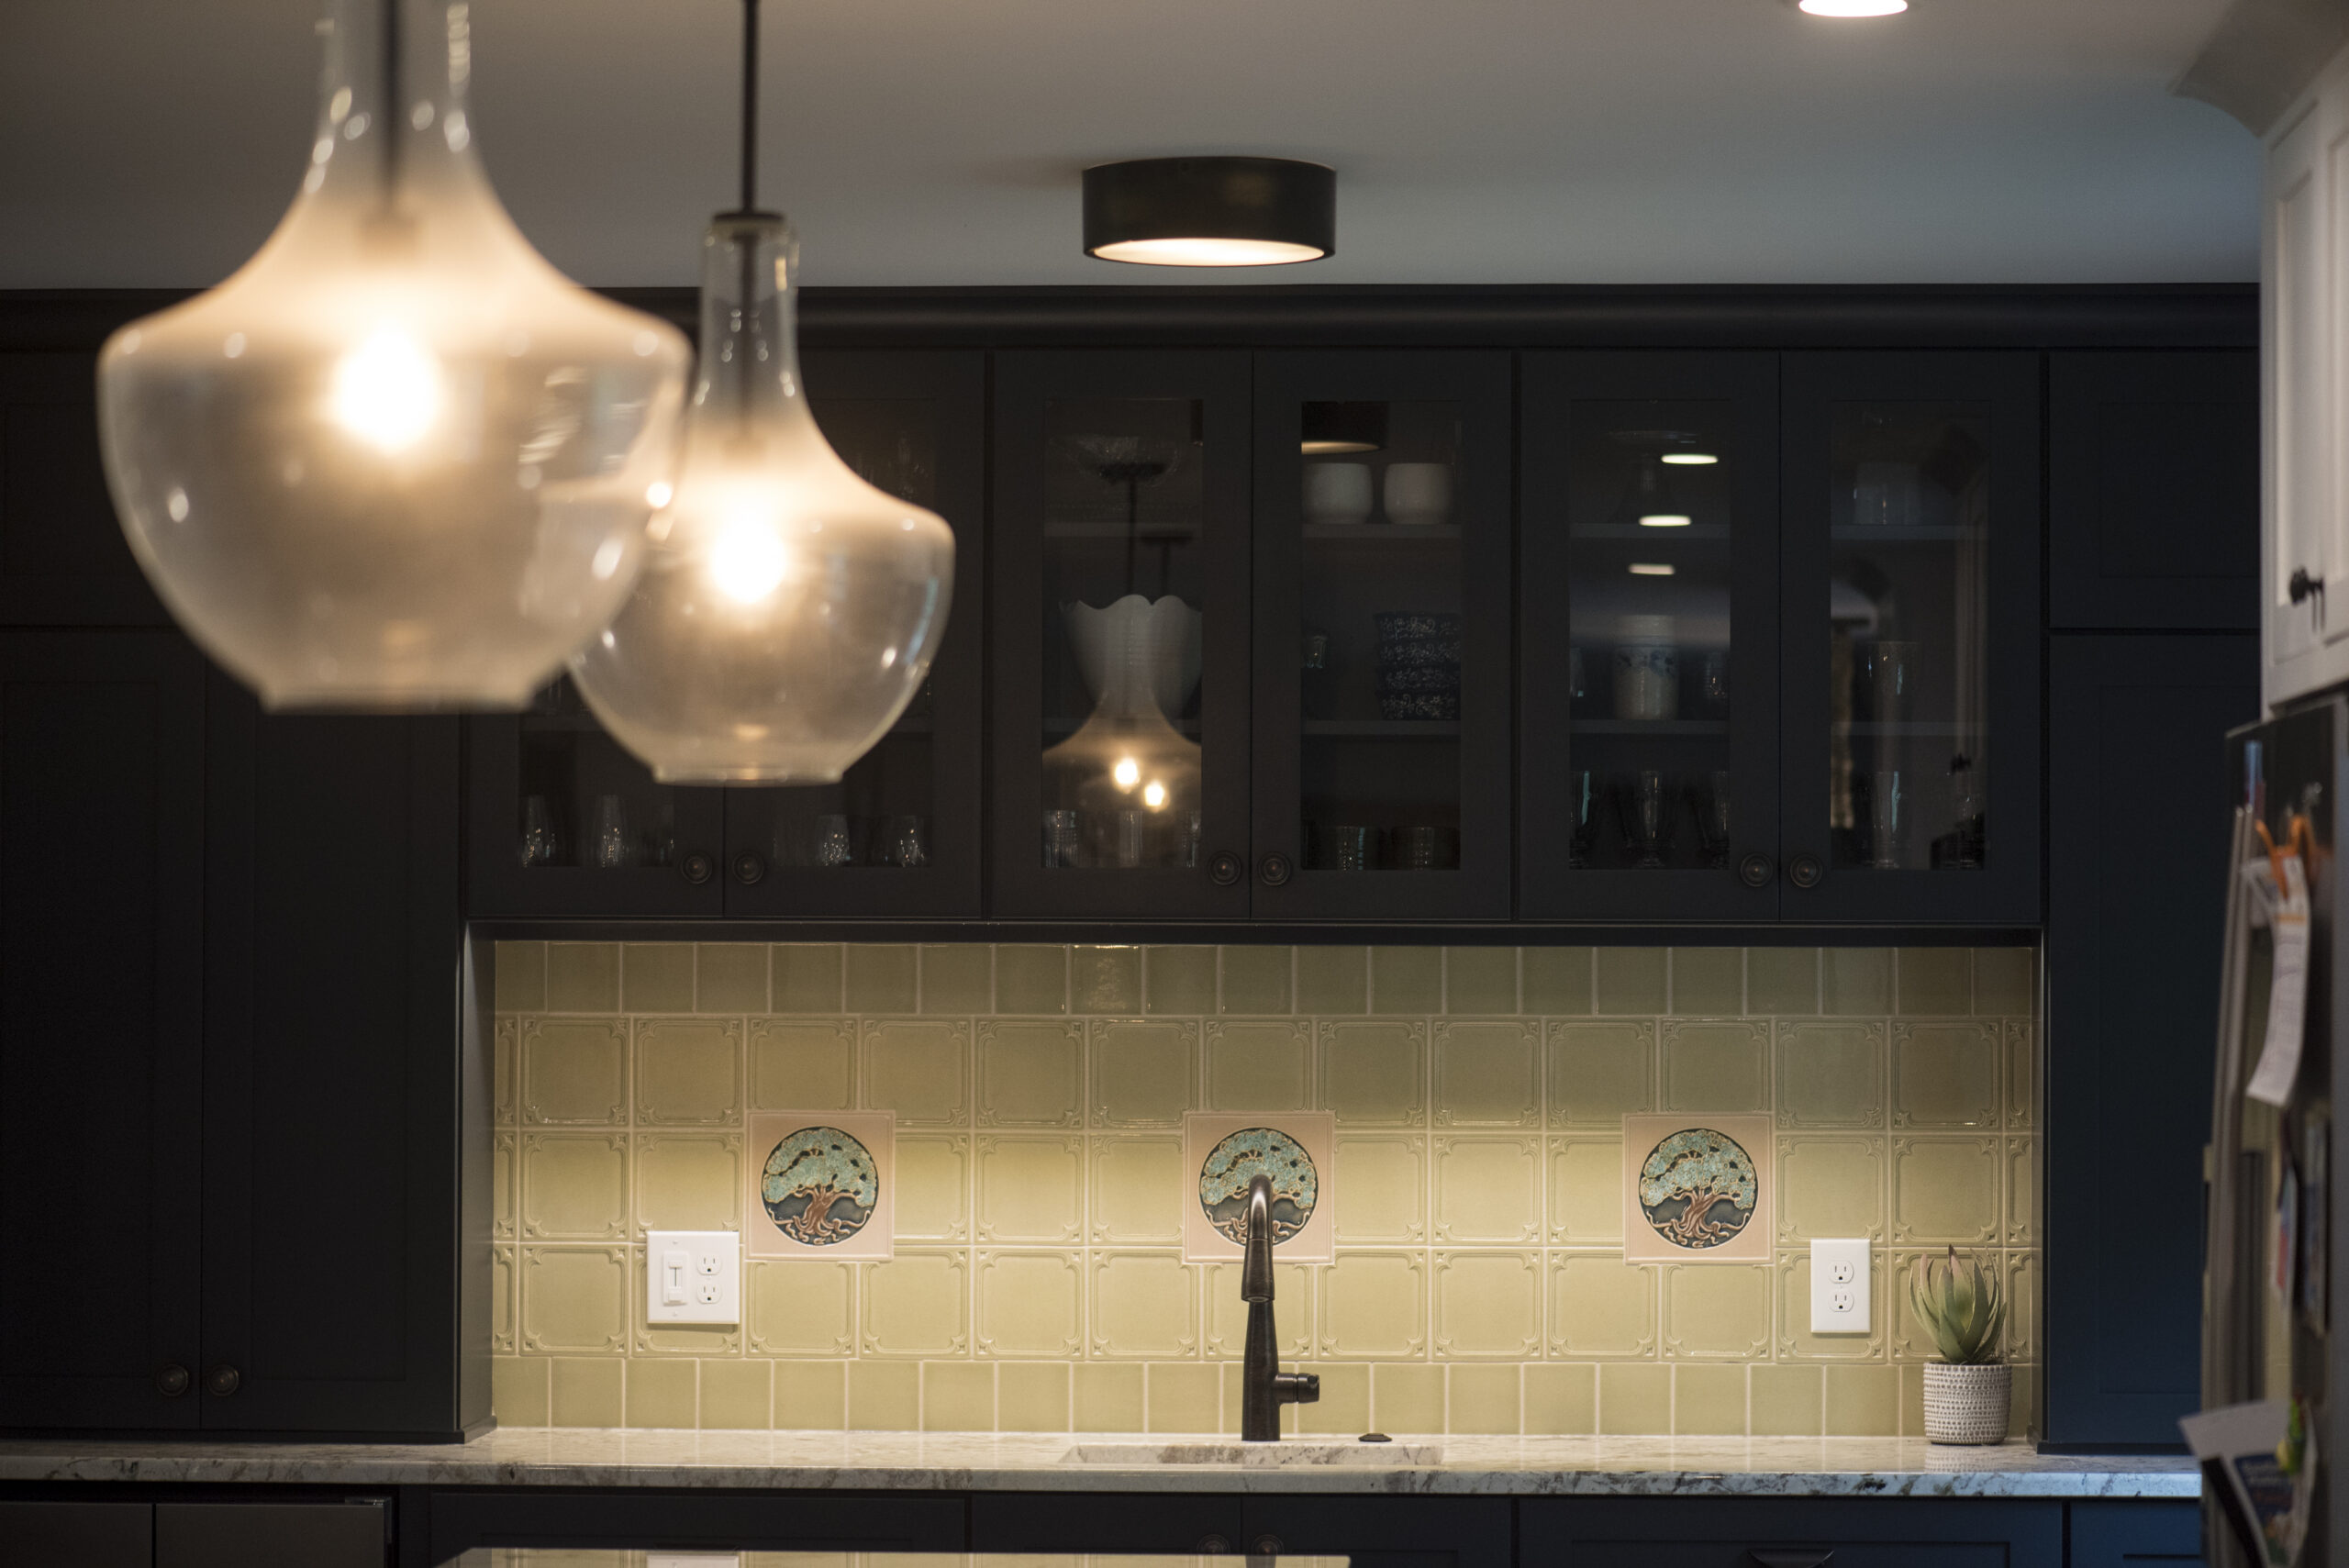
To complete the project, we added a wet bar that feels as though it has always been part of the home. Designed as an extension of the adjacent kitchen and living areas, the bar features cabinetry that mimics the existing style and countertops that perfectly match the surrounding spaces. The true showstopper is the handcrafted tile, sourced by the homeowners and installed in a custom layout that adds a beautiful pop of color, texture, and visual interest.

See Full Gallery


Primary Bathroom

Westerville

This primary bath was completely reimagined and fully reconfigured to better support how the space could actually be used.

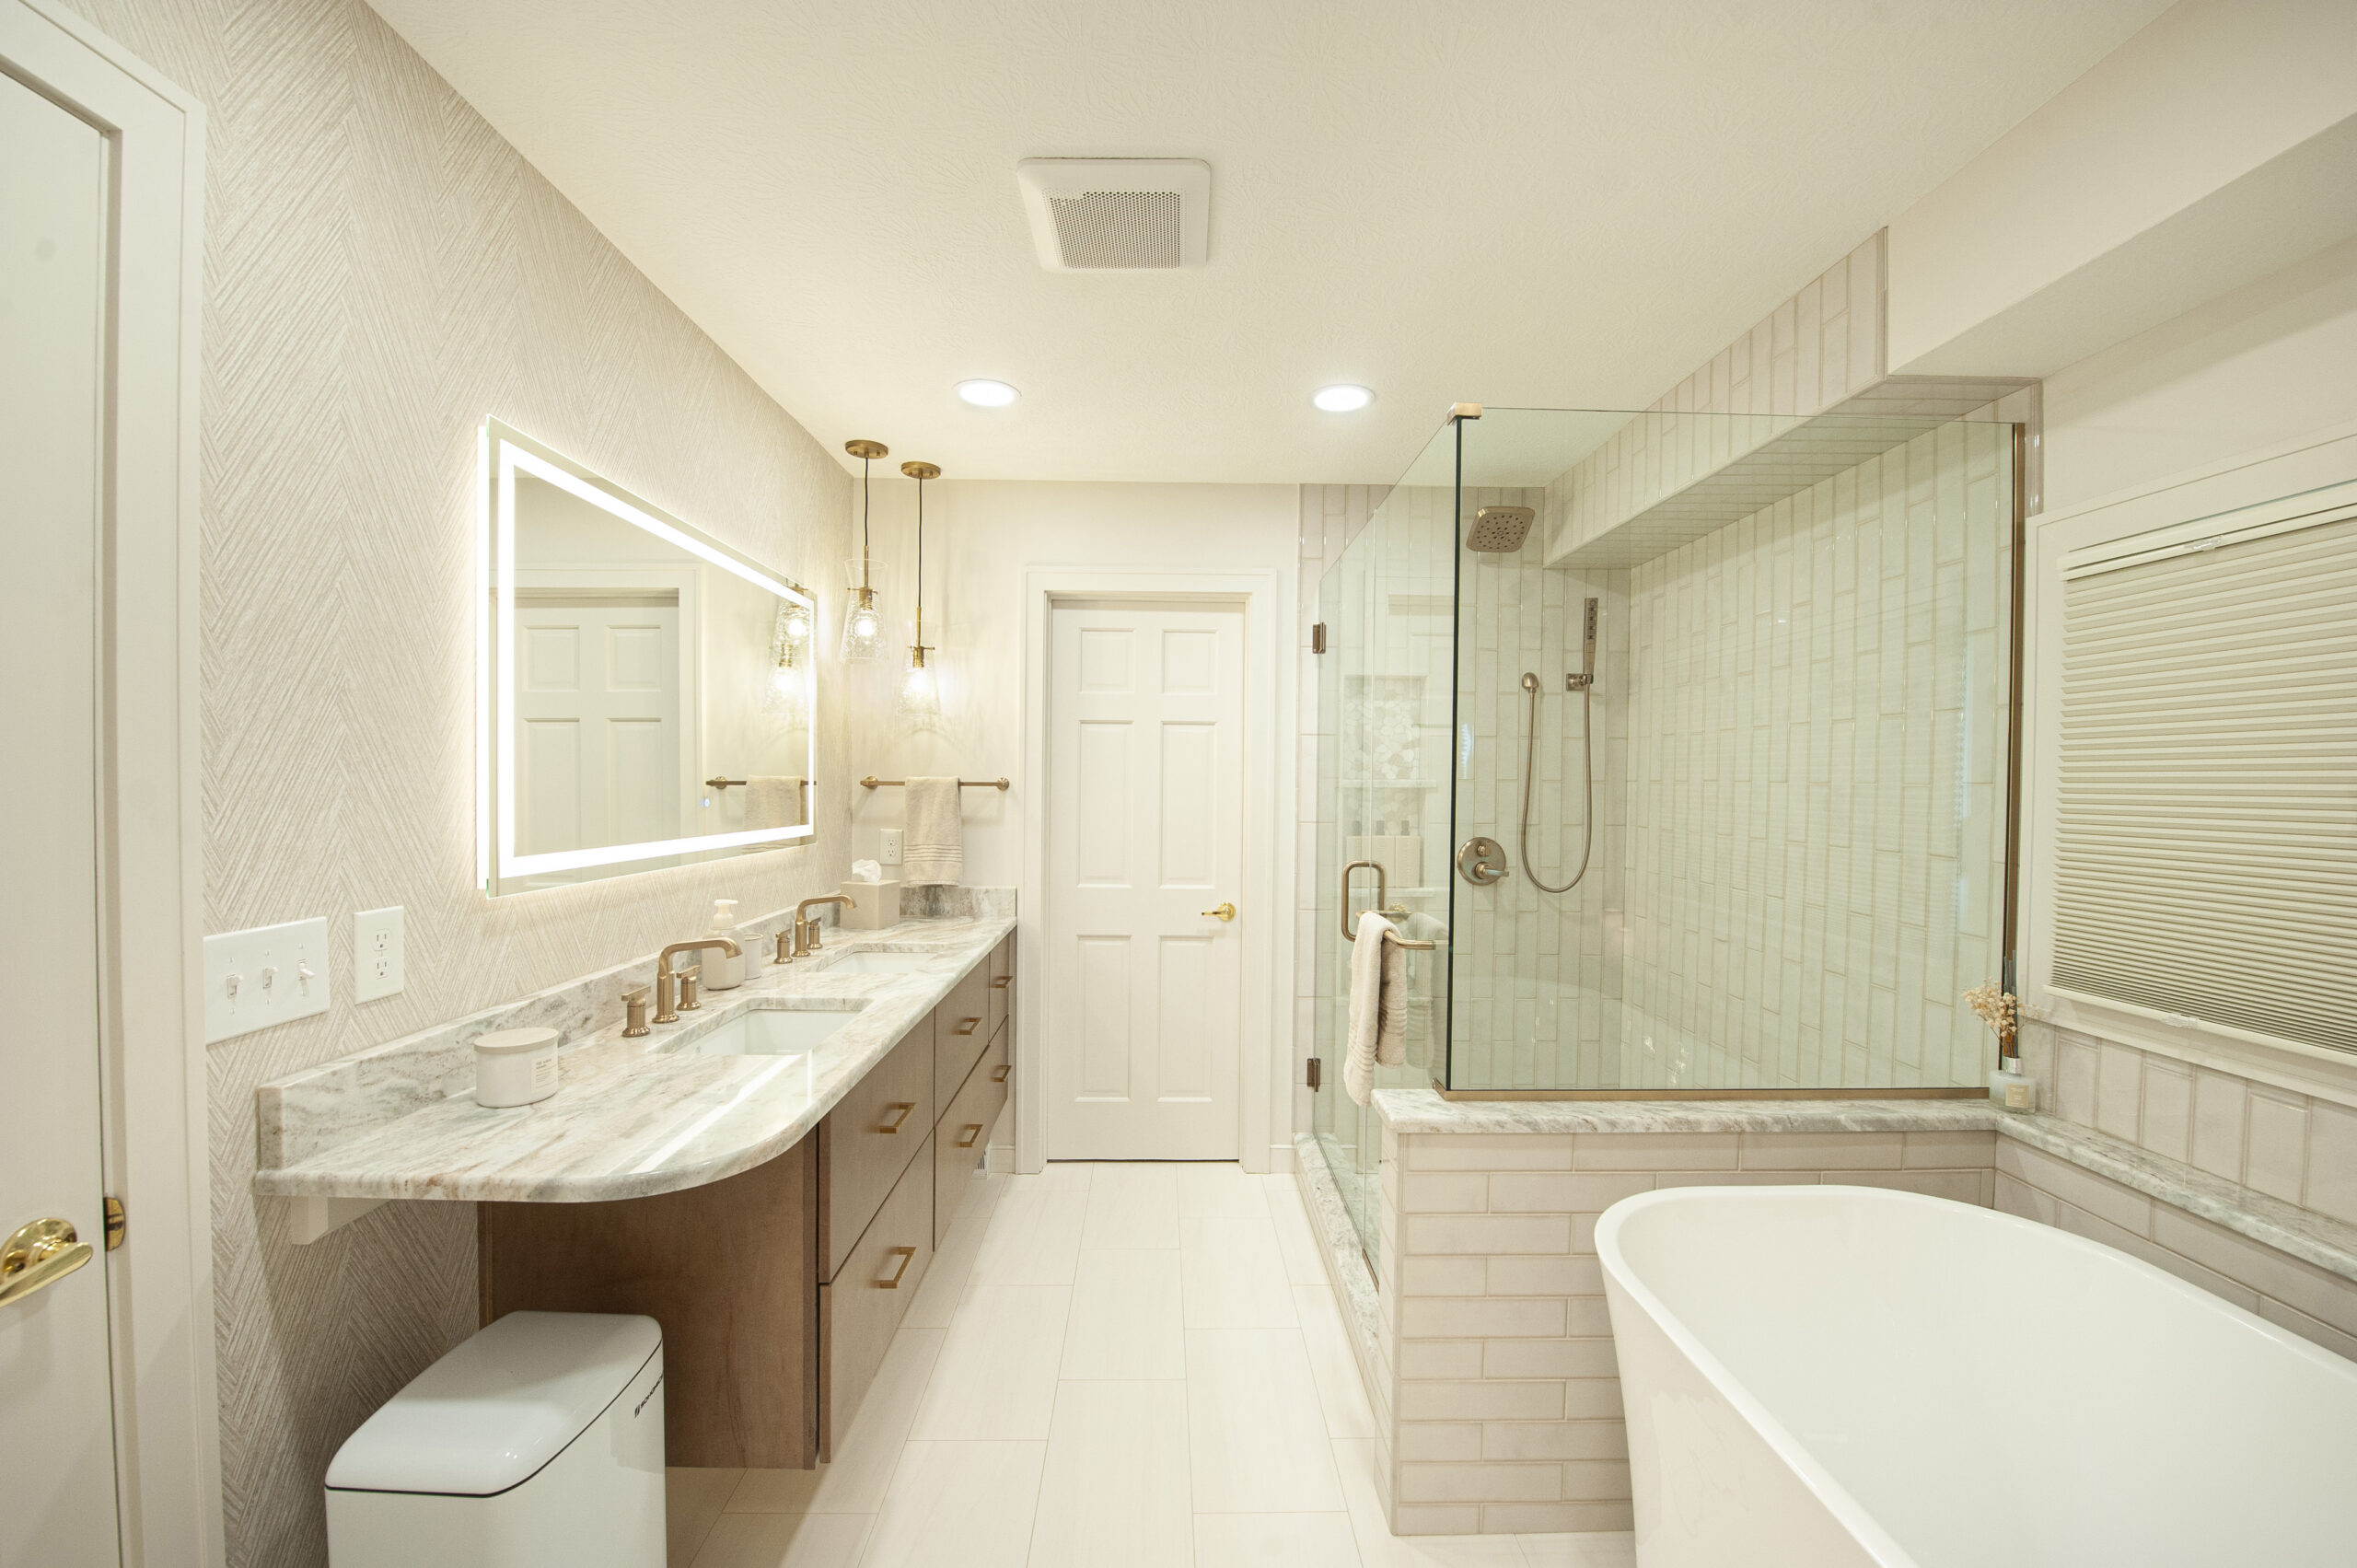
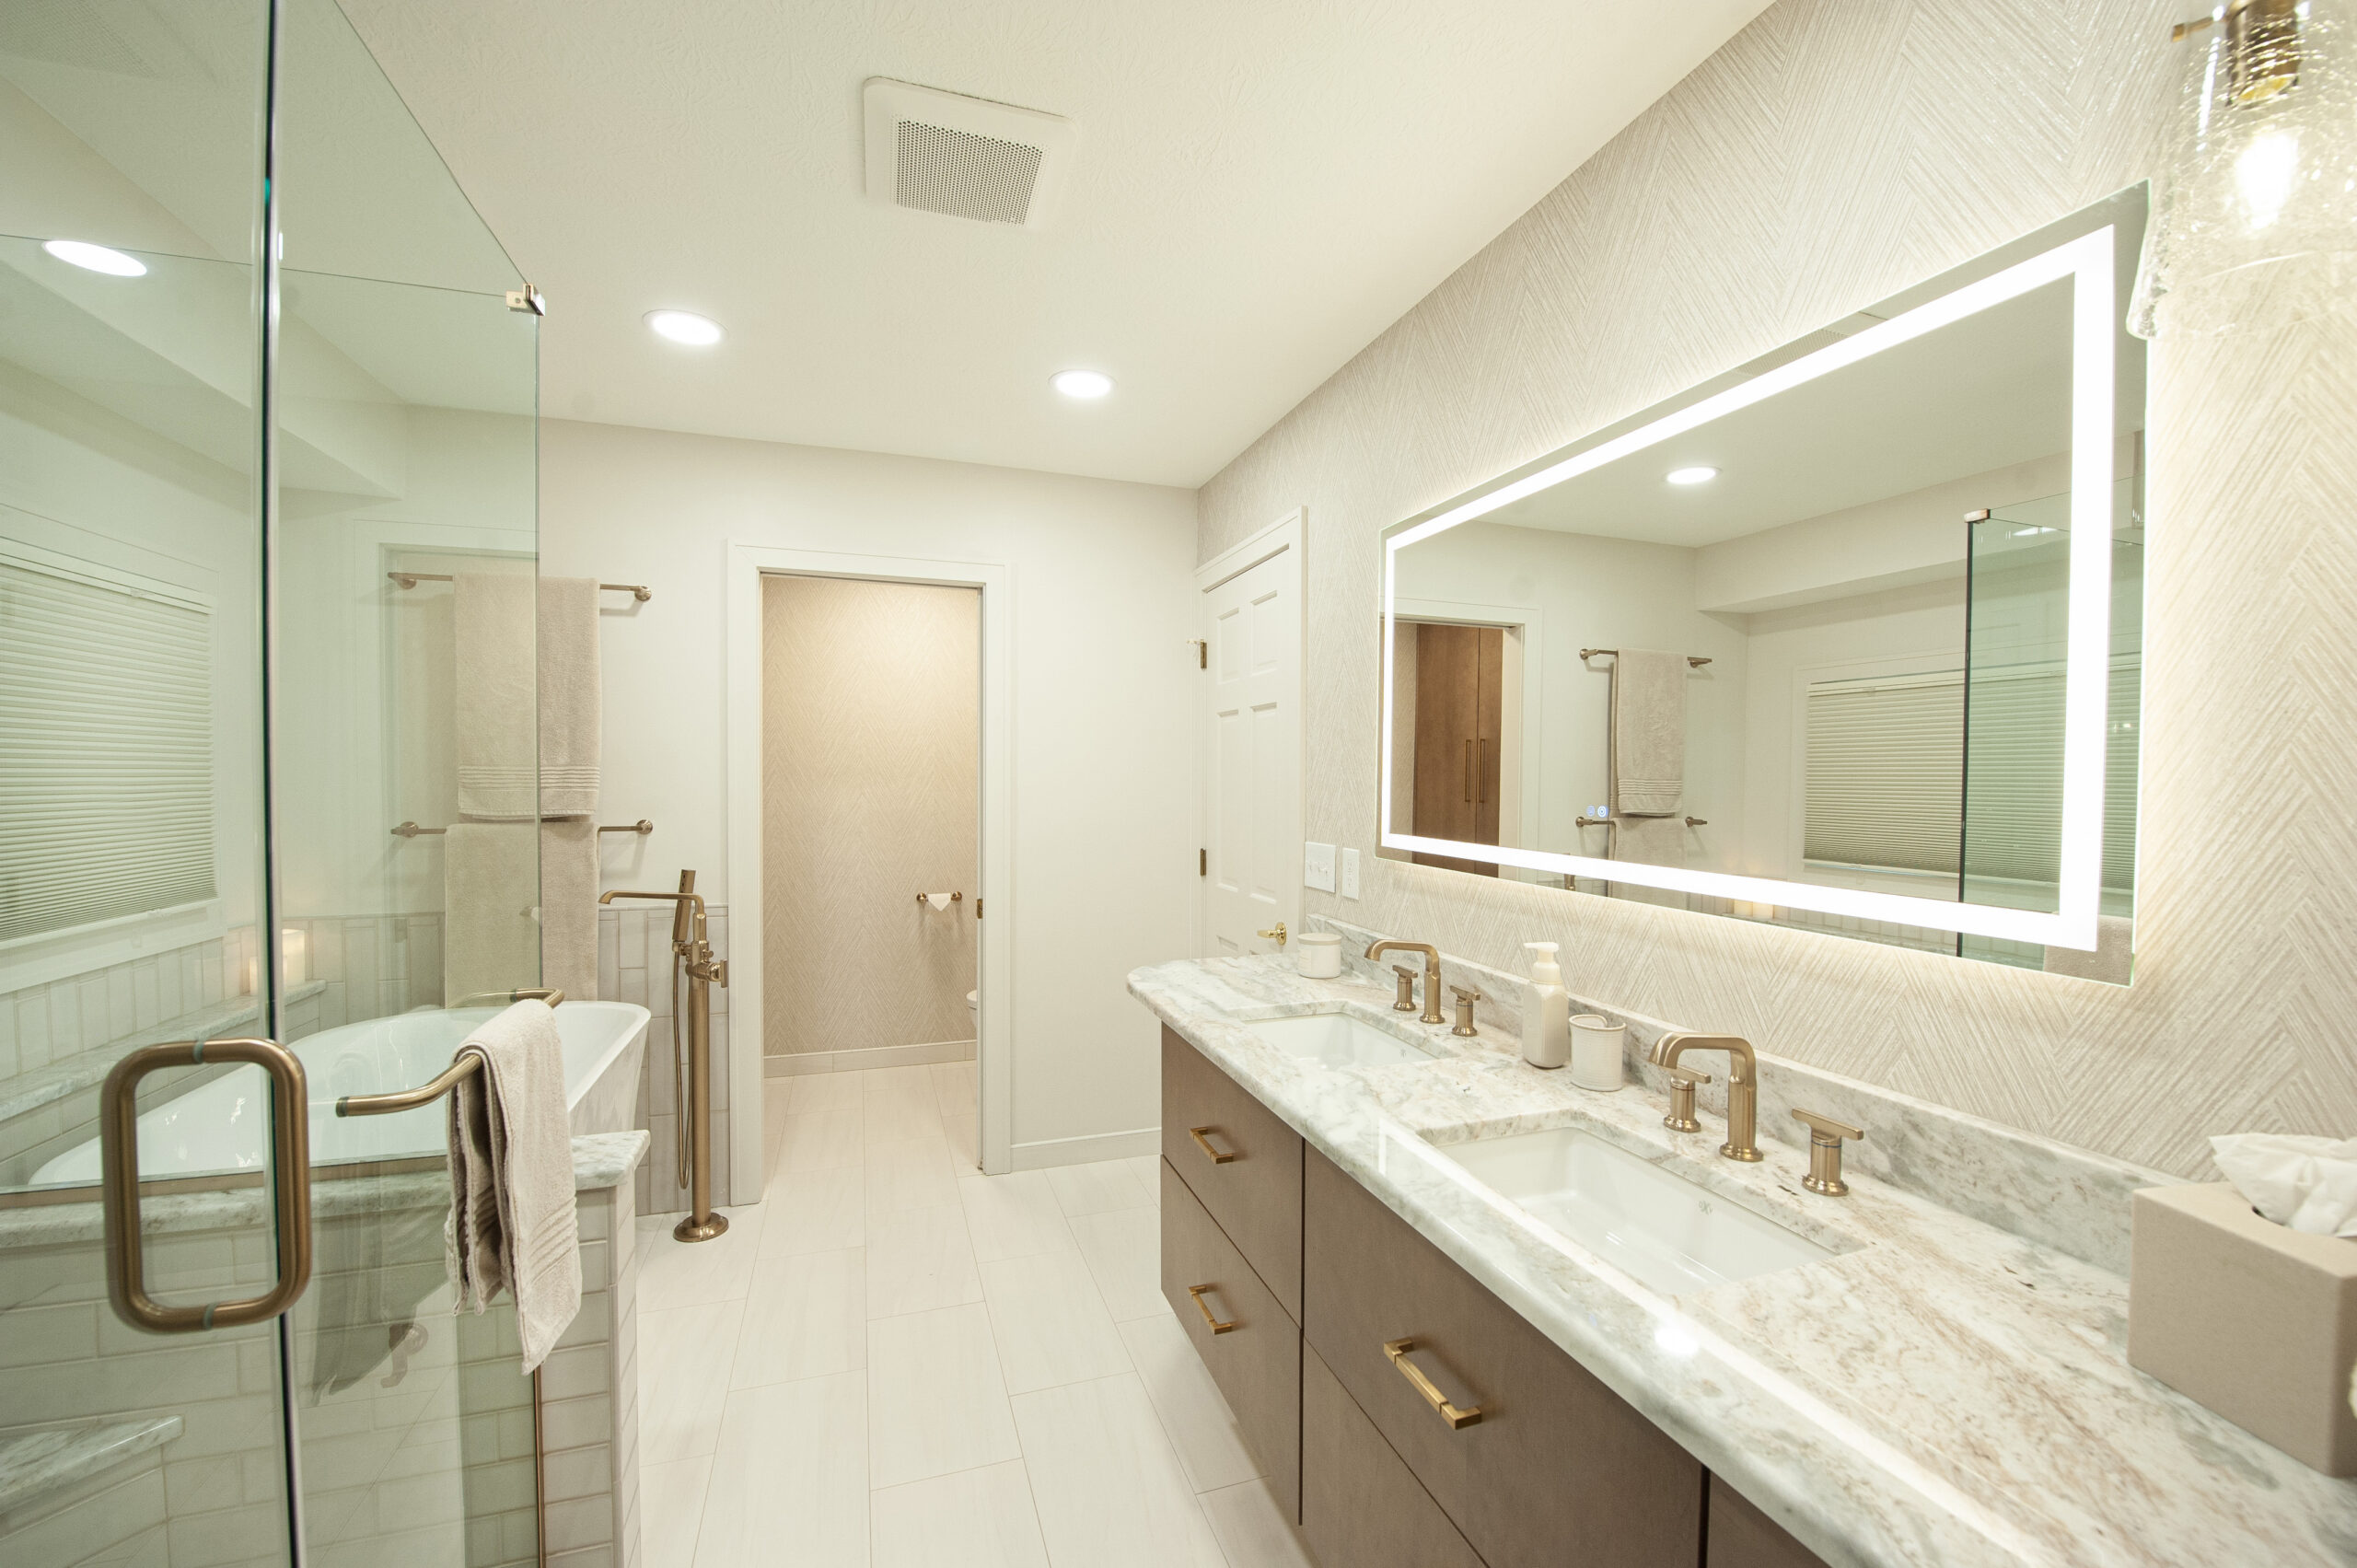
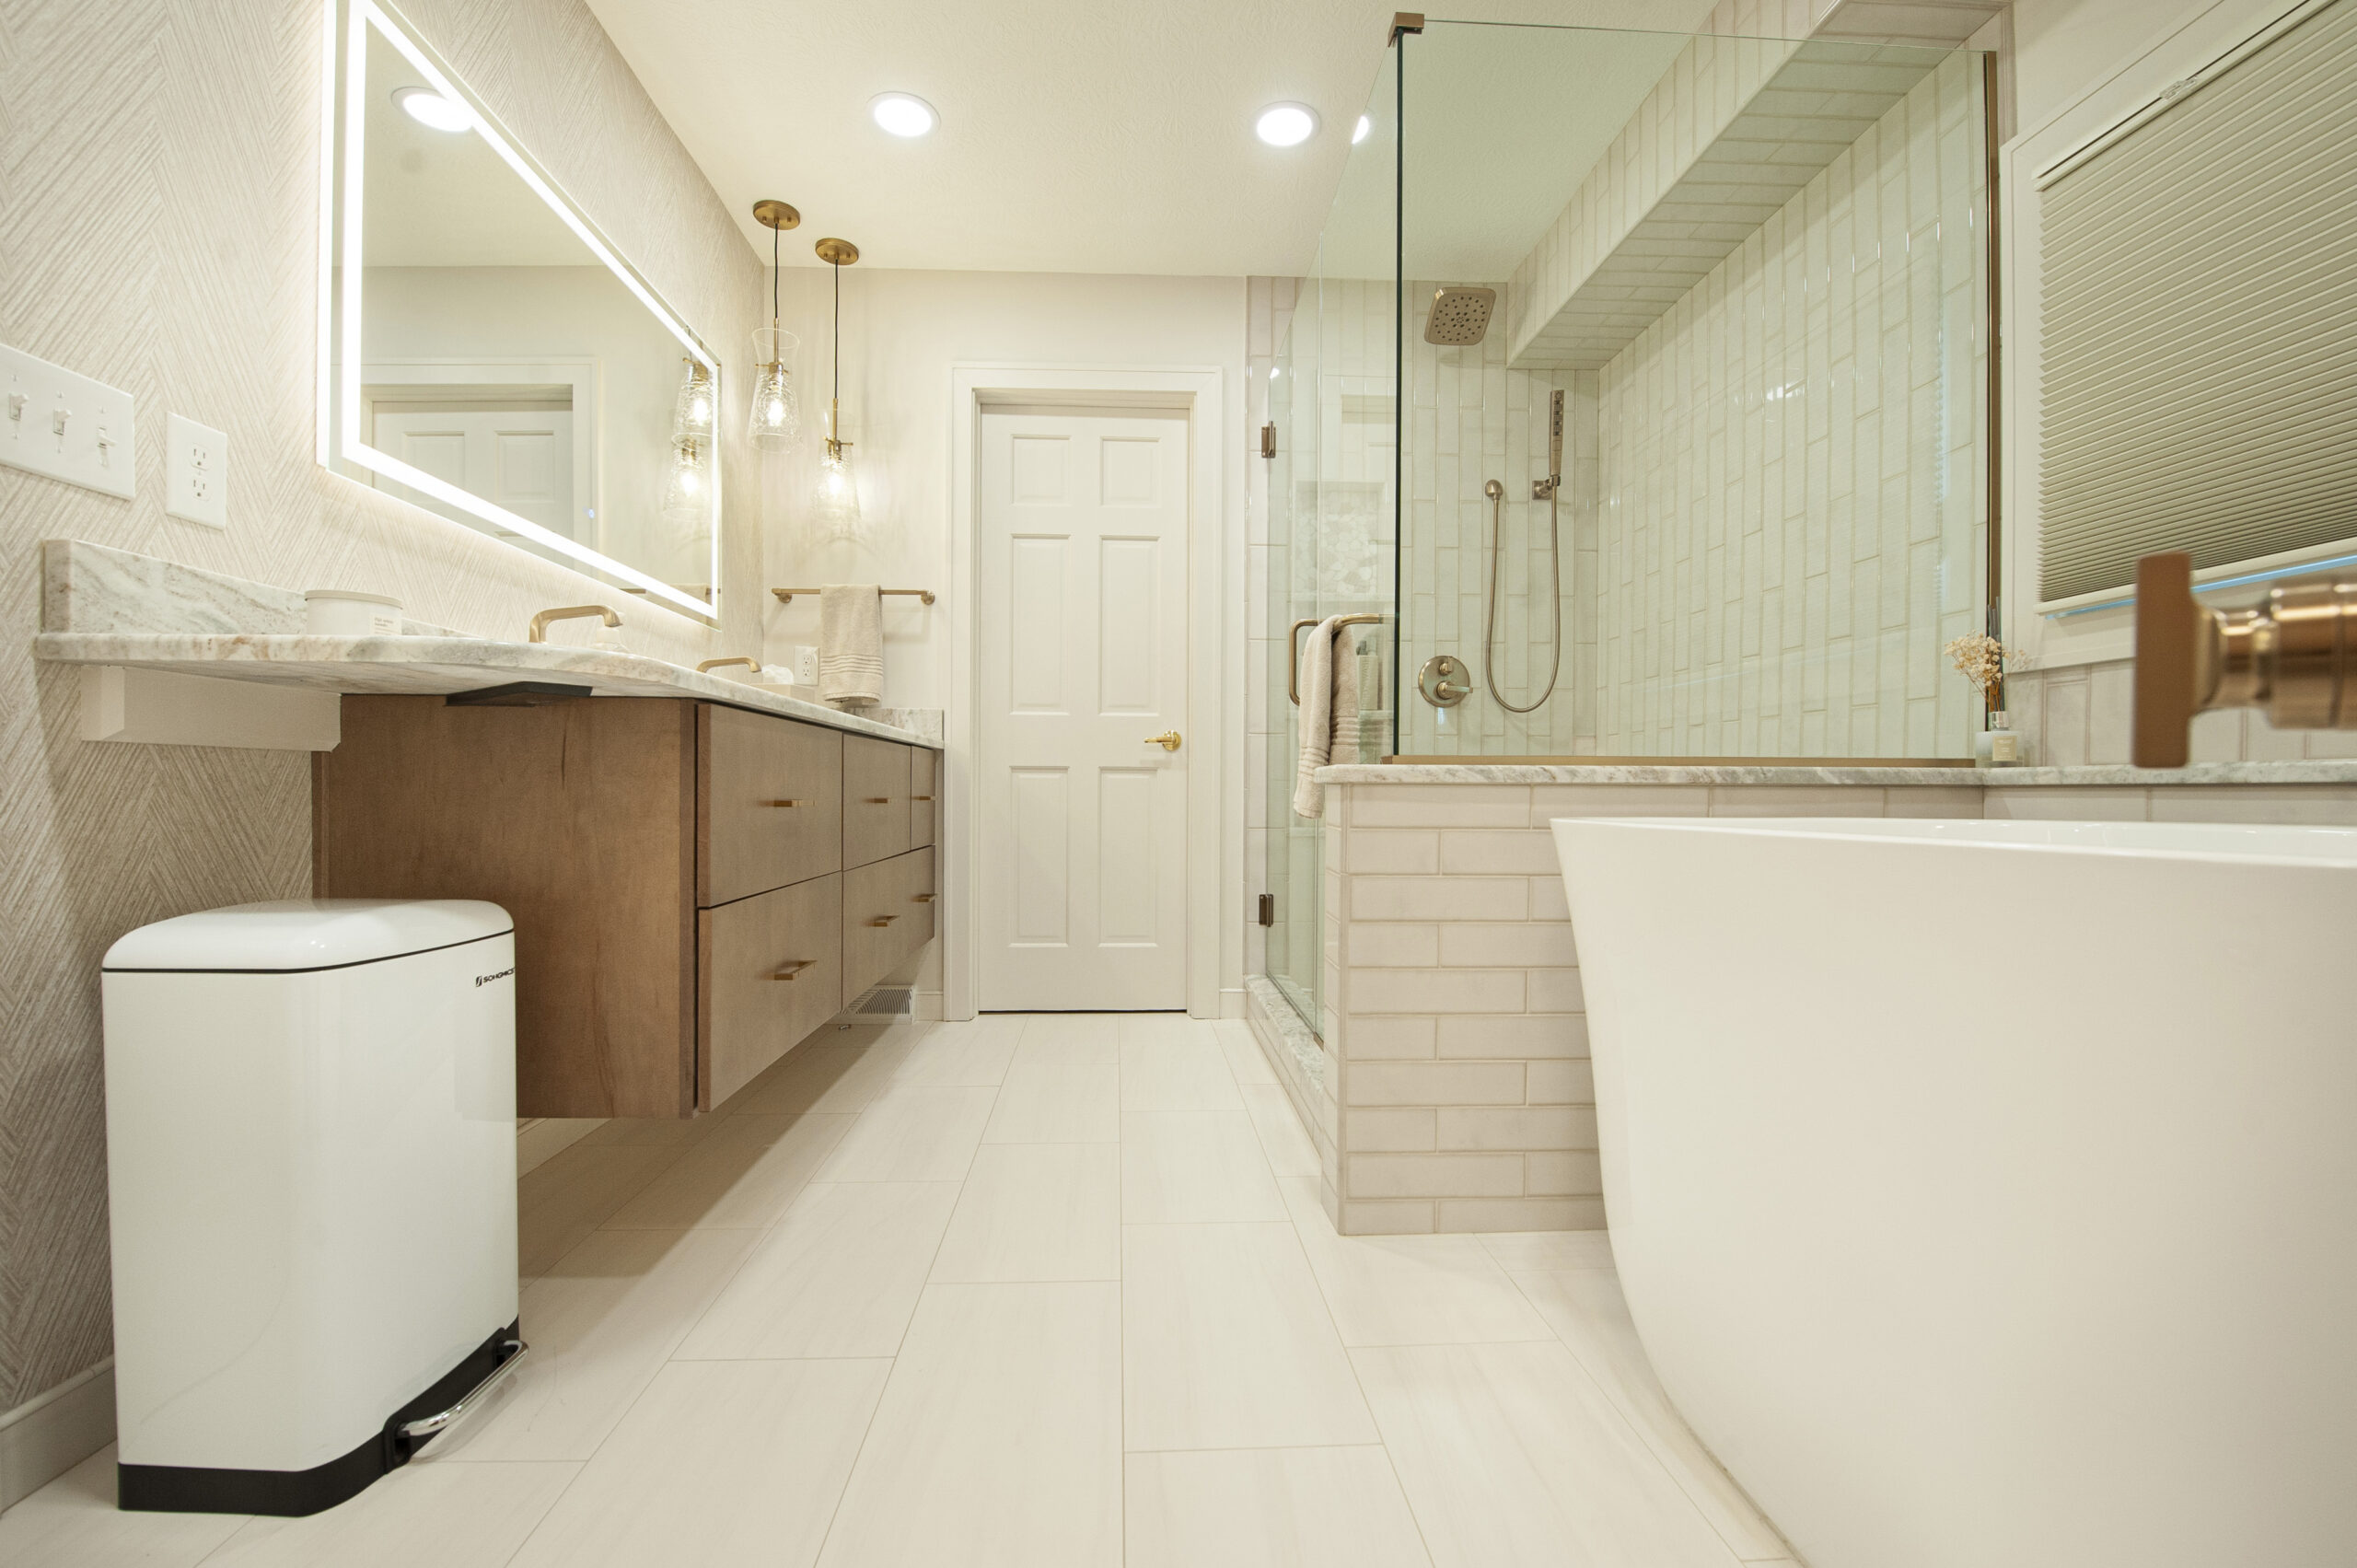
We removed the oversized, rarely-used jetted tub and reallocated that footprint to create a larger, more intentional shower while also adding functional linen storage. In the shower, we paired sleek subway tile with natural pebble tile to create a contrast of smooth and organic textures. Clean lines balanced with something more grounded and tactile. It’s a mix that makes the space feel custom, layered, and a little unexpected in the best way.

Texture is what really brings this space to life. Aside from the tile work, a richly textured wallpaper sets a soft, elevated backdrop for the vanity and water closet. To add to it, the backlit mirror glows against it, highlighting the pattern in a subtle, layered way. Floating vanities keep things visually light, adding contrast to the warmth and depth of the finishes around them.

Lighting and detail work add another level of character. Pendants with crackled glass introduce a soft sparkle and movement when lit, while the lighted bidet toilet brings a quiet, modern comfort detail into the mix. The freestanding tub and filler read almost sculptural, anchoring the room without feeling heavy.

Every element works together to turn this primary bath into a calm, refined retreat with just the right amount of visual interest.

See Full Gallery


Need some more home remodeling inspiration for your next project?

See Full Portfolio

Have a great summer!

Summer 2026

2026 has been amazing so far, and we can’t wait to see what comes next. 

As we head into fall, if you are thinking about a remodel – or simply want to talk through an idea – our team would love to help you bring your vision to life.

Call Us Today

Continue reading

Finishing Your Basement: The Design Decisions That Make It Feel Like a Real Floor

Most Columbus homeowners think about finishing a basement in terms of what to put in it: a rec room, a home office, a guest suite. That’s the right instinct. The harder question, and the one that actually determines whether the space works, is how to make it feel like the rest of the house.

A finished basement that feels like a basement is a wasted opportunity. Drop ceilings, harsh overhead lighting, and walls that stop at floor level can technically be called “finished,” but they don’t add the kind of living space that gets used every day. The design decisions you make before a wall goes up (ceiling strategy, light, layout, egress) are what separate a basement that becomes the most-used room in the house from one that collects camping gear.

Here’s what those decisions actually involve.


Ceiling height: the constraint that shapes everything else

Columbus homes built before the 1980s are notorious for tight basement clearances. A 7-foot ceiling feels comfortable. Below that, the design work gets harder, and the options narrow.

Before anything else, measure your actual clearance from the concrete floor to the underside of the floor joists above, and then account for whatever finished ceiling system you’re adding. A drywall ceiling on a 2×4 frame drops 4–5 inches. A drop ceiling loses 4–6 inches plus the track hardware. Spray-applied insulation on exposed joists gives the most headroom but works best in certain use cases (more on that below).

For basements under 7’6″ finished, the design choices that preserve ceiling height become a priority. That often means:

  • Exposed, painted joists in rec rooms or media spaces, where the industrial look is intentional and acceptable
  • Soffit design to conceal mechanical runs cleanly rather than letting ductwork drop arbitrarily through the space
  • Strategic tray or coffered framing where ceiling height is adequate, to add visual depth without losing clearance in the main field
  • Engineered flooring directly on concrete (no subfloor sleepers) to recover an inch or two at the floor level

When the ceiling is genuinely low, an experienced design team will plan around it rather than fight it. Some of PSR’s most successful Columbus basement projects have turned a 6’10” clearance into a comfortable media room by making the low ceiling a design feature rather than an apology.


Getting light into a below-grade space

Natural light is the single factor that most distinguishes a finished basement that feels like a living floor from one that feels like a finished basement. Every design decision about windows, wells, and egress is worth thinking through before framing begins.

Egress windows are required by code for any bedroom in a basement, but they’re worth considering even in non-bedroom spaces. An egress opening is 20″ wide by 24″ tall at minimum; a well-designed window well with the right well cover and liner can admit meaningful daylight into an adjacent sitting or work area. If there’s any possibility the space will function as a bedroom now or in the future, putting in the egress window at rough-in is far more practical than opening the wall later.

Window wells deserve more design attention than they typically get. A deep, gravel-filled well with a corrugated plastic surround is code-compliant but cheerless. A well lined with stacked stone or cultured stone, with a drainable gravel base and a proper cover, improves both the light quality and the curb appeal of the exterior.

Above-grade exposure. Columbus homes on sloped lots sometimes have partial above-grade basement walls, which opens up the possibility of full-size windows or even a sliding door on a walk-out or look-out side. If your site permits it, a look-out basement (even on one side) fundamentally changes how the space lives.

For below-grade walls where no window is possible, lighting design carries more weight. Recessed fixtures on dimmers, linear lighting along soffits, and wall sconces at lower heights all help distribute light in a way that reduces the bunker effect. A lighting plan, not just a fixture count, makes a real difference here.


Layout: what actually goes in the basement

The best basement layouts are planned around how the household will actually use the space, not around what fits most easily. A few use cases worth thinking through before the framing plan is finalized:

Home office or studio. Basements are naturally quiet and relatively easy to condition for temperature, which makes them excellent dedicated work or creative spaces. The design considerations: a dedicated egress path if the space is heavily used, adequate electrical capacity for equipment, and a lighting plan that doesn’t produce the flat overhead wash that makes screen work harder.

Guest suite. A basement guest suite with a private bath is one of the highest-value basement configurations for Columbus families. Egress is required for the bedroom. The bath requires careful planning around existing drain lines: gravity drainage from a below-grade bath almost always means a sewage ejector pump, which should be sized and located in the design phase, not discovered during rough-in.

Rec room or media room. The most common basement use case, and the one with the most flexibility. Key design choices: acoustic separation from the floor above (especially for home theaters), built-in storage and shelving that’s designed into the framing rather than added afterward, and a wet bar or kitchenette rough-in if the space will function for entertaining. It’s much easier to run the drain and supply lines for a wet bar during rough-in than to core through finished concrete later.

Playroom. For families with younger children, a dedicated below-grade playroom can reclaim the main floor. Design priority here is storage: built-in cubbies, closed cabinet runs, and durable flooring surfaces that can handle the actual use.

Most basements in Columbus homes will serve more than one of these functions over time. A design-build team can plan the rough-in locations, electrical panels, and partition walls so the space can adapt without being gutted.


Moisture, insulation, and the decisions that prevent future problems

A finished basement that develops moisture problems after the fact is an expensive outcome that’s almost always preventable in the design phase.

Before framing begins, the right sequence is: confirm exterior drainage is directing water away from the foundation, check for any existing seepage or efflorescence on the walls, and assess the condition of the slab. Interior drainage systems and sump pump configurations can be addressed as part of the project if needed, and it’s far better to address them before walls are insulated and drywalled than after.

Wall insulation strategy in a basement is different from above-grade walls. Continuous rigid foam insulation against the foundation wall, with framing set inside it, is typically better practice in Ohio’s climate than fiberglass batts in a standard stud cavity flush against the concrete. The physics: concrete is cold, and a thermal bridge between a stud framing member and a cold wall creates a condensation point inside the wall assembly. Rigid foam breaks that bridge.

Flooring on a concrete slab needs to account for the fact that concrete is always slightly permeable to vapor. Luxury vinyl plank directly over a vapor-permeable underlayment, or engineered hardwood with a proper moisture barrier, performs better in a basement than solid hardwood or carpet over a bare slab.

These aren’t exciting design choices, but they’re the ones that determine whether a finished basement holds up over ten years.


What a cohesive basement finish actually looks like

The finished basements that feel most like part of the house rather than an afterthought share a few common design threads: trim profiles and door styles that match the floors above, a consistent flooring or flooring-adjacent material that reads as intentional, and storage that was designed into the space rather than bolted onto it.

Built-in shelving and cabinetry, designed to the specific room proportions, does more to make a basement feel considered than almost any other single investment. The difference between a rec room with floating shelves from a home center and one with floor-to-ceiling built-ins on a feature wall is the difference between a room that was finished and a room that was designed.

The same goes for how the staircase arrives in the space. An open staircase with good railing detail, or a properly trimmed stair opening with a landing that orients you into the room, sets the tone before anyone sees the rest of the floor. Basement stairs that are enclosed in a closet, with a door that opens directly to the middle of the room, are a layout problem worth solving in the design phase.


FAQ

Does finishing a basement require a permit in Columbus? Yes. Any finished basement that adds habitable square footage, involves electrical work, or adds a bathroom requires permits from the City of Columbus (or the relevant suburb’s building department). A permitted project protects you at resale and ensures the work meets current code for egress, ventilation, and electrical capacity. In a design-build model, permit coordination is handled in-house as part of the project.

How much headroom do I need to finish a basement comfortably? The International Residential Code requires a minimum of 7 feet of finished ceiling height for habitable space, with exceptions for beams and mechanical runs. In practice, 7’6″ gives you more design flexibility; anything under 7 feet typically requires either an exposed-joist approach or a specific low-profile ceiling system. A pre-project site visit and ceiling measurement should happen before any scope is defined.

Can I add a bathroom in my basement? In most cases, yes, but it requires careful planning around your existing drain configuration. Below-grade bathrooms almost always need a sewage ejector pump to move waste up to the main drain line. The pump, basin, and vent configuration should be designed into the plan from the start. A design-build team familiar with Columbus-area basement construction will assess your specific drain situation before committing to a layout.

Will finishing my basement affect my HVAC system? Adding conditioned square footage changes the load on your existing HVAC system. A well-planned basement finish should include an HVAC assessment to confirm the existing system can handle the additional space, or to plan for supplemental heating and cooling. In-floor radiant heat is an option on slabs during a finish project and is worth discussing if the basement will be used year-round.

What’s the difference between a look-out and a walk-out basement? A walk-out basement has at least one wall that is fully above grade, with a standard-height door that opens directly to grade outside. A look-out basement has windows at or near grade level but no exterior door; it gets natural light from the above-grade exposure but no direct outdoor access. Walk-outs are more common on sloped lots and dramatically change how the space lives. If you’re not sure which you have, a quick look at the exterior foundation exposure will tell you.

How long does a basement finish project typically take? A straightforward unfinished basement (open floor plan, one bathroom, no major structural work) typically runs 8 to 14 weeks from permit to completion, depending on scope and trade scheduling. A more complex project with multiple rooms, a guest suite, a wet bar, and significant electrical work can run longer. The design-build advantage here is that sequencing is planned from the start, so trade coordination doesn’t create the scheduling gaps that add weeks to a project managed across separate firms.


Thinking through finishing your basement? Request a consultation or call (614) 505-6084). We’ll start by looking at what the space can actually do for you.

Browse our basement renovation work or see how PSR handles every project from concept to completion on the Our Process page. Real finished basements are in the portfolio if you want to see what’s possible.


Whole-Home Remodel or Addition? How to Decide What Your Home Actually Needs

There’s a moment a lot of Columbus homeowners reach, usually somewhere between the third layout sketch and the second contractor conversation, where the question shifts from “what do we want to change?” to “wait, are we thinking about this the right way?”

Maybe you set out to redo the kitchen and kept pulling the thread: the dining room is too small, the main bedroom never gets morning light, the layout doesn’t match how your family actually moves through the house. Or you’ve been circling the idea of an addition for years, more square footage, more rooms, but something keeps nagging at you about a house that doesn’t quite work from the inside out.

A whole-home remodel and a home addition solve different problems. Knowing which one fits your situation changes every decision that follows: the scope, the timeline, the design process, and who you hire to lead it.


What’s the real problem you’re trying to solve?

Before square footage or scope enters the conversation, the most useful question is: what does your home fail to do?

If the answer is about how space works, the flow between rooms, where light falls, how the kitchen relates to the living area, whether your floor plan suits the way you entertain or parent or work from home, that’s usually a whole-home remodel. The bones may be fine. The logic of the floor plan isn’t.

If the answer is that you simply don’t have enough room, a growing family, a needed guest suite, a home office that keeps getting displaced, that points toward an addition. The existing rooms work; there just aren’t enough of them.

Many Columbus homeowners discover, through an honest conversation with a design team, that they’ve been reaching for the wrong solution. Families who want “more space” sometimes find that reconfiguring 2,200 square feet gives them what 2,800 couldn’t. And homeowners planning a focused kitchen remodel often realize the kitchen’s limitations are downstream of a floor plan that needs a wider rethink.

Starting with design before starting with scope is how you avoid building the wrong thing well.


When a whole-home remodel is the better fit

A whole-home remodel makes the most sense when the issue is how rooms connect, flow, and function, not how many of them there are.

The floor plan works against you. Older Columbus homes, especially the mid-century colonials and ranch-styles common in Upper Arlington, Worthington, and Dublin, were designed for a different era of living. Formal dining rooms, compartmentalized kitchens, and layouts that disconnect the spaces where families actually gather. A whole-home remodel can open those floor plans, relocate functions, and let the house respond to how you live now.

Multiple spaces need attention at once. If the kitchen, primary bath, and several secondary rooms are all dated or misaligned, addressing them piecemeal over years is rarely more efficient than a coordinated project. A well-sequenced whole-home remodel lets every decision inform the others: finishes, systems, lighting, and flow designed as a whole rather than stitched together over time.

The structure and systems need updating. Older homes that need electrical, plumbing, or mechanical work can often absorb that investment more efficiently inside a larger remodel, where walls are already open and trades are already coordinated.

You want every room to feel like it belongs. A whole-home remodel done well, especially by a design-build firm where the architect and the build crew are the same organization, produces a house where every room relates. The finishes and details carry through. There are no seams where one contractor’s work ends and another’s began.


When an addition makes more sense

An addition is the right answer when you’ve run out of room, not run out of good floor plan.

You need square footage for a specific function. A primary suite your current footprint can’t accommodate. A mudroom and laundry combination your 1960s layout never anticipated. A proper guest suite, a playroom, or a screened porch that earns its place in the daily life of the house.

The existing layout genuinely works. If you like how your house flows and the rooms function well, adding square footage rather than reconfiguring what’s there makes sense. You’re solving a capacity problem, not a design one.

Your lot and zoning support it. Home additions require site analysis: setback requirements, lot coverage limits, how the addition will relate to the existing roofline and facade. Columbus neighborhoods vary considerably in what’s permitted, and a design team familiar with local zoning can tell you early what’s actually possible.

One thing worth keeping in mind: additions that aren’t carefully designed can create more problems than they solve. A two-story addition that disconnects from the existing floor plan, or a bump-out that blocks a window in the room next to it, can leave you with more square footage and a less livable house. How an addition connects to what already exists is a design problem, and it needs to be solved on paper first.


The case for doing both

For many Columbus families in larger, older homes, the right answer is a phased or combined approach: an addition for needed square footage alongside a remodel of the existing space to unify the result.

This happens most naturally with primary suite additions, where a new main bedroom and bath go in while the rest of the upstairs gets reconfigured to improve flow. Or a rear addition that brings in new living space while a remodel of the existing kitchen and dining area creates the cohesive open plan the homeowner always wanted.

When design and construction are under one roof, a combined project doesn’t require coordinating two firms with different drawings and different accountability. The design team resolves how the addition and the existing house connect from the first sketch, not as an afterthought once framing is already up.


How to know if your floor plan is the issue

If you’ve looked at floor plans of larger homes and found yourself thinking “I’d want to change most of this anyway,” more square footage probably won’t solve the problem.

Some useful questions to work through with your design team:

  • Where does traffic in your house want to go, and does the floor plan support it or fight it?
  • Which rooms do you avoid, and why: is it the room itself, or where it sits relative to everything else?
  • If you had 400 more square feet, where would you put them, and would that actually change how you live?
  • Are the bedrooms or bathrooms the constraint, or is it the shared living space?

A good design-build team will work through these questions with you before any scope is decided. Getting a 3D rendering of a reconfigured floor plan, before a single wall comes down, is one of the most clarifying things a homeowner can do early in this process. You see the house you’d actually get to live in, not a diagram on paper.


What the design-build model means for this decision

Whether you end up with a whole-home remodel, an addition, or both, the decision is easier and the outcome more cohesive when design and construction are handled by the same team.

In a traditional arrangement, an architect designs the project and a contractor bids on it. Any gap between what was drawn and what’s buildable, or sequenced correctly, gets surfaced late, when changes are expensive. The homeowner often ends up in the middle, managing that gap themselves.

In a design-build model, the design team knows what the build team can execute, and vice versa. Structural realities inform design decisions from the start. Timeline and sequencing are planned together. When you ask “is this possible?” you get an answer that accounts for both the design intent and the build reality, not two separate answers that need to be reconciled later.

For a project as significant as a whole-home remodel or a home addition, that kind of unified accountability isn’t a selling point. It’s how you avoid the problems that derail most renovation projects.


FAQ

Is a whole-home remodel faster than an addition? It depends on scope. A focused remodel of an existing footprint avoids the permitting, foundation, and framing work that an addition requires, which can shorten the overall timeline. But a large, complex remodel that touches most systems and rooms can run as long as a modest addition. The better question is which one produces the outcome you’re actually after.

Do I need an architect for a home addition in Columbus? Permitted structural work, which includes almost any addition, requires stamped drawings from a licensed professional. In a design-build model, this is handled in-house: your design team produces the permitted drawings as part of the project. If you’re working with a contractor-only firm, you’ll typically need to engage an architect separately.

Can a whole-home remodel increase my home’s value? A well-executed whole-home remodel by a reputable design-build firm, especially one that produces a cohesive, design-forward result, typically strengthens a home’s market position. That’s especially true in Columbus neighborhoods like Dublin, Upper Arlington, and Bexley, where buyers are comparing homes that have been carefully updated against those that haven’t. The quality of the work and the integrity of the design are the factors that matter most.

What should I bring to a first consultation? Whatever you have: photos you’ve saved, a rough sketch, a list of what frustrates you about the current house. You don’t need a finished idea. The most useful thing to bring is a clear picture of how you want to live and what the house keeps you from doing. The design conversation starts there.

How does Pat Scales Remodeling approach the whole-home vs. addition decision? We start by listening. The first conversation isn’t about scope; it’s about how the house works for you and where it falls short. From there, our in-house design team can show you what both paths look like, often with 3D visualizations that let you see the options before any decisions are made. Most homeowners find that seeing both possibilities clearly makes the right direction obvious.


Ready to think through what your home actually needs? Request a consultation or call us at (614) 505-6084. We’ll start with the questions, not the scope.

Explore our whole-home remodel work and home additions, or see how we approach every project from concept to finish on Our Process page. To see what this looks like in real Columbus homes, our portfolio is a good place to start.


Home Addition Ideas: Smart Ways to Add Space to Your Columbus Home

You love your neighborhood, your street, and a lot about your house. You’ve just run out of room in it. Before you start scrolling listings, it’s worth knowing that a well-designed home addition can give you the space you need while keeping everything you already love about where you live. The trick is designing it so the new space feels like it was always part of the house, not bolted on as an afterthought.

Here are home addition ideas that work well for Columbus homes, along with the design thinking that makes each one feel right. As a design-build firm, we plan additions from the inside out and the outside in at the same time, so the new rooms work for daily life and the exterior reads as one cohesive home.

Start with how you actually live

The best additions don’t begin with square footage. They begin with a frustration. The kitchen that bottlenecks every time you host. The primary bedroom you’ve outgrown. The lack of a real entry where everyone drops their shoes and bags. Naming the daily friction points first tells you what kind of addition you need, and where it should go.

It also helps to think a few years ahead. An addition is a long-term move, so design for the life you’re growing into, not just this month’s pain point.

Popular home addition ideas worth considering

A primary suite addition

Adding a primary suite is one of the most rewarding additions, especially in older Columbus homes where the original bedrooms are modest. A well-planned suite gives you a comfortable bedroom, a bathroom that finally fits two people getting ready at once, and a walk-in closet. Placing it thoughtfully, often at the back or above the garage, keeps it private and quiet.

A great room or kitchen expansion

If your main living space feels cramped the moment more than a few people gather, a great room addition or a kitchen bump-out can change how the whole house feels. Opening the kitchen into a larger living and dining area creates the connected, light-filled heart that modern life revolves around. This is where flow, sightlines, and natural light deserve real attention.

A four-season room or sunroom

A sunroom adds usable, light-filled space you’ll reach for year-round, from morning coffee to a quiet reading spot. Designed and insulated properly, a four-season room works in an Ohio January, not just in spring. Generous glazing and a comfortable transition to the adjacent room are what make it feel like part of the house rather than a porch with walls.

A second-story addition

When your lot is tight or you’d rather not give up yard space, building up instead of out can be the answer. A second-story addition can add bedrooms, a bathroom, or a dedicated office without expanding the footprint. It takes careful structural planning and a roofline that ties into the existing home, which is exactly the kind of problem a design-build team solves before construction starts.

An in-law suite or multigenerational space

More Columbus families are creating space for aging parents or returning adult children. An in-law suite, with a bedroom, full bath, and sometimes a small kitchenette and private entrance, offers togetherness with independence. Thoughtful, low-step, accessible design makes it comfortable now and adaptable later.

A mudroom and a better entry

Not every meaningful addition is large. A mudroom or expanded entry bump-out solves a daily problem for almost every household: where everything lands when you walk in. Built-in lockers, bench seating, and smart storage turn a chronic mess into a calm, organized arrival point.

A home office or studio

Working from home is here to stay, and a dedicated office addition separates work from the rest of the house in a way a converted corner never quite manages. Good light, quiet, and a door that closes make all the difference for focus.

Ideas for smaller homes and ranches

You don’t need a large lot to add space well. On smaller homes, a modest bump-out can expand a kitchen or bathroom just enough to change how it functions day to day. Ranch homes are especially good candidates, since their single-story layout makes rear additions and great-room expansions feel natural, and a second-story or partial second-story addition can dramatically increase space without widening the footprint. The key is proportion: the addition should feel of the house, matching its scale, rooflines, and materials.

Make the addition look like it was always there

This is where a home addition succeeds or fails. A great addition is invisible in the best way: you can’t tell where the original house ends and the new work begins. That comes from matching rooflines, siding, trim, and window styles, carrying interior finishes through so rooms connect naturally, and respecting the home’s original proportions and character. In Columbus’s older and historic neighborhoods, that sensitivity matters even more.

Because our design and construction happen under one roof, the people drawing the addition are working hand in hand with the people building it. That keeps the design realistic, the structure sound, and the finished result cohesive from the curb to the back corner of the new room. You can see examples on our home additions page and in our portfolio.

A few things to plan for early

  • Flow and connection. How you move between old and new is as important as the new room itself. Avoid awkward steps, hallways, and pinch points.
  • Natural light. Plan windows and orientation early so the addition is bright and the rooms it connects to don’t lose their light.
  • Rooflines and exterior fit. The exterior should read as one home. This is a design decision, not an afterthought.
  • Structure and foundation. Additions touch framing, foundations, and sometimes load-bearing walls. Getting this right up front prevents surprises.
  • Permits and timeline. Additions require permits and inspections in Columbus and the suburbs. Building that into the plan keeps the project moving smoothly.

Frequently asked questions

What is the most popular type of home addition? Primary suite additions and great-room or kitchen expansions are among the most requested, because they solve the everyday friction most families feel: not enough comfortable bedroom space, or not enough room to gather.

What are the top tips for a home addition? Start with the daily problem you’re solving, design for a few years down the road, prioritize flow and natural light, and make sure the addition matches the home’s scale and exterior so it looks original. Working with a design-build team keeps all of that coordinated.

Can you add onto a ranch or smaller home? Yes. Ranches take well to rear and great-room additions, and building up is an option when the lot is tight. On smaller homes, even a modest bump-out can meaningfully improve how a kitchen or bath functions.

How do you make an addition match the existing house? By carrying through the rooflines, siding, trim, window styles, and interior finishes, and by respecting the home’s original proportions. This is a core focus of the design phase.

Should I add on or remodel what I have? Sometimes reworking the existing layout gets you there without adding square footage. The right answer depends on your home and goals, which is what an initial design consultation is for. (See our whole-home remodeling page if you’re weighing both.)

Let’s design an addition that fits your home and your life

If your home is feeling tight, the next step is a conversation about how you live and what’s not working. Our award-winning, in-house design team will help you picture the possibilities, often with lifelike 3D renderings, before a single wall is framed. We serve Columbus and the surrounding suburbs, from Dublin and Upper Arlington to Bexley, Worthington, and Grandview. Request a consultation or call (614) 505-6084, and let’s design a space that feels like it was always part of your home.

spa-like bathroom

How to Choose Tile, Fixtures, and Lighting for a Spa-Like Bathroom

Your bathroom should feel like the most relaxing room in your house. Right now, for most Columbus homeowners, it doesn’t even come close.

Why the Right Choices Make or Break a Spa-Like Bathroom

You’ve probably seen it on Instagram or walked through a hotel room and thought: “Why doesn’t my bathroom feel like this?” The answer almost always comes down to three decisions, tile, fixtures, and lighting, and the way those three elements work together.

A spa-like bathroom isn’t about spending more than necessary. It’s about spending intentionally. The materials you put on your walls and floors set the sensory tone the moment you walk in. The fixtures you choose shape how the space functions every single day. The lighting either pulls everything together or quietly undermines it.

According to the National Association of Realtors’ 2022 Remodeling Impact Report, 73 percent of homeowners wanted to be in their homes more after a bathroom remodel, and 61 percent experienced an increased enjoyment of their home. A bathroom renovation earned a Joy Score of 9.6 out of 10. 

That kind of satisfaction doesn’t happen by accident. It starts with the right decisions.

Choosing Tile: The Foundation of the Whole Look

Tile does more work in a bathroom than any other material. It covers the largest surface area, takes the most abuse from moisture and daily use, and carries the most visual weight. Getting this decision right matters for both the look and the long-term performance of your remodel.

Porcelain: The Practical Workhorse

For Columbus bathrooms that see daily use, porcelain is consistently the most reliable tile choice. Porcelain is often considered the gold standard for bathroom shower tile because of its dense makeup and remarkable water resistance. It is engineered under high heat, making it highly durable, less porous, and suitable for continuous exposure to water. 

Porcelain also comes in formats that convincingly replicate the look of marble, travertine, slate, and concrete without the maintenance demands of the real thing. For busy households, that combination of aesthetics and practicality is hard to beat.

One important note: matte porcelain tile offers a less slippery surface and is particularly suitable for bathroom floors and wet areas. If you’re designing a walk-in shower or a wet room, a matte or textured finish on the floor is a functional necessity, not just a style choice. 

Natural Stone: Luxury With Conditions

Marble, travertine, and limestone bring a level of visual warmth and organic variation that manufactured tiles cannot replicate. The look is genuinely luxurious. The maintenance requirements are genuinely higher.

Natural stone can be porous, meaning it can absorb moisture and water over time. This can lead to staining, discoloration, and even structural damage if moisture is not addressed properly. Sealing natural stone before use and resealing regularly is essential for bathroom applications. 

For a spa-like bathroom where the look of natural stone is a priority, the practical middle ground is often this: use stone-look porcelain tile on floors and shower surrounds, then introduce real stone in lower-moisture areas like a freestanding soaking tub surround or a vanity backsplash. You get the luxury aesthetic where it counts without inheriting a high-maintenance obligation everywhere.

Tile Placement and Layout Matter More Than Most People Realize

The same tile laid in different patterns creates entirely different impressions. Large-format tiles (12×24 or larger) on floors and walls reduce grout lines, create a cleaner, more expansive look, and are easier to maintain. Smaller mosaic tiles work well on shower floors where slip resistance is needed. Vertical stack patterns on walls draw the eye upward and make bathrooms feel taller.

Here are the tile placement principles that consistently work well in spa-style designs:

  • Use large-format porcelain on shower walls and bathroom floors to minimize grout and maximize visual continuity
  • Introduce a feature wall with a contrasting tile, stone-look, textured, or subtly patterned, as a single focal point
  • Match or coordinate the floor tile with the wall tile in tone rather than trying to match exactly
  • Keep grout color close to the tile color for a seamless, modern look
  • Use slip-resistant textured tile on any floor surface inside a wet shower area

Choosing Fixtures: Function Is the Starting Point

Fixtures include everything from your shower system and faucets to your vanity, toilet, and bathtub. In a spa-inspired design, the selection process starts with function and then layers in style.

Walk-In Showers vs. Soaking Tubs

This is one of the first questions Columbus homeowners ask during a bathroom remodel, and there is no single right answer. The better question is: how do you actually use your bathroom?

Walk-in showers are the more practical investment for households that don’t regularly use a bathtub. Walk-in showers offer better accessibility and safety, help save water, reduce upkeep and cleaning time, and make bathrooms look modern. Many homebuyers seeking bathrooms with a spa-like quality specifically look for well-designed walk-in showers.

Soaking tubs, on the other hand, are the quintessential spa element. A freestanding soaking tub positioned as a visual centerpiece, particularly when paired with a floor-mounted tub filler, creates a focal point that immediately elevates the entire space. If a freestanding tub fits your bathroom layout and your lifestyle, it is one of the most visually impactful additions you can make.

For larger bathrooms, the best outcome is often both: a walk-in shower with a frameless glass enclosure and a separate freestanding tub positioned in front of a window or a tiled feature wall.

Finish Selection: Matte vs. Polished, Warm vs. Cool

Fixture finishes set the metallic tone of the whole room. The dominant choices for spa-style bathrooms currently include:

  • Matte black: High contrast against white or light stone tiles, feels modern and graphic
  • Brushed nickel or satin nickel: Warmer tone, hides water spots better than polished, works in a wide range of design styles
  • Brushed gold or champagne bronze: Warmer and more luxurious-feeling than cool metallics, pairs exceptionally well with cream, warm white, and natural stone tones
  • Polished chrome: Clean and classic, works in both traditional and contemporary designs but shows water spots more readily

The single most important fixture selection rule is consistency. Choose one finish and carry it through the entire room: faucets, showerhead, towel bars, robe hooks, toilet paper holder, and cabinet hardware. Mixing finishes in a small space creates visual noise that undermines the calm, intentional feel of a spa environment.

Vanity Considerations

In spa-style design, vanity selection is about balancing storage with visual weight. A floating vanity (wall-mounted, no floor contact) makes the floor feel larger and the room feel more open. A freestanding vanity with furniture-style legs brings warmth and character.

For Columbus homes in the mid-range to upper-mid remodel category, quartz countertops on the vanity consistently outperform marble on the practicality side: highly stain resistant, no sealing required, and available in stone-look finishes that are nearly indistinguishable from the real thing.

Choosing Lighting: The Element Most Homeowners Get Wrong

Tile and fixtures get most of the attention during bathroom planning. Lighting is where bathrooms quietly fail. A beautiful tile and a thoughtfully selected vanity can look flat and uninviting under the wrong lighting. The same room under well-planned lighting feels completely transformed.

The foundational principle of good bathroom lighting is layering.

The Three Layers of Bathroom Lighting

Effective bathroom lighting incorporates three distinct layers: ambient lighting for overall brightness, task lighting for specific functions like grooming, and accent lighting to highlight features and contribute to a spa-like atmosphere. Integrating dimmers allows customizable brightness, enabling users to shift effortlessly between an invigorating morning routine and a soothing evening bath.

Here’s how to apply each layer specifically:

Ambient lighting is your baseline. Recessed downlights in the ceiling, a central pendant or flush-mount fixture, or cove lighting along a soffit all serve this purpose. The goal is even, shadow-free general illumination throughout the bathroom.

Task lighting is the layer most Columbus homeowners under-prioritize. For bath vanities, side sconces mounted at eye height with balanced vertical illumination are the correct approach. Avoid a single downlight positioned directly over the mirror, as this creates unflattering shadows. Sconces flanking the mirror, or a lighted mirror with side-lit panels, produce the shadow-free illumination that makes daily grooming actually functional.

Accent lighting is the spa layer. LED strips along the underside of a floating vanity, recessed lighting inside a shower niche, uplighting around a freestanding tub, or toe-kick lighting at the base of the vanity all add depth, warmth, and that distinctly luxurious, resort-like quality.

Color Temperature and Dimmers Are Non-Negotiable

For bathroom lighting, aim for a color temperature of 2700K to 3000K for warm, flattering light. Look for a CRI (Color Rendering Index) of 90 or higher to accurately reflect skin tones. For vanity lighting specifically, 1,500 to 2,500 lumens is the ideal range. LED bulbs provide energy efficiency and long service life, making them the practical choice for bathroom applications. 

Every bathroom lighting circuit should be dimmable. The ability to shift from bright morning-routine lighting to a softer, lower-lit evening bath is one of the simplest upgrades that most meaningfully contributes to the spa experience.

FAQs About Spa-Like Bathroom Remodels

1. How much of my bathroom remodel budget should go toward tile?

Tile typically represents 15 to 25 percent of a total bathroom remodel budget, depending on the size of the space and the material selected. Porcelain offers the widest range of price points and the best performance for the investment. Natural stone comes at a premium and also requires ongoing sealing. Budget for both materials and installation labor, since proper substrate preparation and waterproofing behind tile are as important as the tile itself.

2. Do I need a permit for a bathroom remodel in Columbus?

Structural changes, plumbing relocations, and electrical work in Columbus bathrooms generally require permits under the Ohio Building Code. Cosmetic updates like replacing fixtures, tile, and vanities in the same footprint typically do not. Working with a licensed contractor ensures that any work requiring permits is handled correctly, which protects your home’s resale position and prevents issues during future inspections.

3. Is a freestanding soaking tub worth the investment?

For homeowners who will use a soaking tub regularly, yes. It is one of the highest-impact single elements in a spa-style bathroom design. According to the National Association of Realtors, bathroom remodels consistently rank among the highest in homeowner satisfaction, earning a Joy Score of 9.6 out of 10, with buyers willing to pay more for homes with updated, well-designed bathrooms. The visual impact alone often justifies the investment in homes where the bathroom is a selling point.

4. How do I maintain a spa-like bathroom once it’s finished?

The maintenance requirements vary by material. Porcelain tile requires only regular cleaning with a pH-neutral cleaner. Natural stone requires periodic resealing, typically once a year. Matte fixtures are more forgiving of water spots than polished finishes. Installing a properly sized exhaust fan is one of the most practical things you can do to protect tile, grout, and fixtures over time by managing moisture and humidity.

5. Can I create a spa-like bathroom in a smaller space?

Absolutely. Large-format tile on walls and floors reduces visual interruption and makes small bathrooms feel larger. A floating vanity opens up floor space. A frameless glass shower enclosure allows sightlines to extend across the room rather than being stopped by a wall. Thoughtful layered lighting, particularly with dimmers, makes even a compact bathroom feel intentional and retreat-like.

How Pat Scales Remodeling Brings Spa-Level Design to Columbus Homes

A bathroom that looks this good doesn’t happen by accident, and it doesn’t happen with a contractor who treats your project like a checkbox on a list. The tile choices, the fixture selections, the lighting plan, all of it has to work as a system. When one element is off, the whole thing suffers.

At Pat Scales Remodeling, we specialize in bathroom remodels for Columbus homeowners who want a finished product that functions beautifully and holds up over time. We understand Ohio’s climate, Columbus’s housing market, and what’s required to create a spa-like bathroom that serves your household for years to come.

We guide you through tile selection, fixture coordination, and lighting design so every decision is intentional. We handle permits, waterproofing, installation, and all the behind-the-wall work that separates a remodel that lasts from one that causes headaches two years later.

If you’re ready to transform your bathroom into the retreat you’ve been picturing, reach out to us today for a consultation. We’ll walk through your space, understand what you’re looking for, and give you a clear picture of what the project involves. Let’s build something you’ll genuinely love coming home to.

Pat Scales Spring 2026 Newsletter

Happy Spring from Pat Scales Remodeling

April 2026 Newsletter

The first quarter of 2026 has brought us some amazing moments here at PSR – from beautifully finished kitchen and bath remodels to big personal milestones. 

Pat Scales Remodeling Named Regional Remodeler of the Year 2026

Award-Winning Kitchens, Now on the National Stage

Following our success at the Evening of Excellence, we’re proud to share that we’ve been named 2026 Regional Remodeler of the Year Winners.

What an incredible honor to be recognized beyond our local chapter!

⭐Residential Kitchen Under $50k
⭐Residential Kitchen $100k – $150k
⭐Residential Kitchen $150k – $200k

Earning recognition at the regional level is especially meaningful, as it represents the best projects across multiple NARI chapters. We’re grateful to our clients, partners, and team for the trust, collaboration, and craftsmanship that made this possible.

Next stop: the national stage in Phoenix this April. We’re honored to represent Central Ohio and look forward to celebrating alongside the best in the industry.

Stay tuned as we continue sharing the projects behind these awards!

See the Winners

⭐Residential Kitchen Under $50k

New countertops, stylish cabinetry, and elevated finishes – a winning combination. 

⭐Residential Kitchen $50-100k

We’re proud to take home the NARI award for beautiful kitchen remodel. 

⭐Residential Kitchen $100-150k

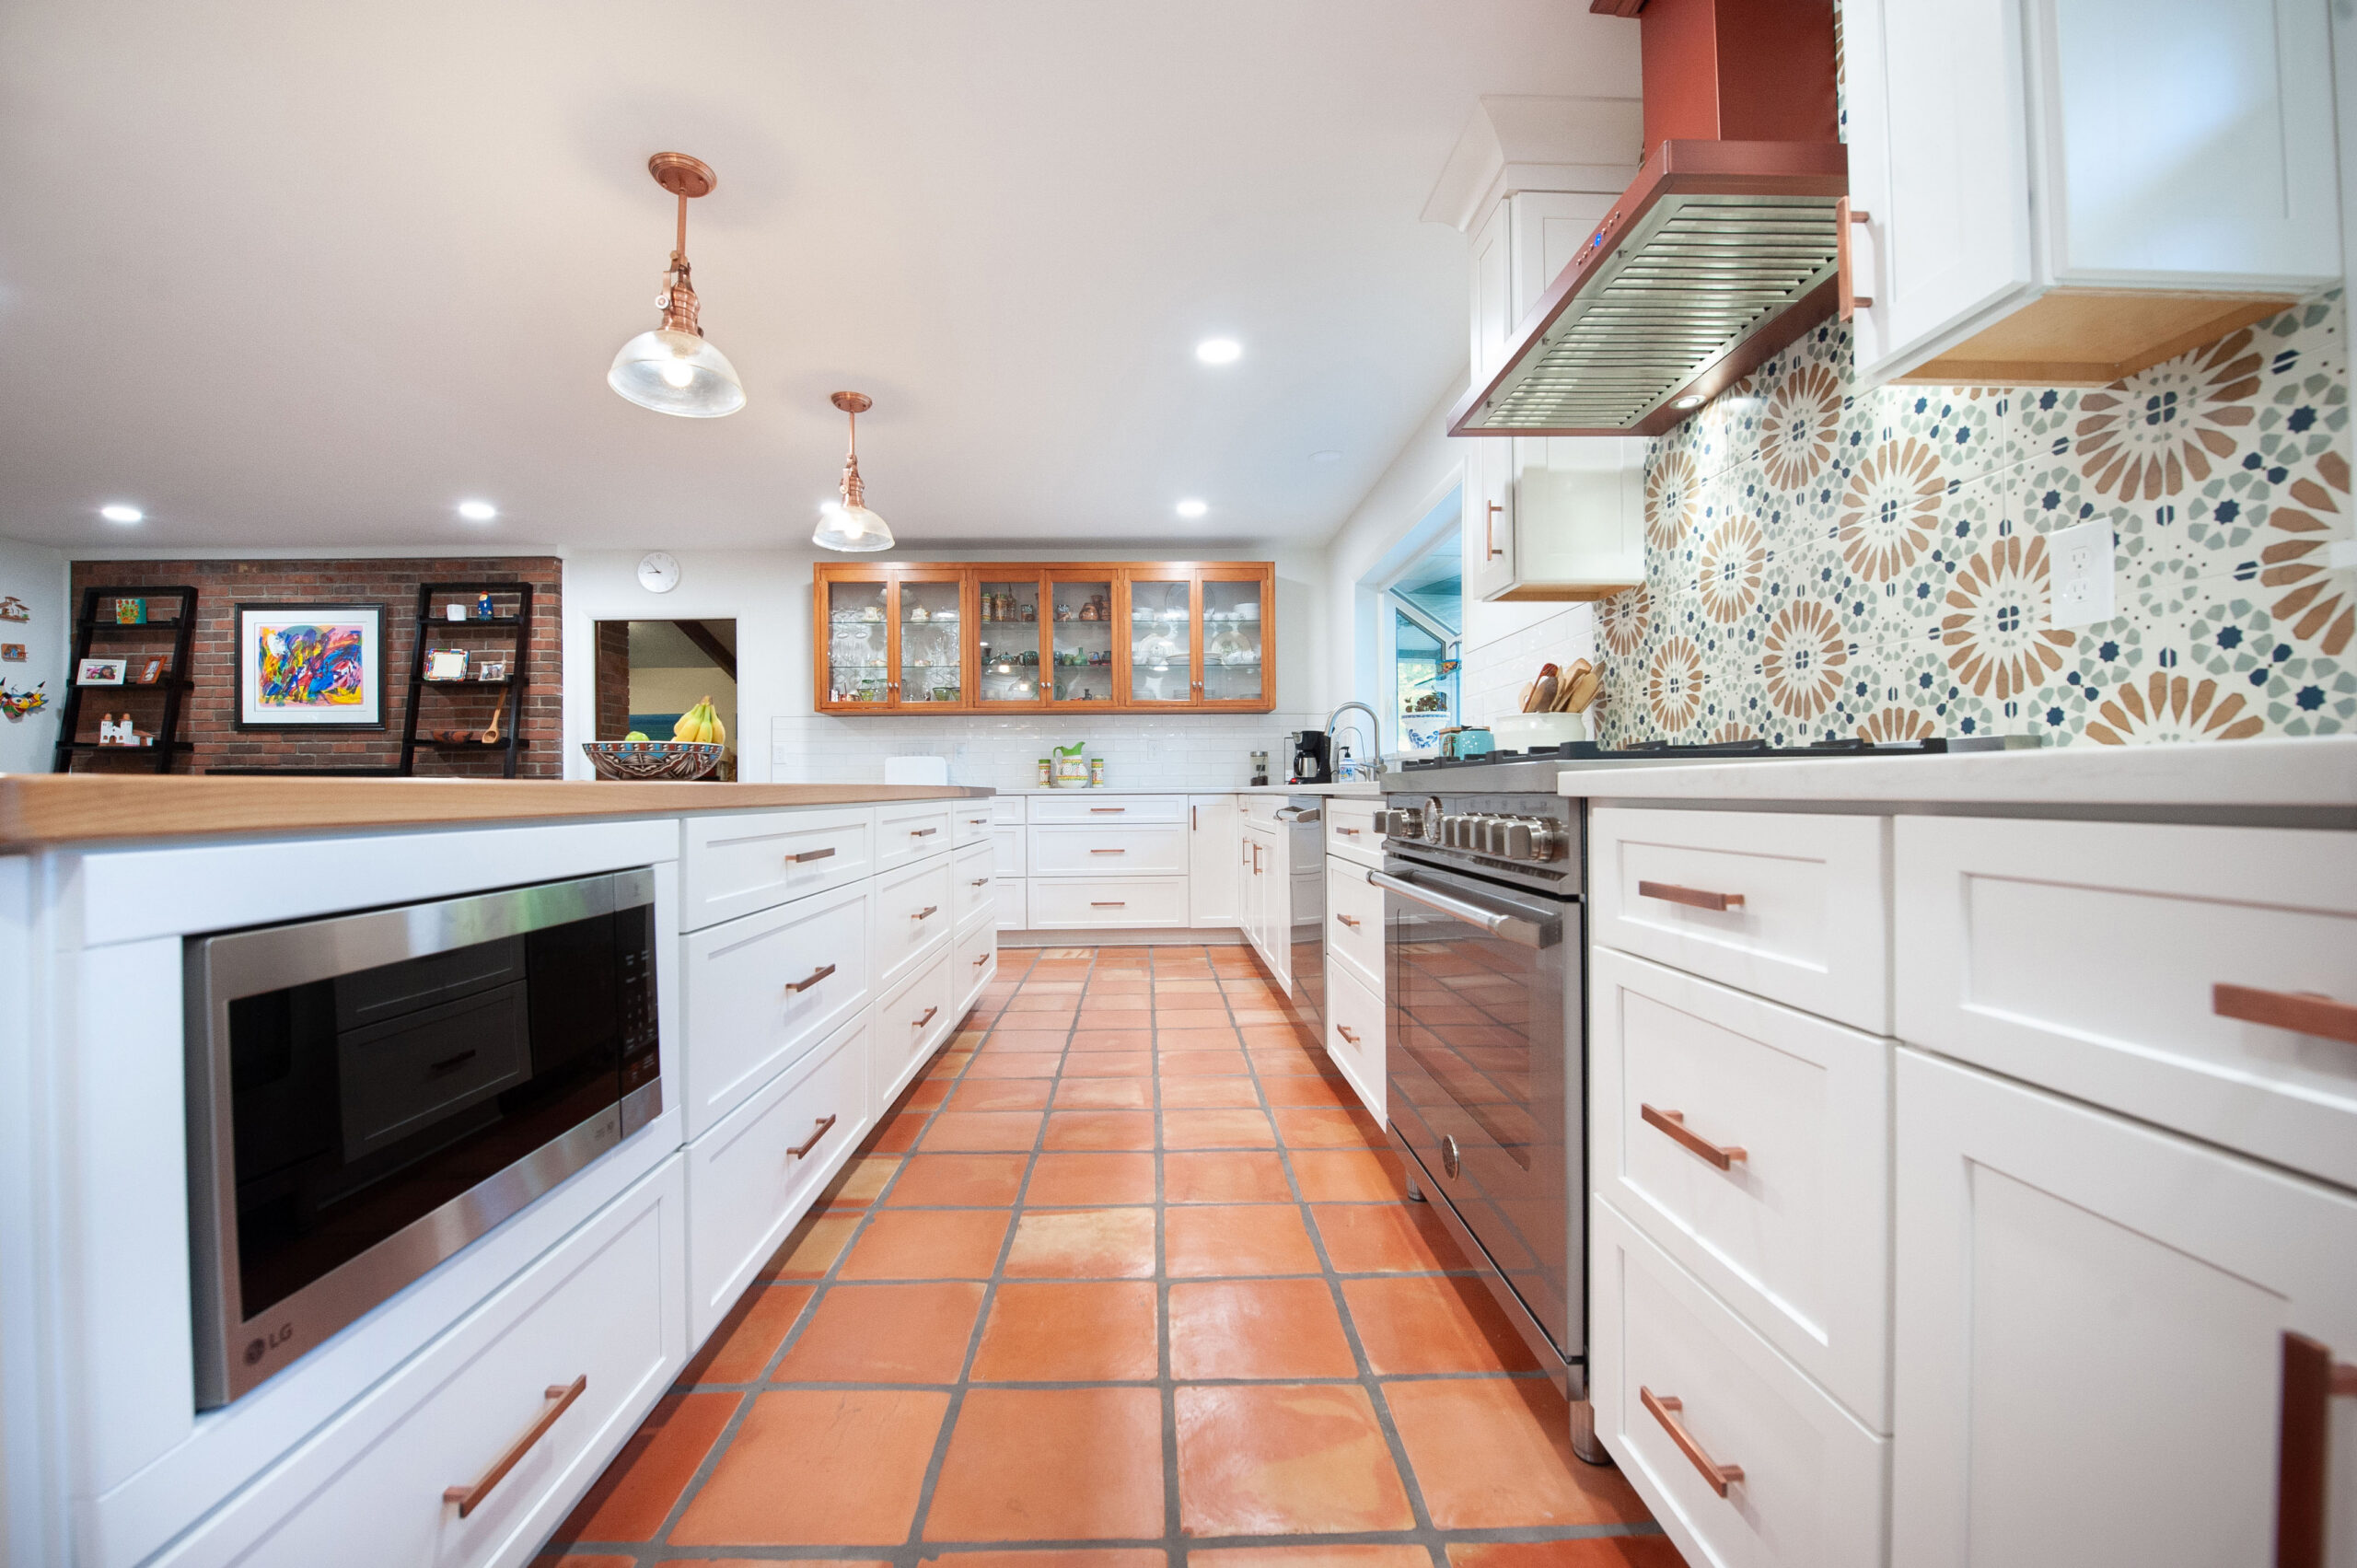
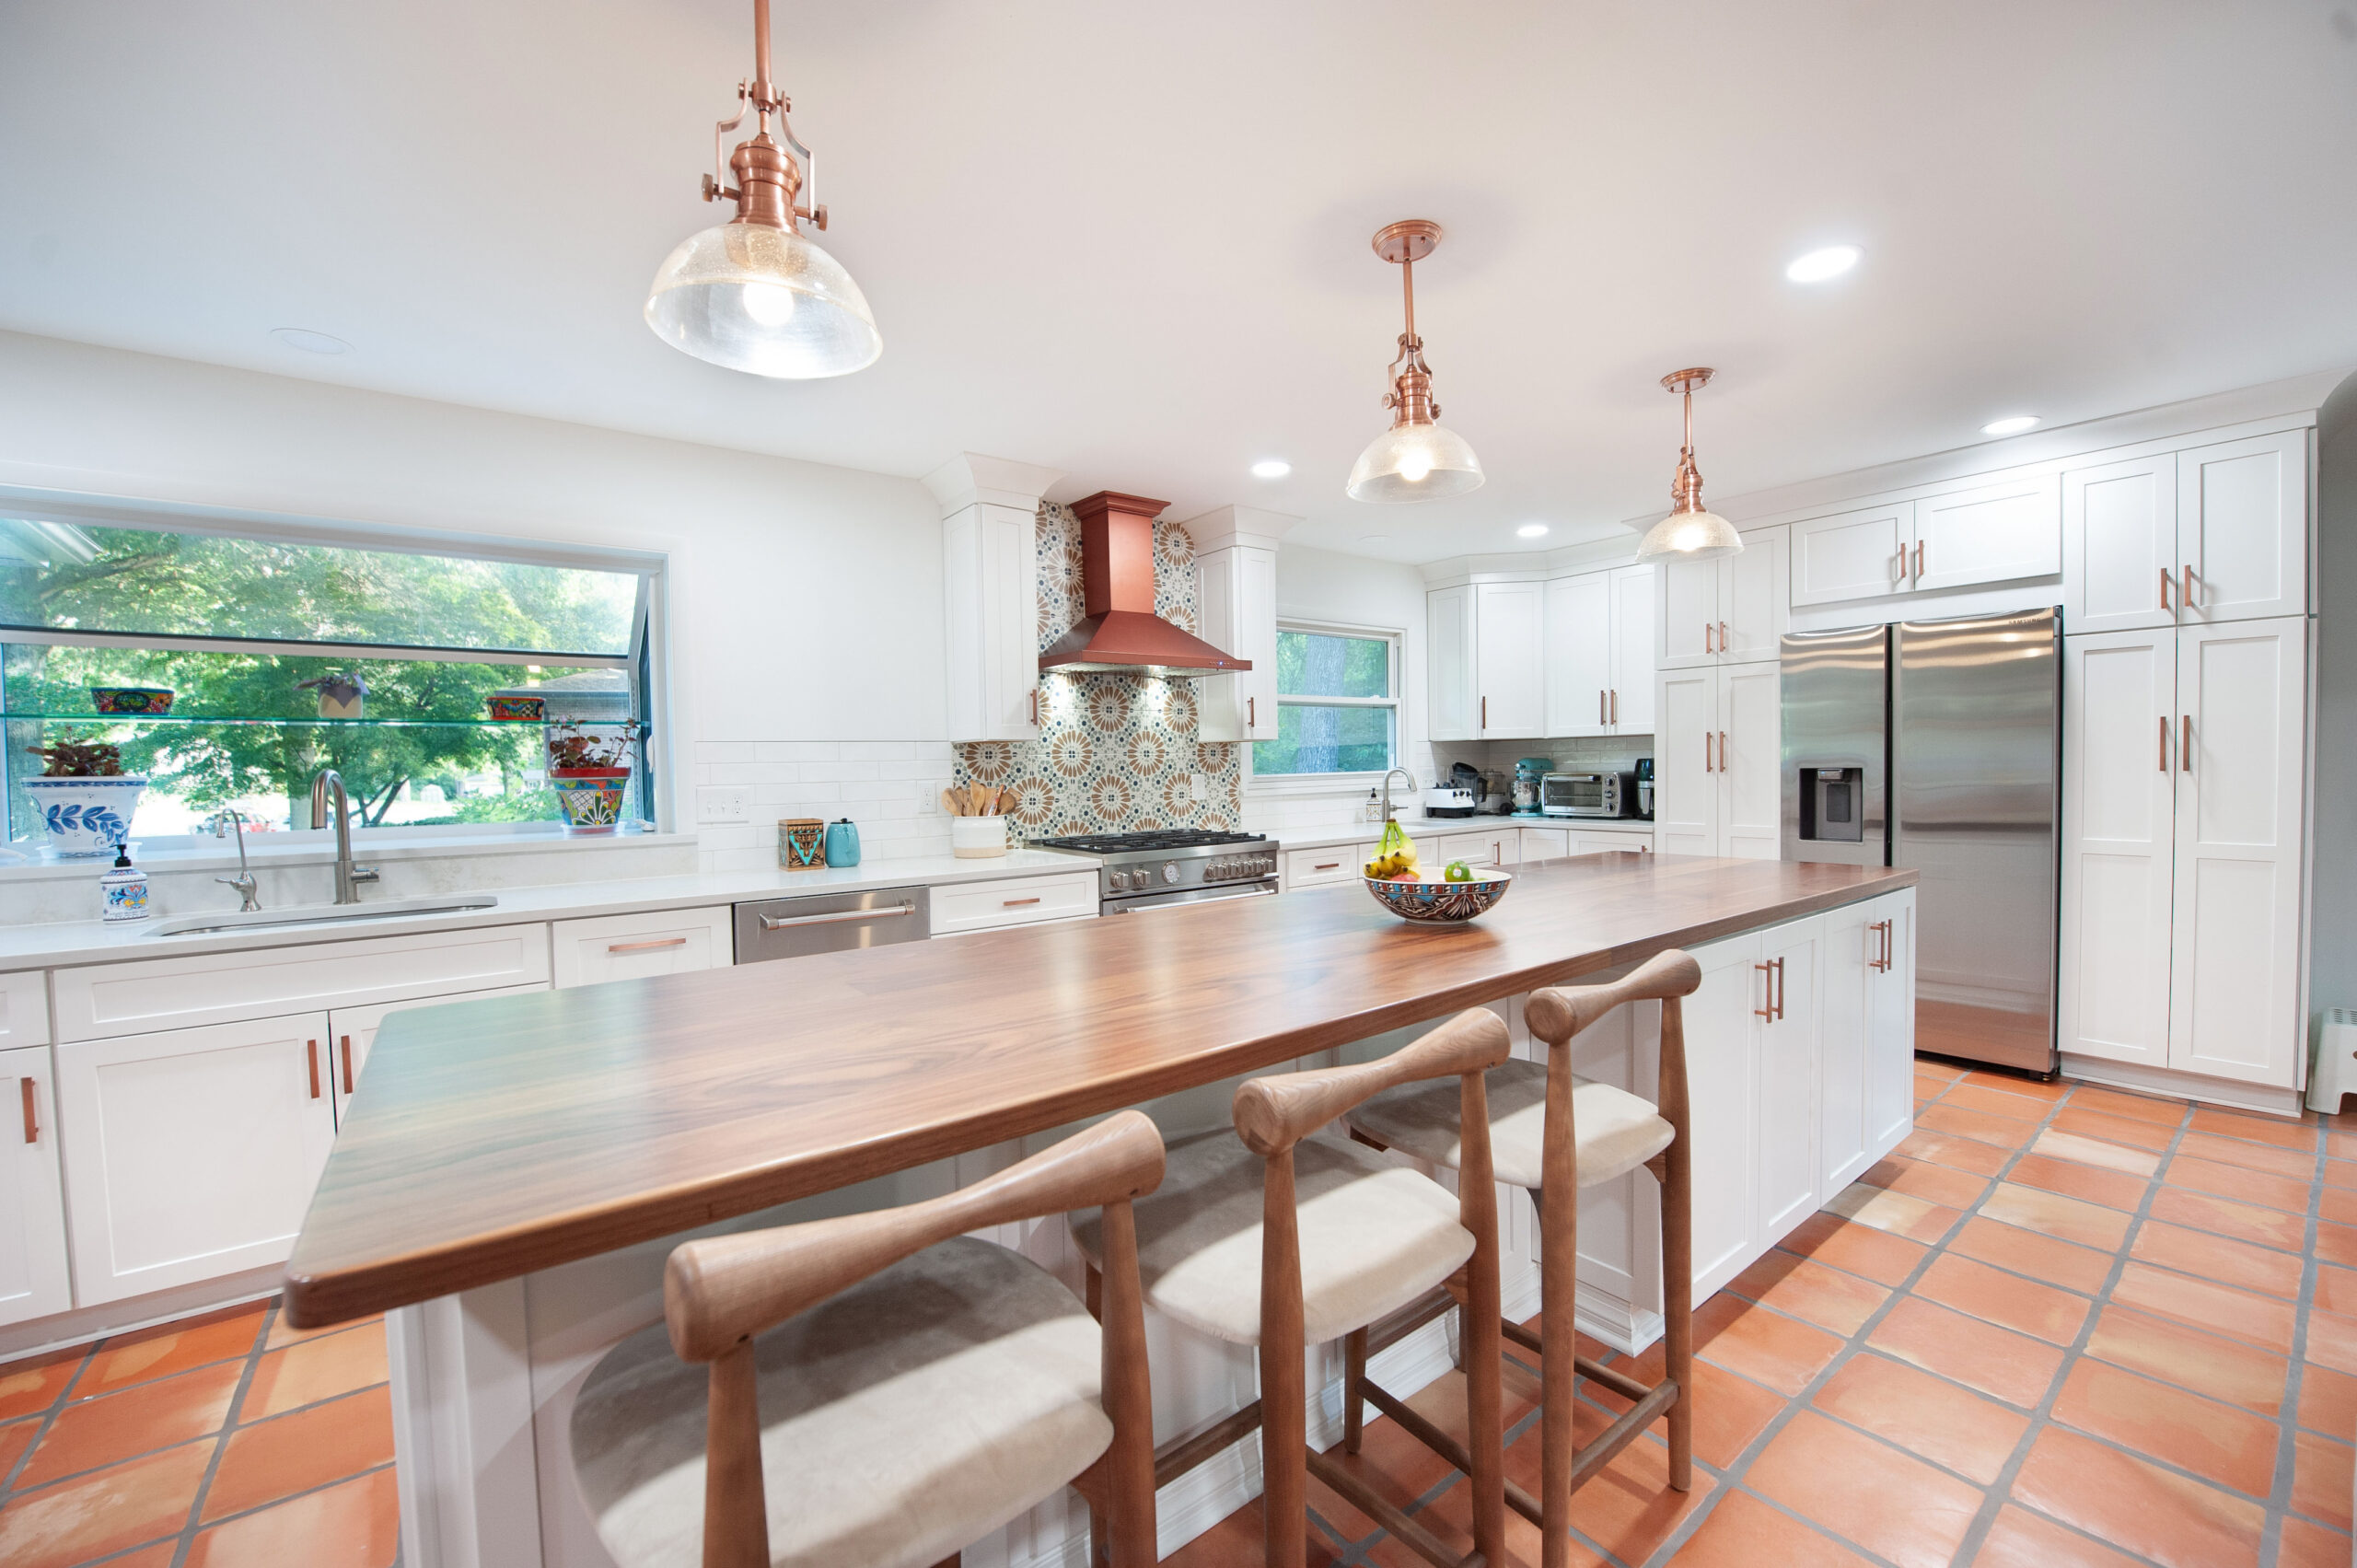
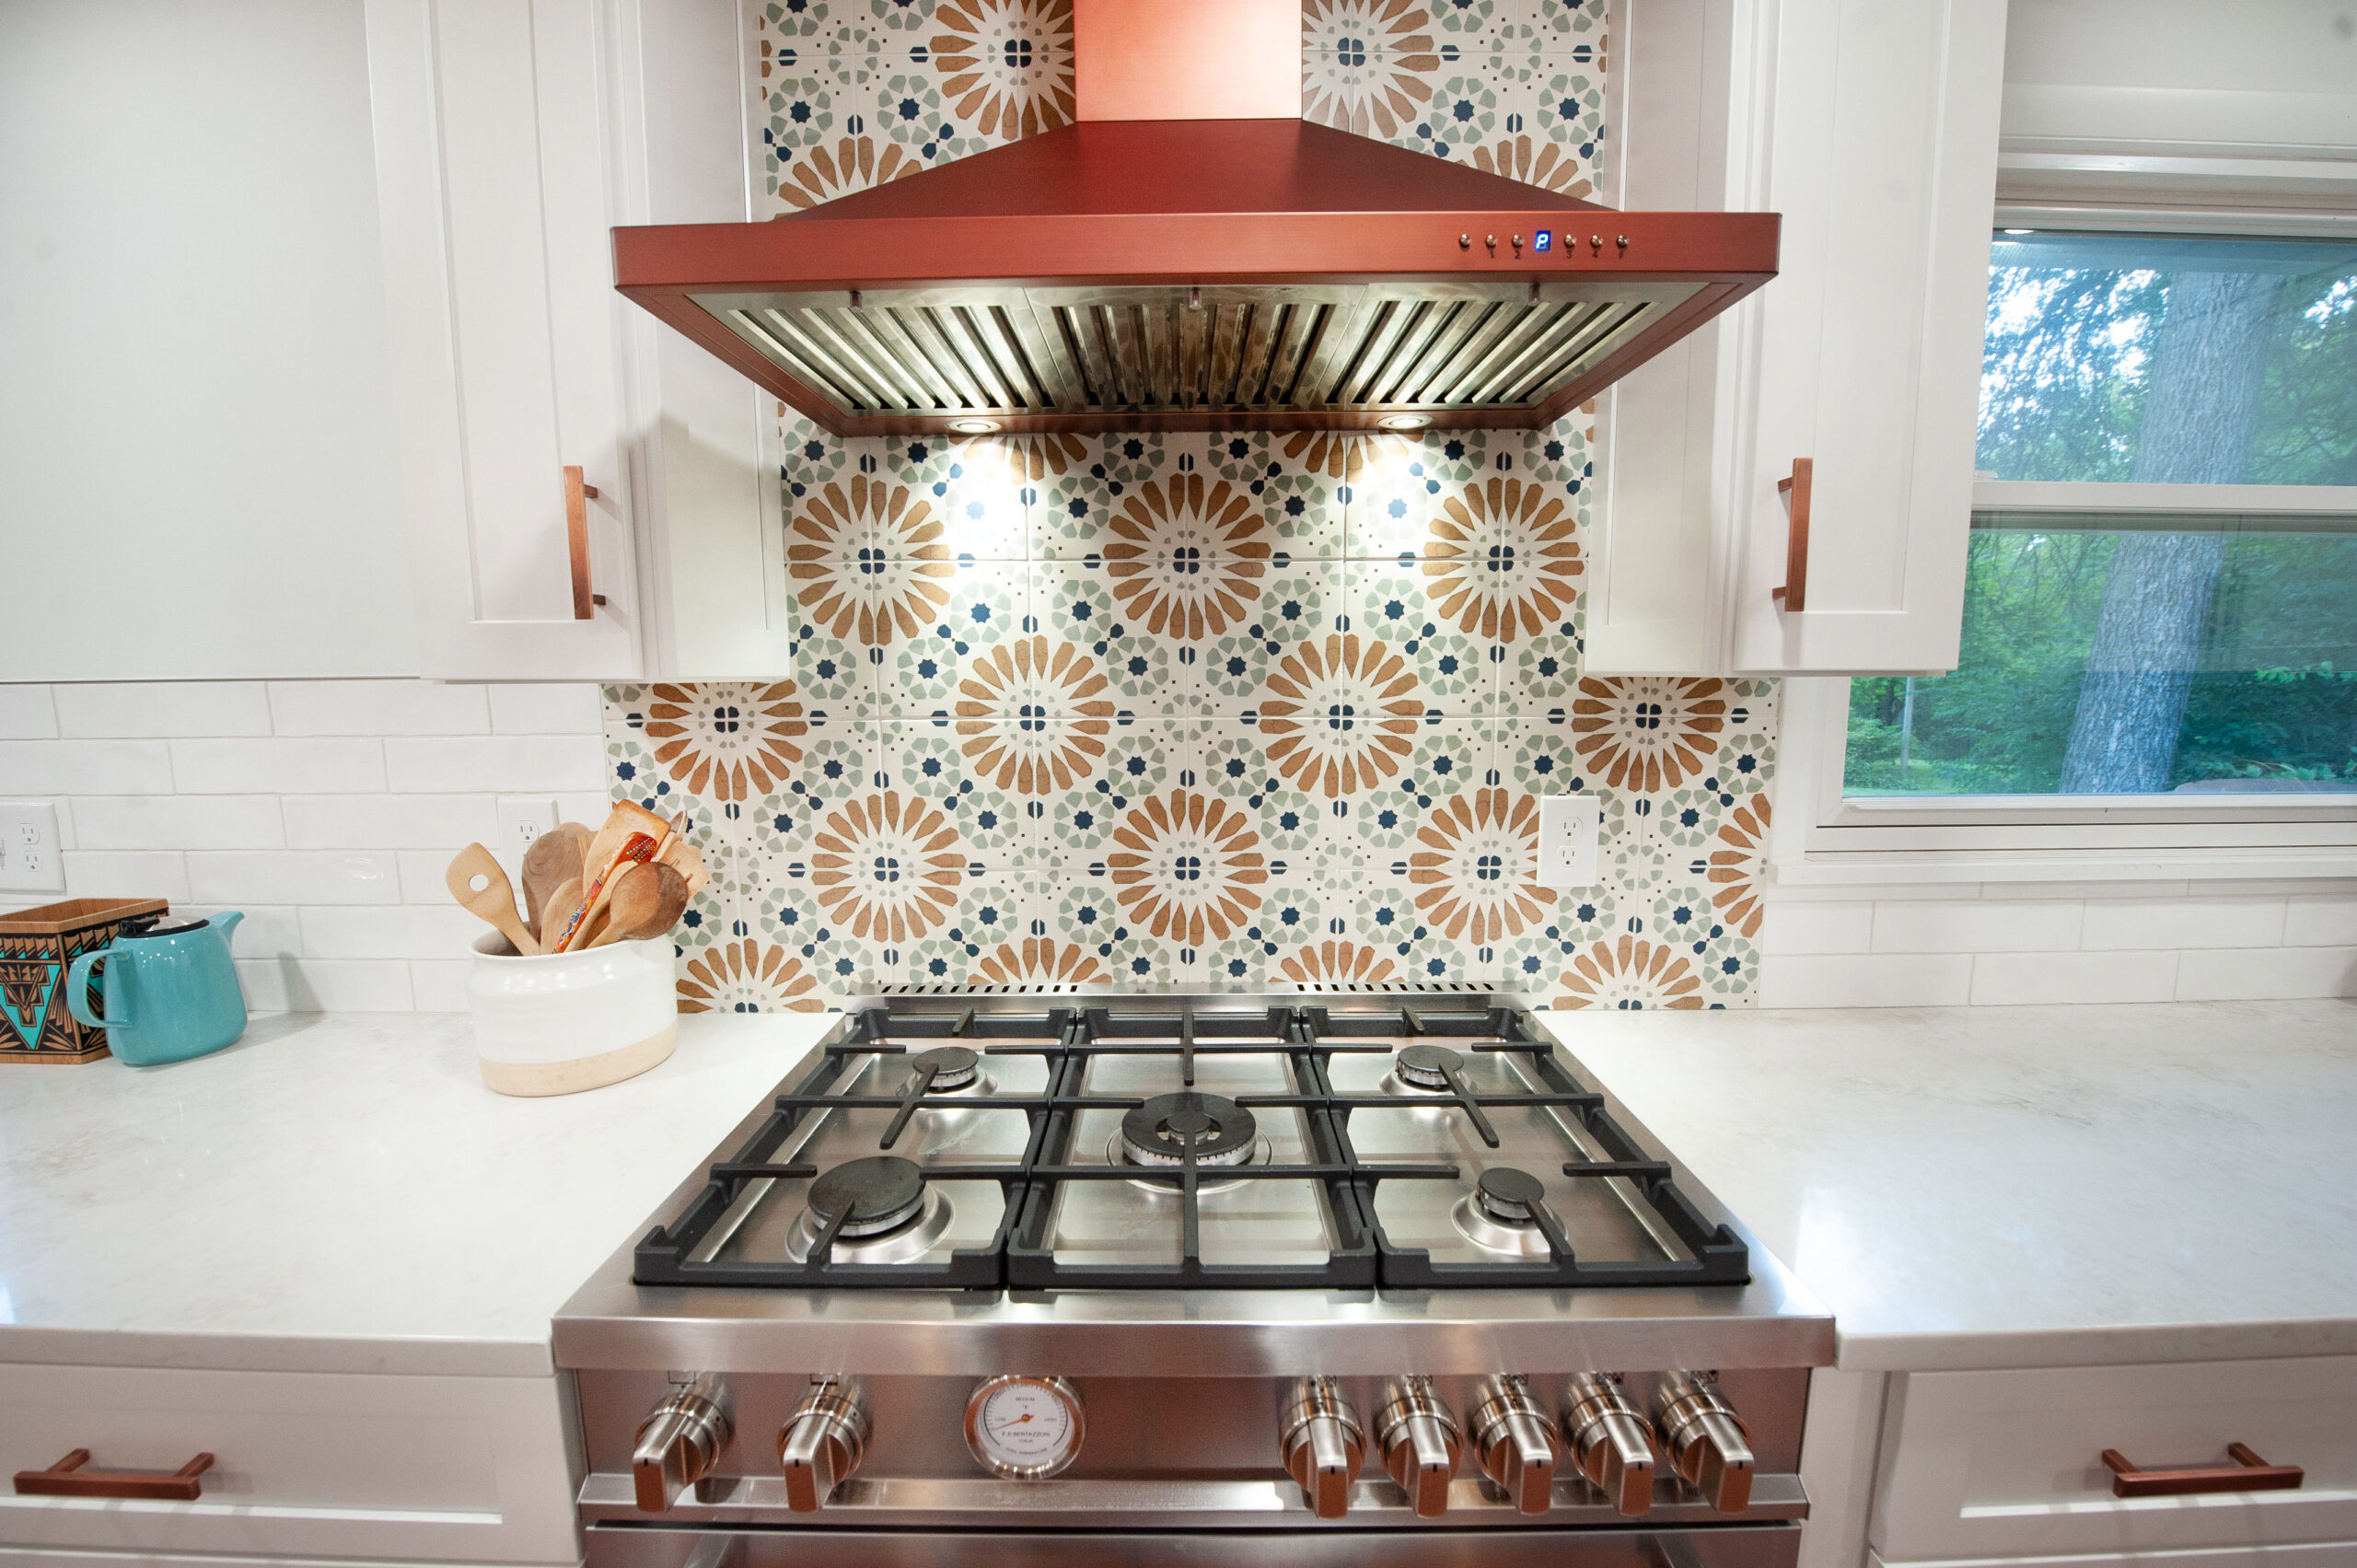
For this kitchen remodel in Columbus we added a colorful backsplash and chose finishes and fixtures that accentuate the terra cotta flooring, taking top honors in the $100k+ category.

Celebrating Miranda Norin, CRD

We’re excited to share a big milestone for our team.

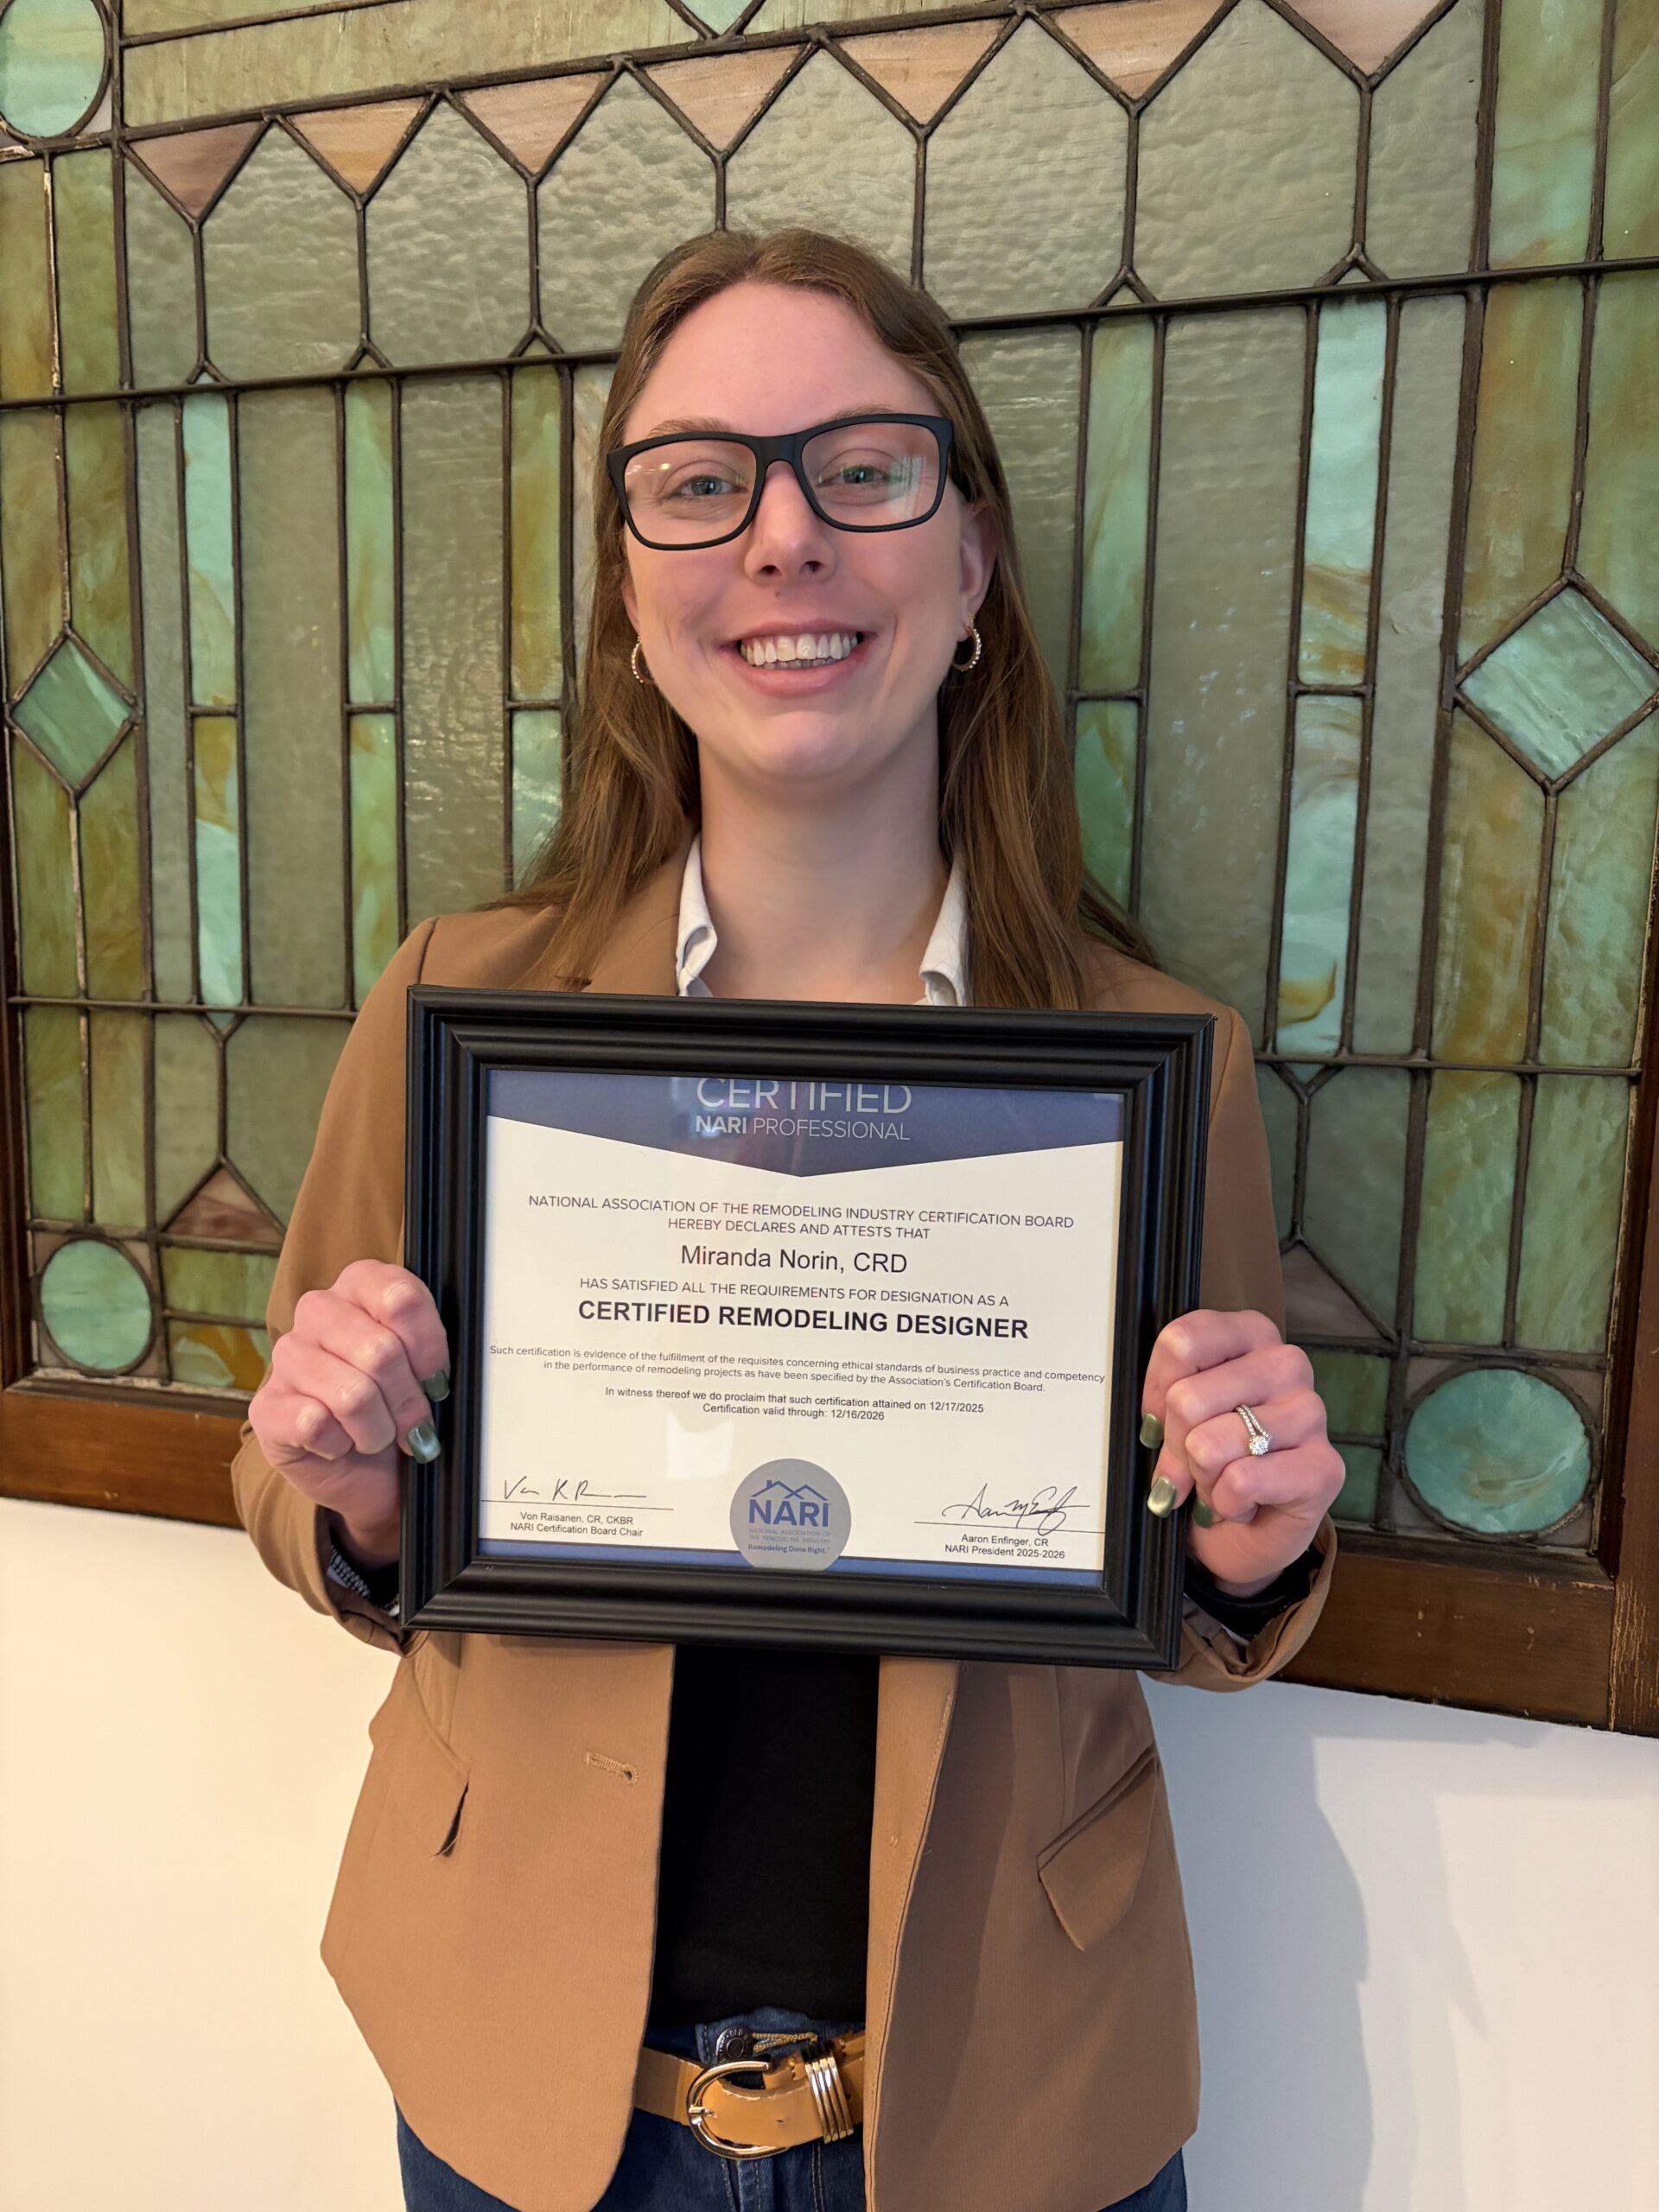
Miranda Norin, our Interior Designer, is now a Certified Remodeling Designer through NARI.

This certification reflects a high level of experience, technical knowledge, and a deep understanding of the remodeling process from concept through construction. It’s not just about creating beautiful spaces, it’s about designing with intention, function, and buildability in mind.

Miranda brings all of that and more to every project she touches, and this achievement is a testament to the thoughtfulness and expertise she delivers to our clients every day.

Please join us in congratulating Miranda on this well-earned accomplishment.

NARI Remodelers Night 2026

Thanks to NARI for a great evening!

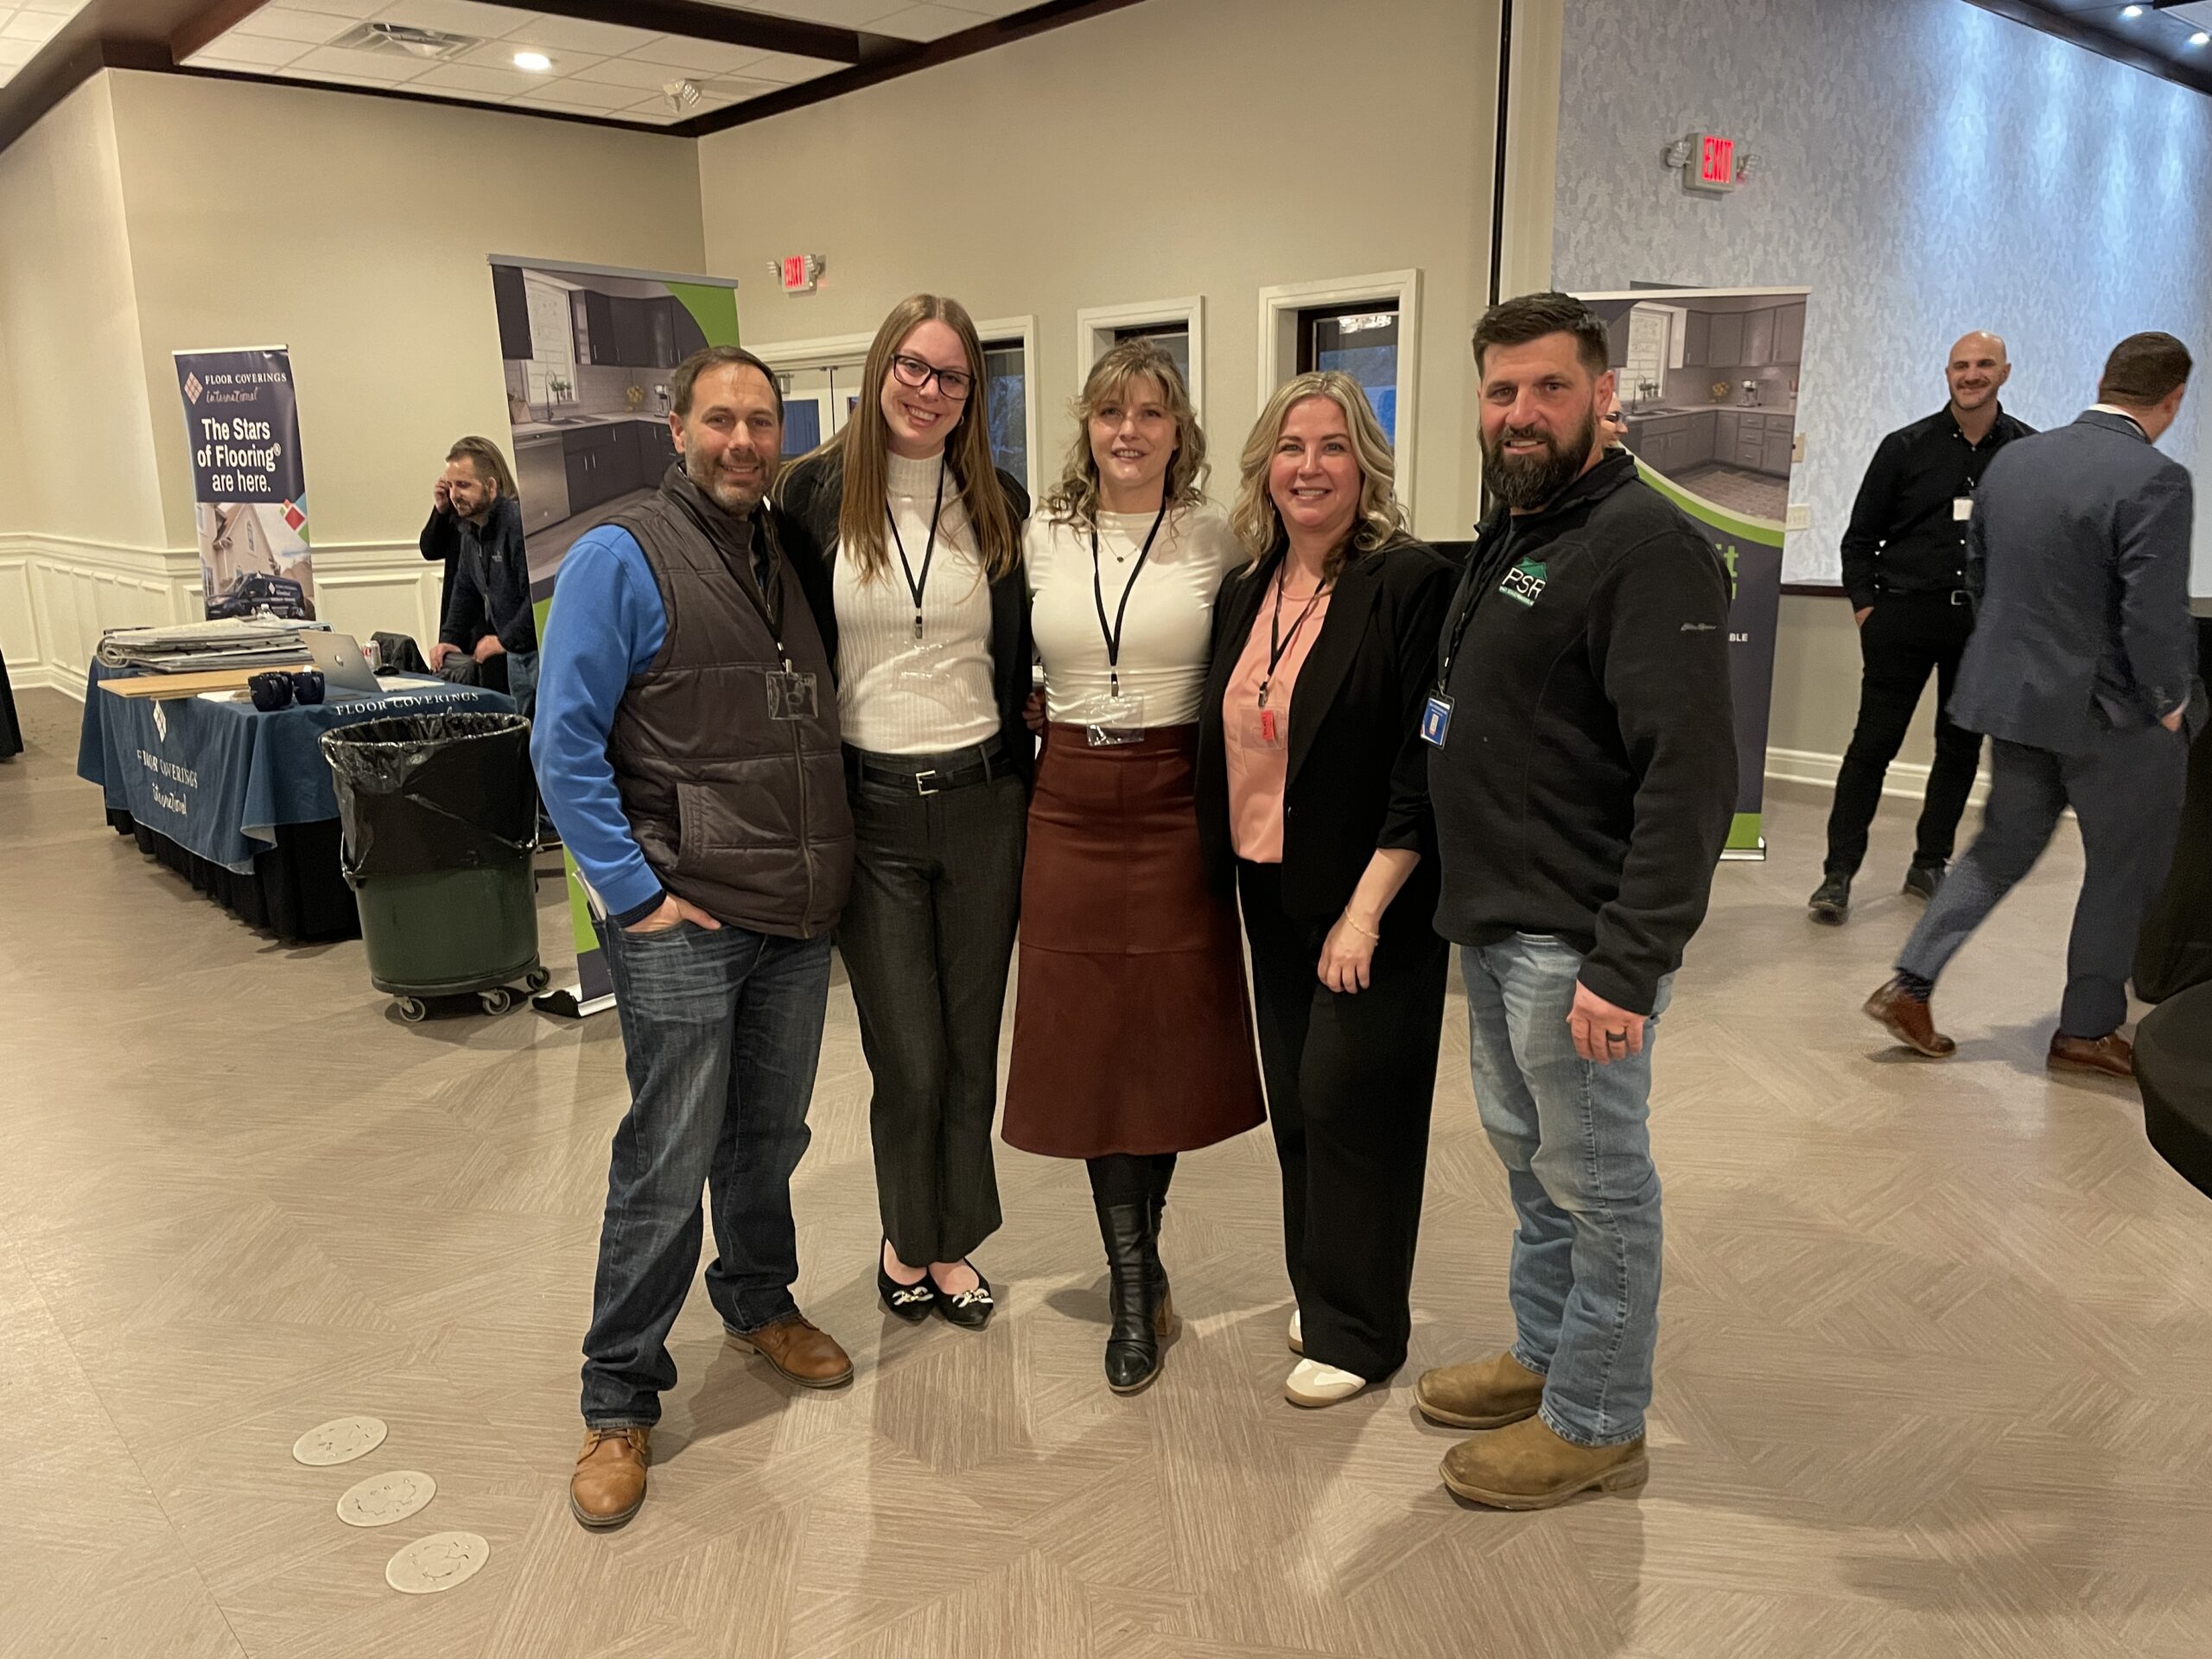
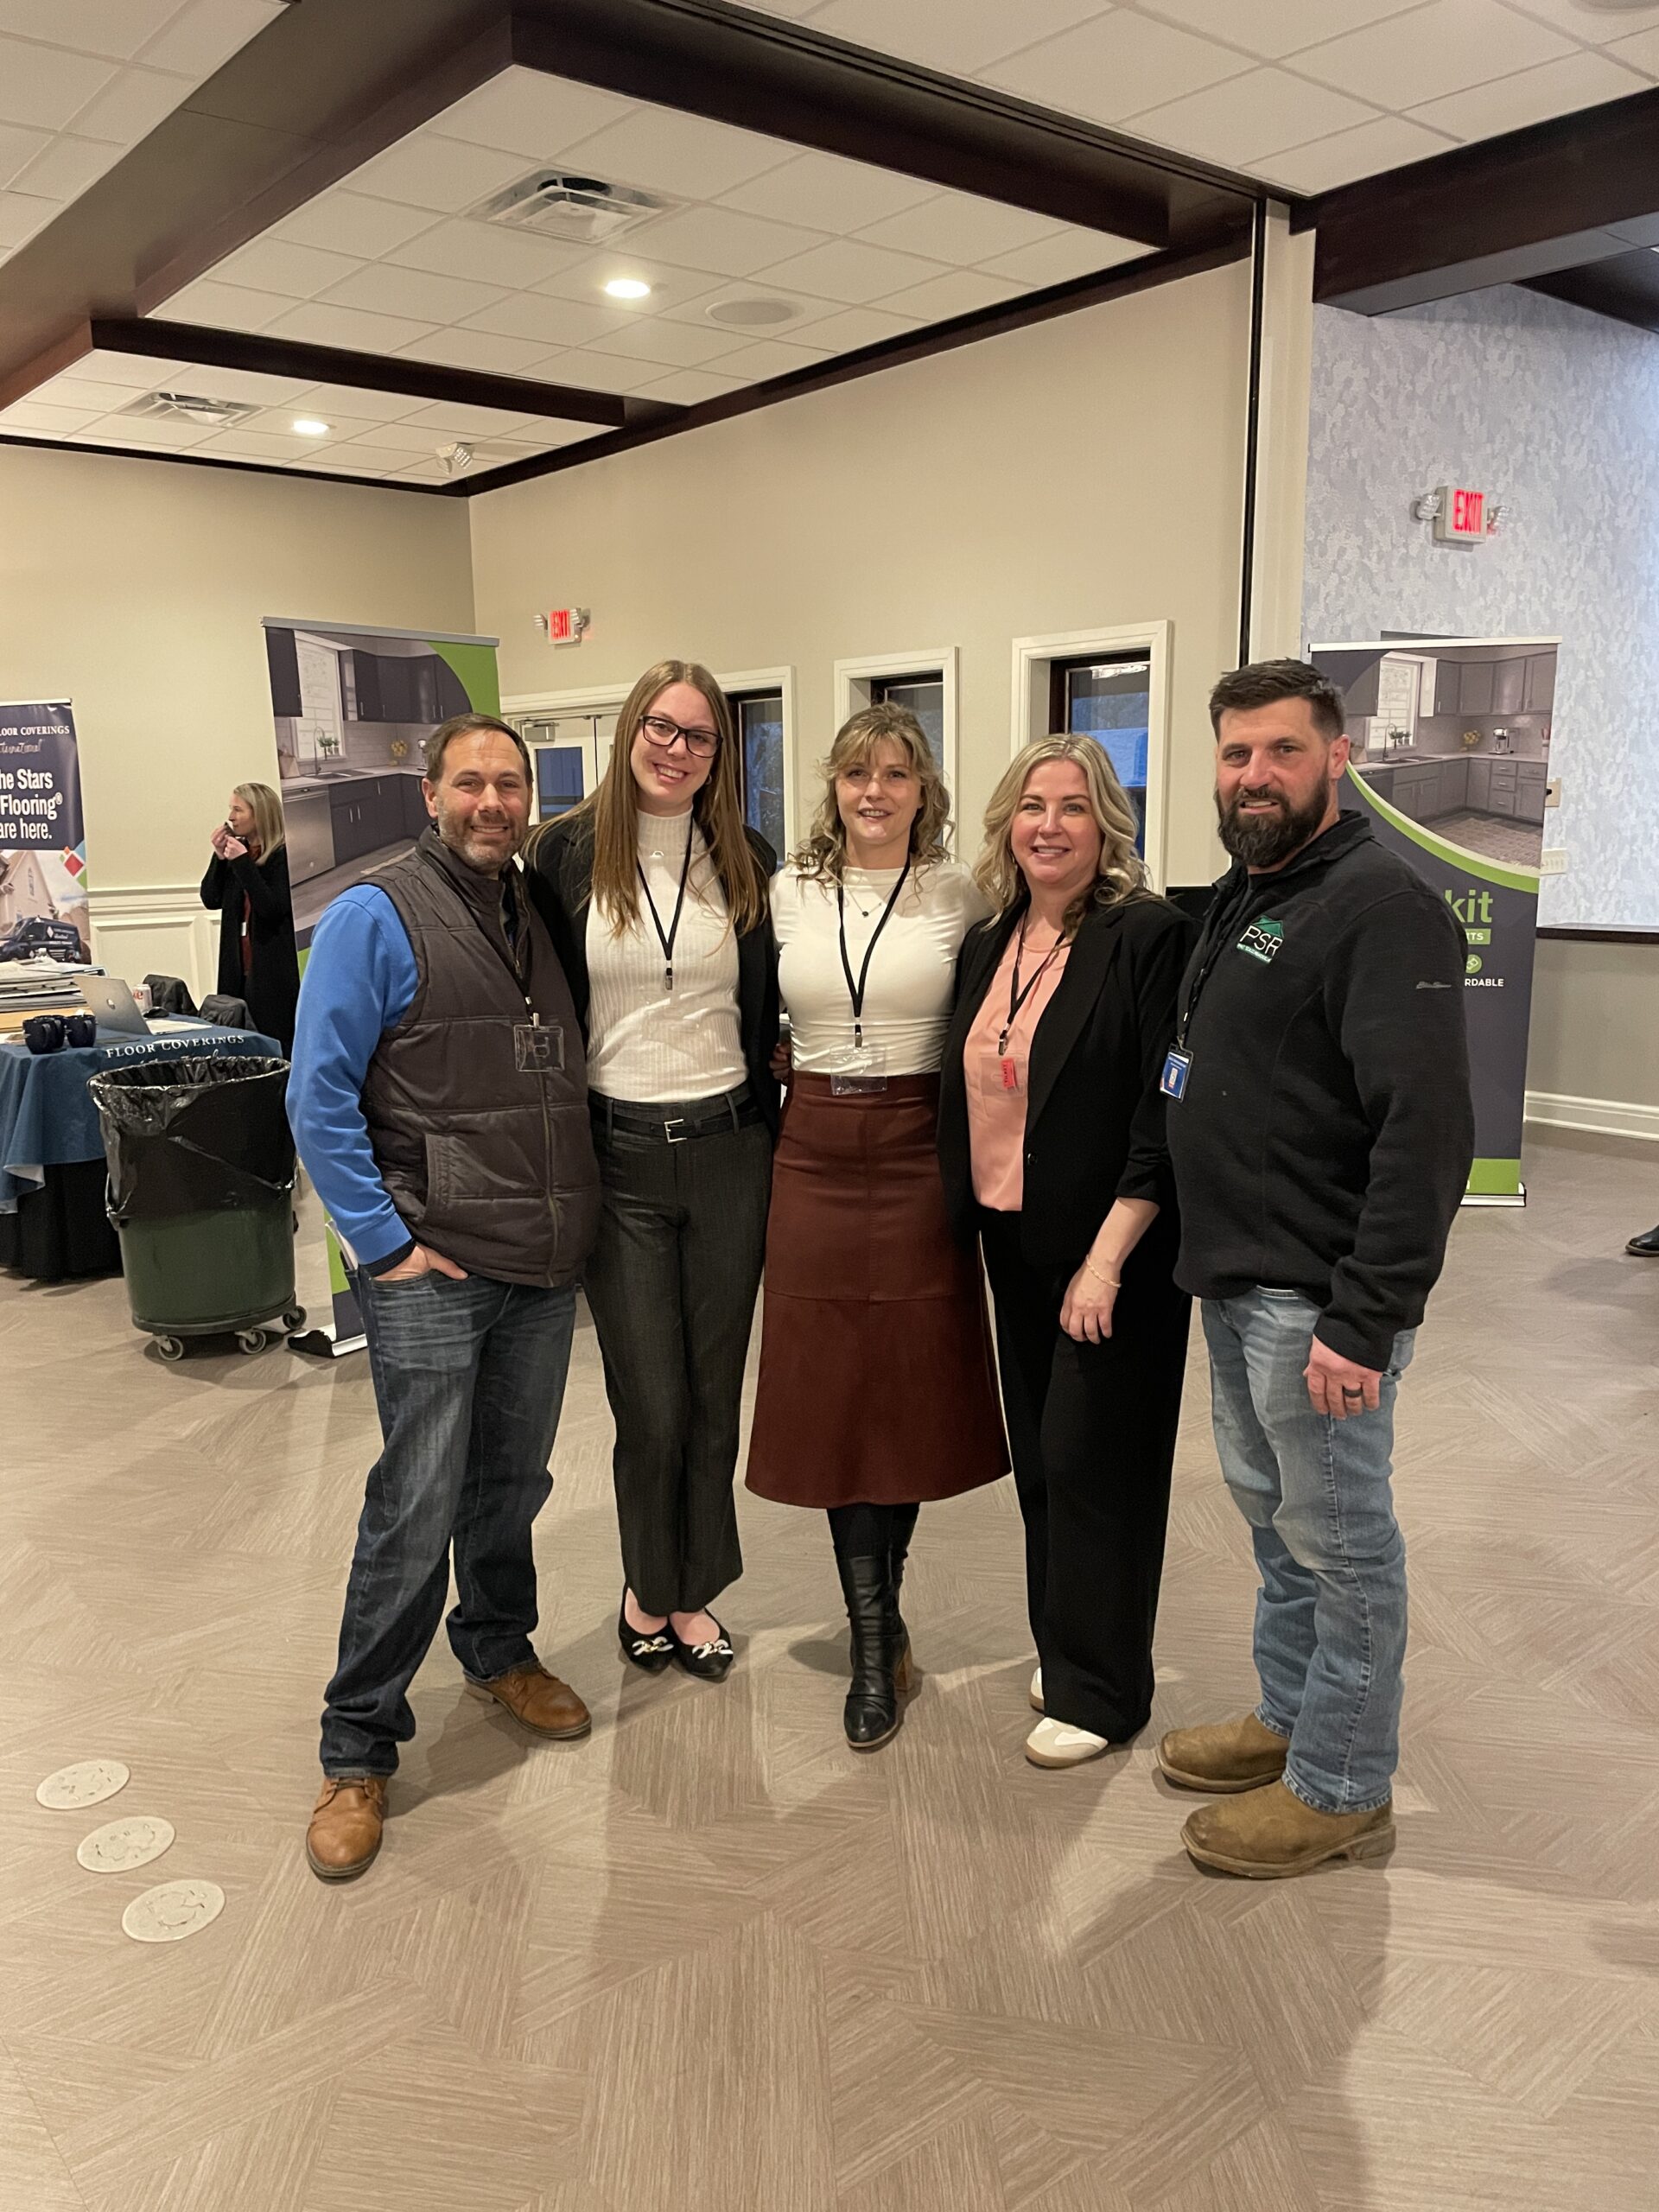
Members of our team had the pleasure of attending NARI’s Remodelers Night, hosted by the Wigwam Event Center. The evening was a great opportunity to connect with fellow professionals from across the industry, strengthen relationships with our valued vendor partners, and stay engaged with the vibrant remodeling community through National Association of the Remodeling Industry.

From meaningful conversations to a few fun prize wins along the way, it was an enjoyable and energizing night for everyone who attended. We’re always grateful for opportunities like this to learn, connect, and celebrate the work we’re all passionate about.

Recent Projects ~ Spring 2026

Bathroom Renovation

Dublin

This project included a thoughtfully designed pair of bathroom spaces, each with its own personality while maintaining a cohesive, elevated feel throughout.

The primary bathroom was created as a true everyday retreat. Warm wood cabinetry grounds the space with natural richness, paired with timeless tile flooring that keeps the design classic and enduring. The standout feature is a stunning tile shower with a penny-hex tile floor. Brushed gold transitional fixtures add a soft warmth throughout, tying the entire space together with an elegant finishing touch.

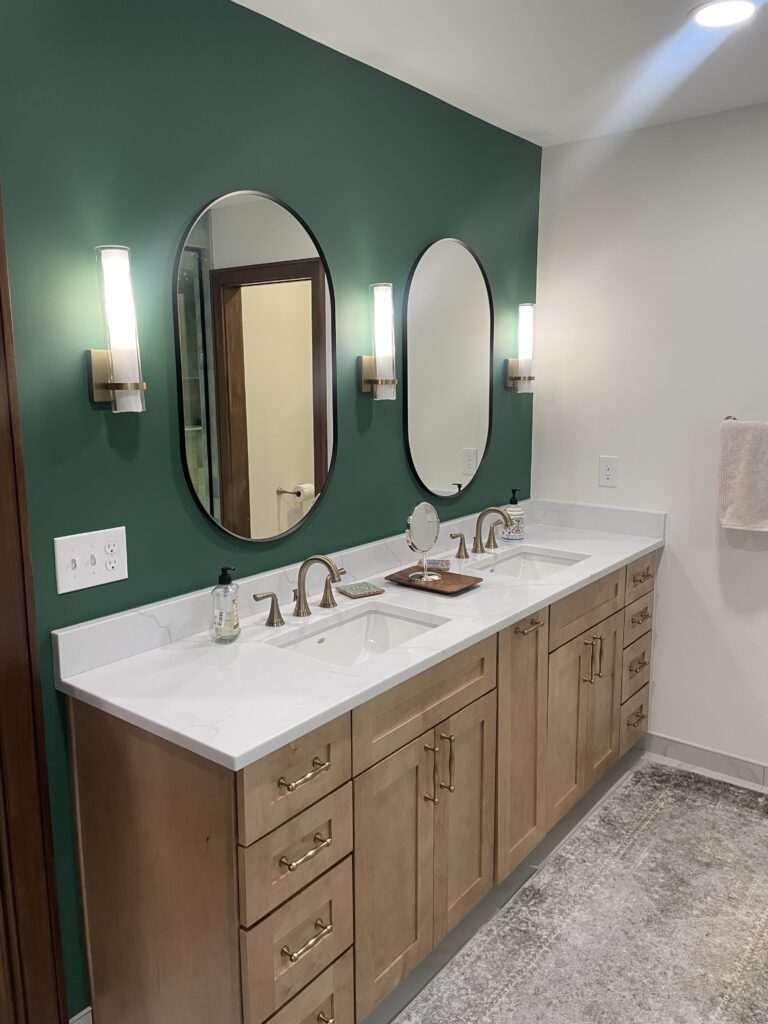
The adjacent hall bathroom received a refreshed, modern update with dark wood cabinetry that adds depth and contrast. A soft, cloudy, solid surface shower wall creates a clean and calming backdrop, while the long vanity mirror helps maximize and reflect the natural light in the space. A subtle green accent wall introduces a fresh pop of color, bringing just the right amount of personality to the room. The overall design feels crisp, functional, and beautifully renewed.

Whole Home Remodel

Worthington

This first-floor remodel completely transformed the heart of the home with a fresh, functional, and stylish layout. The kitchen was redesigned to maximize usability, featuring clever hidden features in the cabinetry for a clean, uncluttered look. Bright, easy-to-maintain finishes make the space both inviting and practical for everyday living. Throughout the entire level, new LVP flooring provides a cohesive, durable surface that’s perfect for high-traffic areas. The remodel didn’t stop in the kitchen, living spaces were thoughtfully updated as well. The fireplace received a new surround, giving the room an elevated focal point. Bathrooms were refreshed with updated vanities and the p[rimary shower was updated with and easy-to-clean shower surface. This helped us in creating spaces that are as low-maintenance as they are beautiful. This renovation brings a perfect balance of style, functionality, and convenience to the home.

See Full Portfolio

Wishing you a joyful start to your spring

Spring 2026

2026 has been amazing so far, and we can’t wait to see what comes next. 

As we head into summer, if you are thinking about a remodel – or simply want to talk through an idea – our team would love to help you bring your vision to life.

Call Us Today

Continue reading

bathroom remodel

Waterproofing, Ventilation, and Mold: Essentials for a Long-Lasting Bathroom Remodel

A beautiful new bathroom can turn into a costly disaster in three years if the invisible work underneath the tile is wrong. Here is how to make sure yours lasts.

You are a Columbus homeowner planning a bathroom remodel. You have seen the before-and-after photos, you know the tile you want, and you have a rough sense of your budget. What most homeowners do not realize until it is too late is that the materials you see in a finished bathroom, the tile, the vanity, the fixtures, account for only part of what determines whether that remodel holds up for decades or starts failing in a few years. The work that protects the investment happens behind those surfaces.

This article covers the three unsexy but absolutely critical foundations of a durable bathroom: waterproofing, ventilation, and mold prevention. Get these right and your remodel rewards you for 20 years. Get them wrong and you are looking at structural rot, persistent mold, and an early tearout.

Why the Bathroom Is Your Home’s Most Vulnerable Room

No other room in a Columbus home generates as much consistent moisture as the bathroom. Every shower cycle floods the air with warm, humid vapor. Every bath, every hair dryer, every wet towel on the floor contributes to a cumulative moisture load that, if not properly managed, works its way into walls, subfloors, and framing.

According to the Centers for Disease Control and Prevention, mold will grow wherever there is moisture, such as around leaks in pipes or where water has accumulated, and the most effective response is to remove the mold and fix the underlying moisture problem. In a bathroom that is not waterproofed and ventilated correctly, that moisture problem never goes away — it simply migrates deeper into the structure where it is harder to detect and more expensive to address.
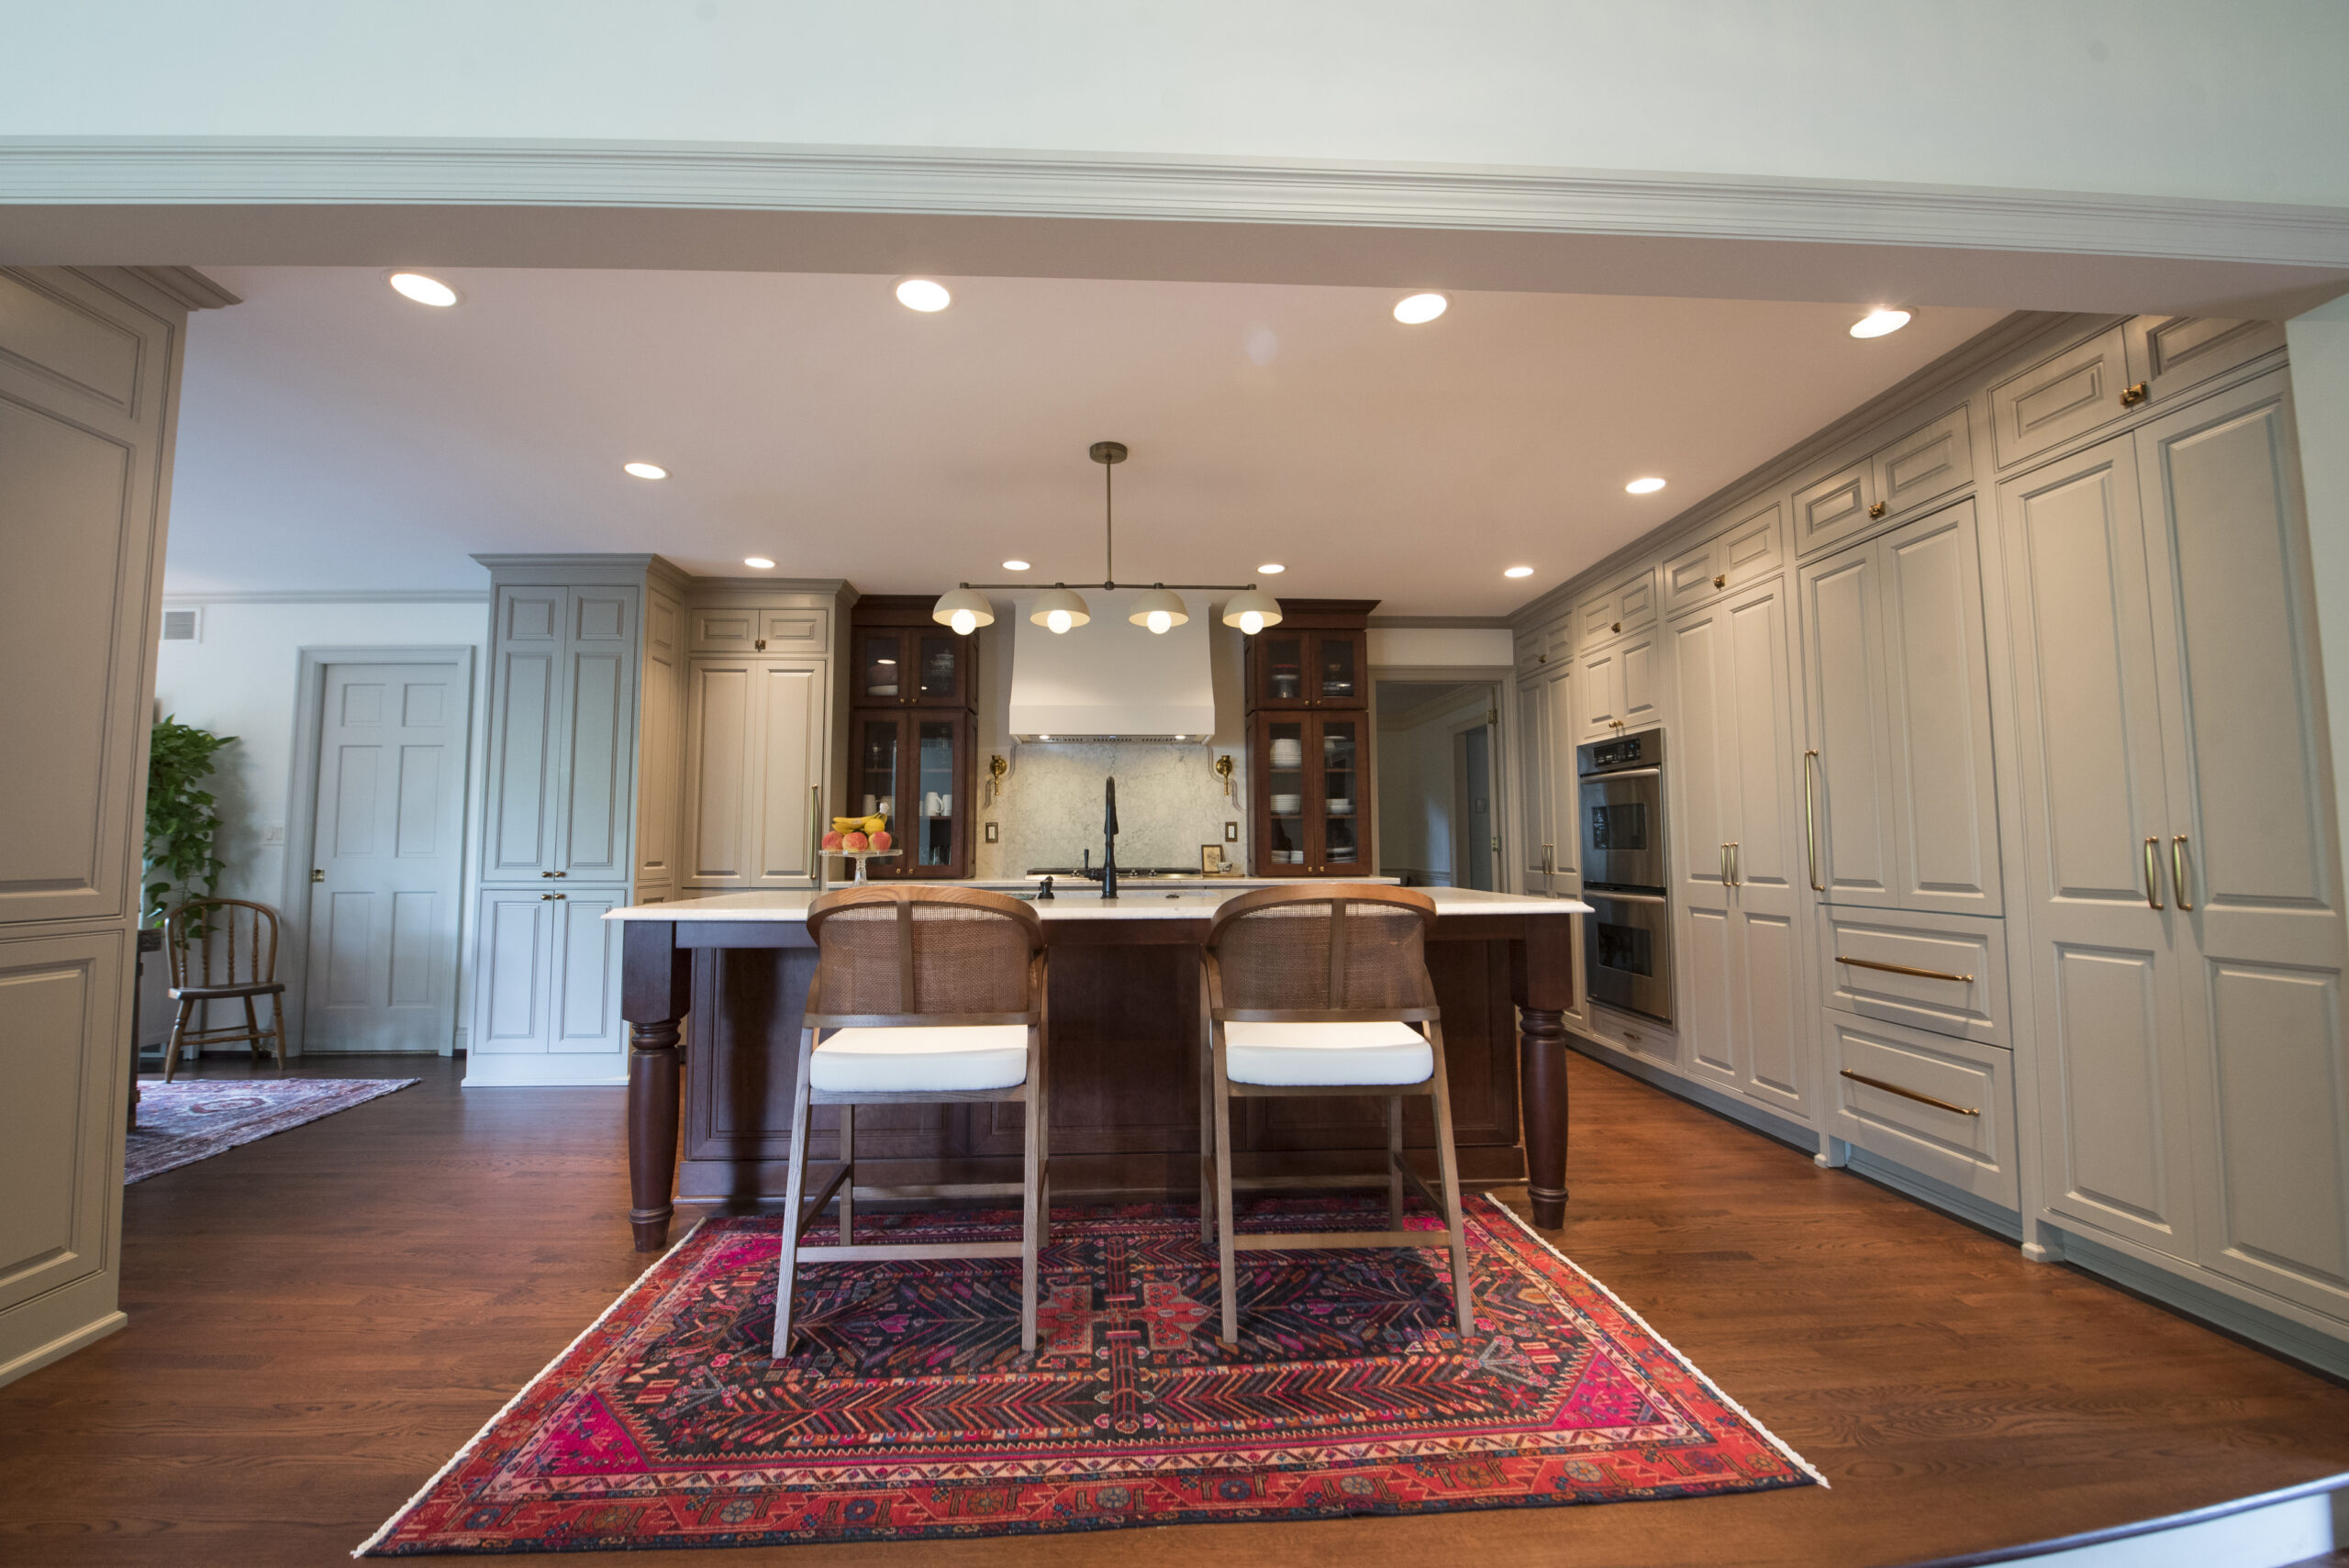
Ohio’s climate adds another layer of complexity. Columbus winters bring extended cold stretches that create temperature differentials between the warm, humid interior of a shower and the cold wall cavity behind it. This temperature difference is exactly the condition that causes moisture to condense inside wall cavities, feeding mold growth that can take hold without any visible sign for months.

The Three Layers of Proper Shower Waterproofing

Tile and grout are water-resistant but not waterproof. This is one of the most consequential misunderstandings in residential construction. Grout is porous, and over time water will work through grout joints and reach whatever substrate lies beneath. If that substrate is not waterproof, the water keeps moving into framing lumber and insulation where it will cause rot and mold.

A properly waterproofed shower during a bathroom remodel requires a continuous moisture barrier between the wet surface and the structural elements of the home. There are three primary approaches used in modern construction:

Sheet membranes are pre-formed waterproof layers adhered directly to the substrate before tile installation. Materials like polyethylene sheet membrane systems create a fully bonded waterproof barrier that is more predictable and verifiable than older methods. The membrane must be continuous, with all seams properly overlapped and corners addressed with prefabricated corner pieces or embedded tape.

Liquid-applied membranes are brushed or rolled onto cementboard or foam substrate to create a flexible, seamless waterproof coating. These are effective for irregularly shaped spaces, niches, benches, and areas where achieving a continuous sheet is difficult. Proper application requires sufficient coverage thickness and careful attention to seams and penetrations.

Foam board waterproof systems use integrated foam panels that serve simultaneously as substrate and waterproof layer. These systems are popular in full renovation projects because they are lightweight, easy to cut, and provide consistent waterproofing when properly installed and sealed.

Regardless of which system a remodel uses, several critical areas require special attention beyond the flat wall and floor surfaces:

  • Shower floor drains and the pan-to-wall transition, where most waterproofing failures begin
  • Interior and exterior corners, which experience the most movement and are prone to membrane gaps
  • All plumbing penetrations, including valve bodies, shower arms, and tub spouts
  • Niches, shelving, and built-in benches that collect standing water
  • The transition zone where the shower floor meets the bathroom floor outside the shower

According to tile installation experts at TileLetter, the Tile Council of North America (TCNA) Handbook states that a waterproof membrane or vapor retarder membrane must be specified to prevent moisture intrusion and protect adjacent building materials. Professional installation that follows TCNA standards is what separates a shower that lasts 25 years from one that fails in five.

Why Ventilation Is as Important as Waterproofing

Waterproofing manages the water that directly contacts surfaces inside the shower. Ventilation manages the airborne moisture that affects the entire bathroom, including the ceiling, the wall paint, the cabinetry, and the flooring outside the shower footprint.

The U.S. EPA recommends using exhaust fans in bathrooms to remove moisture to the outside of the building, not into the attic, as a primary method for controlling moisture-related problems in the home.

An undersized or misdirected exhaust fan is one of the most common errors in bathroom construction and remodeling. The fan must be sized appropriately for the room’s square footage and must exhaust to the exterior of the home through properly insulated ductwork. Venting into the attic, which is a common shortcut in older homes, deposits moisture into attic insulation where it causes its own structural damage and mold.

The Home Ventilating Institute (HVI) recommends that exhaust fans for bathrooms up to 100 square feet provide 1 CFM per square foot of airflow, and for larger bathrooms, basing the calculation on the number of fixtures at 50 CFM each for the toilet, shower, and tub.

For a Columbus homeowner planning a bathroom remodel, upgrading to a modern ENERGY STAR-certified exhaust fan with a built-in humidity sensor is one of the highest-value investments in the project. Humidity-sensing fans activate automatically when the moisture level in the room rises above a set threshold and continue running until the humidity returns to normal, regardless of whether anyone remembers to turn the fan on or leaves it running. This automatic operation is particularly valuable in households where family members of different ages and habits share a bathroom.

Key ventilation specifications to confirm during any bathroom renovation:

  • Exhaust fan sized to at least 1 CFM per square foot of bathroom floor area, with a minimum of 50 CFM
  • Ductwork directed to exterior of the home, not the attic or interior wall cavity
  • Duct insulation where the duct passes through unconditioned space, to prevent condensation inside the duct
  • Humidity-sensing or timer-based controls that ensure adequate run time after bathing
  • Sound rating of 1.5 sones or below if continuous operation is planned

Mold: The Consequence of Getting Waterproofing and Ventilation Wrong

Mold in a bathroom is not primarily a cleaning problem. It is a building science problem. Surface mold that reappears a few weeks after scrubbing is almost always a symptom of persistent moisture, not inadequate cleaning. Addressing the surface without addressing the underlying moisture source is an exercise in frustration.

According to Consumer Reports, citing CDC guidance, the best way to inhibit mold growth is to keep indoor humidity levels at no higher than 50 percent, and proper exhaust ventilation is one of the primary mechanisms for achieving this in the bathroom environment.

The materials selected during a remodel also play a significant role in whether mold takes hold:

  • Moisture-resistant or cement-based tile backerboard in wet areas instead of standard drywall
  • Mold-resistant paint with GREENGUARD or similar certification in bathroom areas outside the shower
  • Properly sealed grout that is maintained on a regular schedule, typically every one to two years
  • Caulk rather than grout at all transitions and corners, because caulk maintains a waterproof seal through the minor movement that causes grout to crack at joints

One critical point that many Columbus homeowners overlook is wall insulation. When bathroom walls are not adequately insulated, warm humid interior air migrates into the wall cavity where it contacts cold sheathing in winter and condenses. This condensation inside the wall is invisible and persistent, creating ideal mold conditions that cannot be resolved by any amount of surface treatment. A remodel that opens wall cavities is the right time to verify that insulation is correct and that vapor management is addressed properly.

What to Look for When Hiring a Columbus Remodeling Contractor

A contractor who cuts costs on waterproofing and ventilation is cutting the lifespan of your remodel in half, and you will not see the consequences until the warranty period has long expired. When evaluating contractors for a bathroom project, ask specific questions about these areas:

  • What waterproofing system do you use, and do you perform a flood test before tiling?
  • Where does the exhaust fan duct terminate, and is it insulated where it passes through unconditioned space?
  • What substrate do you use for shower walls and floors?
  • How do you address corners, penetrations, and the shower floor drain area?
  • Do you pull permits for bathroom work, and do the permits include plumbing and mechanical inspections?

A remodeler who gives clear, specific answers to these questions and who welcomes permit inspections is demonstrating that the technical work will hold up to scrutiny. A remodeler who dismisses these questions or offers vague assurances should be approached with caution.

FAQs About Bathroom Waterproofing and Mold Prevention

1. How do I know if my current shower is not properly waterproofed? 

Common signs include recurring mold or mildew that returns after cleaning, soft or discolored areas on walls near the shower, grout that cracks repeatedly at corners and floor-to-wall transitions, musty odors that persist even after thorough cleaning, and any visible water staining on the ceiling below a second-floor bathroom. If you notice any of these, a professional inspection before your remodel is warranted to fully understand the scope of the existing problem.

2. Can I just replace the tile in my shower without doing new waterproofing? 

Removing the tile to replace it exposes whatever waterproofing system, or lack of one, is currently in place. In most cases, once tile is removed the exposed substrate should be inspected for damage and the waterproofing should be redone rather than simply relied upon from the original installation. Skipping this step during a tile replacement saves money in the short term and often leads to the same moisture problems reappearing.

3. Is a window in the bathroom sufficient for ventilation instead of an exhaust fan? 

Windows provide some natural ventilation when open, but they are not a reliable substitute for a mechanical exhaust fan. In Ohio’s winters, windows are rarely open during and after bathing, which is precisely when moisture levels peak. Building codes generally require mechanical exhaust ventilation for bathrooms containing showers and tubs, and a properly sized and ducted exhaust fan is the standard for consistent moisture management year-round.

4. How often should I reseal grout in my bathroom? 

Shower grout in a primary bathroom should be inspected and resealed every one to two years under normal use. The frequency depends on how heavily the bathroom is used and the porosity of the specific grout product installed. A simple test is to apply a few drops of water to the grout and observe whether the water beads up or absorbs. If it absorbs, resealing is overdue.

5. What is the difference between mold-resistant and waterproof materials in a bathroom? 

Mold-resistant materials, such as mold-resistant drywall and mold-inhibiting paints, resist mold growth under conditions of temporary or moderate moisture exposure. They are appropriate for the bathroom walls and ceiling outside the shower wet zone. Waterproof materials, such as shower waterproofing membranes and cement-based tile backerboard, are designed to prevent water from penetrating the substrate entirely and are required inside the shower and in areas of direct water contact.

Build a Bathroom That Lasts in Columbus

A bathroom remodel is one of the most used and most scrutinized rooms in your home. When the technical work beneath the surfaces is done correctly, the result is a bathroom that performs beautifully for decades without surprise repairs, moisture damage, or mold problems. When it is not done correctly, the aesthetic you paid for deteriorates quietly behind the walls until the damage becomes unavoidable.

At Pat Scales Remodeling, we handle the full scope of what makes a bathroom remodel genuinely durable: from proper bathroom renovation planning and substrate preparation to correct exhaust ventilation installation, professional waterproofing systems, and careful material selection throughout. We also bring this attention to detail to kitchen remodels, basement finishing, home additions, and full home renovations across Columbus and the surrounding area.

We know what Columbus homes need to perform through Ohio’s seasonal extremes, and we build accordingly. If you are planning a bathroom project and want the technical work done right the first time, reach out to us to discuss what your remodel should include.

tub-to-shower conversion

Tub-to-Shower Conversions: When They Make Sense and When to Keep the Tub

You’ve walked past that tub a hundred times without using it. But tearing it out is a bigger decision than most people realize — here’s how to get it right.
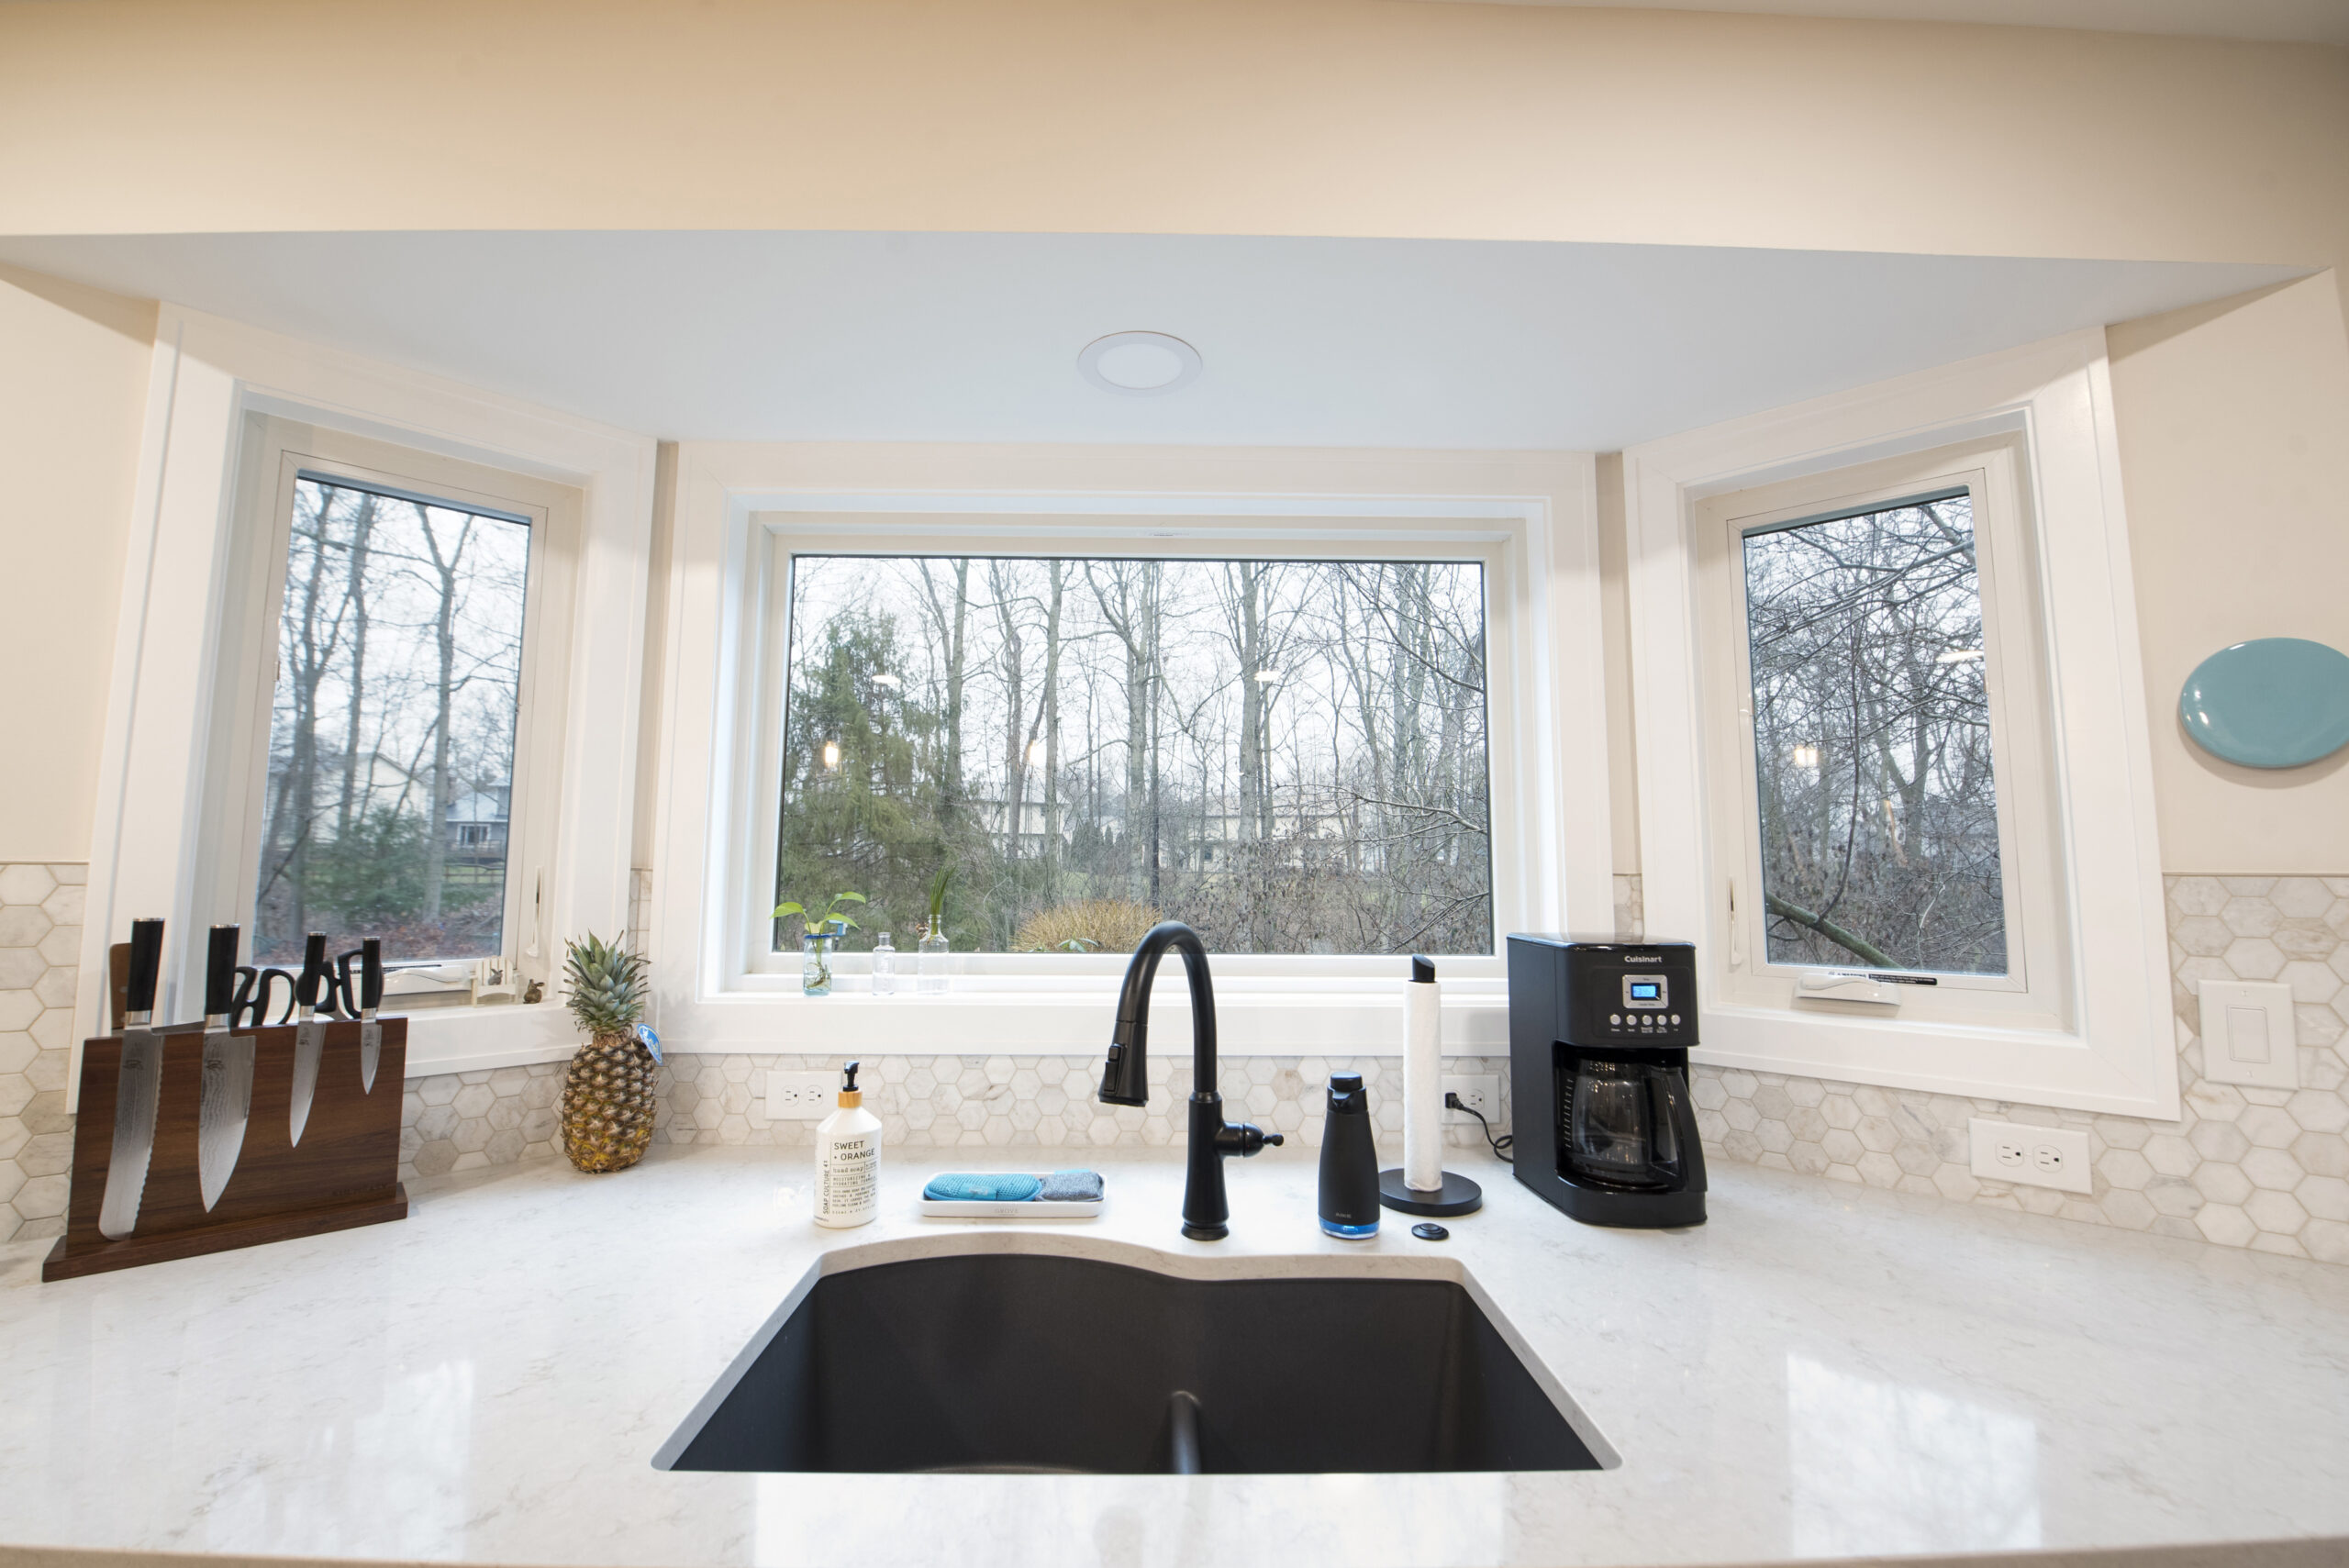
Tub-to-shower conversions are one of the most popular bathroom upgrades Columbus homeowners ask about and one of the most misunderstood. The idea sounds simple enough. Remove a tub you never use, gain floor space, modernize the look, and move on. But the decision has more layers to it than most renovation guides let on. Whether you’re aging in place, updating a primary bath, prepping a home for resale, or just tired of a tub that collects dust, the right answer depends entirely on your situation.

This article breaks down the decision honestly, so you can walk into a consultation with a clear picture of what makes sense for your home.

What Is a Tub-to-Shower Conversion, Exactly?

The perfect tub-to-shower conversion shouldn’t be difficult for you.

A tub-to-shower conversion involves removing an existing bathtub and replacing the footprint with a shower — typically a walk-in design with tile work, a glass enclosure or open entry, a new drain system, updated plumbing fixtures, and often a built-in bench or niche. The scope of the project depends heavily on the bathroom’s existing layout, plumbing configuration, and what finishes are being used.

Some conversions are straightforward. Others involve rerouting drain lines, reinforcing the subfloor, or reconfiguring the surrounding tile entirely. That’s why the first question isn’t “shower or tub” — it’s “what does this bathroom actually need?”

When a Tub-to-Shower Conversion Makes Sense

There are several scenarios where removing a tub is clearly the right call. Here’s when the math and the practicality works in your favor.

You never use the tub. This is the most common reason homeowners make this change. The primary bathroom tub in many Columbus homes sits unused for months at a stretch. If your household showers exclusively, converting that space into a well-designed walk-in shower adds daily functional value rather than just visual appeal.

Safety is a Concern 

Stepping over a tub ledge is one of the most common household fall hazards. According to the CDC, falls are the leading cause of injury death among adults aged 65 and older, and the bathroom is a primary location where those falls occur. Approximately 80% of in-home falls involve the bathroom, with a significant portion occurring while getting in or out of the tub. For homeowners planning to age in place — or those remodeling for a parent or spouse with mobility concerns — a curbless or low-threshold shower is a meaningful safety upgrade, not just an aesthetic one.

You Want to Maximize a Small Bathroom

Standard tubs occupy roughly 13 to 15 square feet of floor space. A well-designed shower can serve the same function in considerably less room, freeing up space for a double vanity, more storage, or simply better flow in a tight footprint.

The Primary Bath Already Has a Second Tub Elsewhere

If your home has two full bathrooms (both with tubs) converting one into a shower only improves functionality without reducing the flexibility your home offers to future buyers.

You’re targeting modern buyers in a resale scenario. In many Columbus neighborhoods, particularly those with older buyers or empty nesters, a spacious, well-finished walk-in shower in the primary bath is viewed as an upgrade. According to HomeLight’s 2024 research, 94% of real estate agents believe modernized bathrooms make homes more appealing to buyers, and a bathroom remodel typically recoups approximately 73.7% of its cost upon resale.

When You Should Keep the Tub

The case for keeping a tub is equally strong in certain situations, and skipping this part of the conversation is where a lot of homeowners make expensive mistakes.

Your Home Only Has One Bathroom

If there’s a single full bath in the house and it currently has a tub, removing it significantly narrows your buyer pool. Families with young children, in particular, treat a tub as a baseline requirement rather than a feature. Eliminating the only tub in a one-bath home is one of the few bathroom renovation decisions that can actively reduce what buyers will offer.

You’re in a Family-Oriented Neighborhood

Columbus suburbs like Worthington, Powell, and Dublin skew toward households with children. In those markets, retaining at least one functional tub remains a practical consideration from a resale standpoint. The National Association of Realtors has consistently noted that homes with at least one bathtub command broader market appeal across buyer demographics.

The Tub Is in a Secondary Bathroom Used by Kids or Guests

A hall bath or shared bathroom that serves children is exactly where a tub earns its keep. Tub-to-shower conversions make the most sense in primary bathrooms — not in secondary baths where the tub actually gets regular use.

You Enjoy Soaking

This sounds obvious, but it’s worth saying. If you use your tub regularly and find it genuinely relaxing or therapeutic, keeping it is the right answer regardless of trends. A bathroom should serve the people living in the house.

The Resale Question: What Columbus Homeowners Actually Need to Know

The resale question is where tub-to-shower conversions generate the most anxiety and the most conflicting advice. Here’s a grounded summary of where things stand:

  • Removing the only tub from a home generally limits buyer pool and can reduce resale flexibility
  • Replacing a secondary tub with a well-designed shower typically has minimal negative impact on value
  • In primary bathrooms with at least one tub remaining elsewhere in the home, a walk-in shower upgrade often adds perceived value
  • The quality of the conversion matters significantly. A poorly executed shower in a dated bathroom helps no one
  • Columbus’s market, particularly in neighborhoods popular with professionals and growing families, rewards thoughtful, functional upgrades over trendy ones

The safest general rule: keep at least one tub in the home. Where you put the shower versus where you keep the tub is the real question. And that’s where a design-build remodeler earns their keep.

What Goes Into a Quality Tub-to-Shower Conversion

Not all conversions are equal. A budget swap that swaps a tub for a prefab shower insert is a very different project from a custom tile-and-glass build that transforms the entire footprint of the bathroom. Here’s what separates a lasting conversion from one that creates problems down the road:

  • Proper waterproofing behind the walls, not just surface tile work
  • A correctly sloped shower pan that drains without pooling
  • Plumbing reconfiguration done to code, including updated drain placement
  • Quality materials rated for wet environments (not all tile performs the same)
  • Thoughtful placement of grab bars, built-in niches, and benches for both function and style
  • Glass enclosures or open entries that complement the room’s proportions

Skipping steps on any of these fronts leads to water intrusion, mold issues, and ultimately a tear-out that costs far more than doing it right the first time. According to the CDC’s older adult fall prevention research, thoughtful design elements like grab bars and low-threshold entries aren’t just for seniors. They make bathrooms safer and more functional for everyone in the household.

FAQs: Tub-to-Shower Conversions in Columbus

1. Will removing my bathtub hurt my home’s resale value? 

It depends on how many bathrooms your home has and whether a tub remains elsewhere. Removing the only tub in a home can reduce buyer interest, particularly in family-focused Columbus suburbs. If at least one tub remains in the house, converting another bathroom to a shower typically has minimal negative impact and can add value when done well.

2. How long does a tub-to-shower conversion take? 

Most tub-to-shower conversions take between five and ten business days for a custom tile build, though simpler conversions may take less time. Timeline depends on the extent of plumbing work, the materials selected, and whether any subfloor or wall repairs are needed.

3. Can any bathroom support a tub-to-shower conversion? 

Most can, but the feasibility depends on existing plumbing location, drain positioning, floor structure, and square footage. A walkthrough by an experienced remodeler will identify any constraints before the project begins.

4. Is a curbless shower worth it for an aging-in-place renovation? 

Strongly yes. A curbless or barrier-free shower eliminates the step-over hazard that makes traditional tubs dangerous for older adults. Research consistently cited by the CDC identifies tub and shower transfers as one of the most common points of bathroom injury for adults aged 65 and older. A zero-threshold shower is both a safety upgrade and a long-term investment in independence.

5. What size should my new shower be? 

A minimum of 36 by 36 inches meets building code in most jurisdictions, but 36 by 48 or larger is far more comfortable and functional. If the tub footprint allows, many homeowners convert to a 48 by 60 inch walk-in, which provides room for a bench and makes the space feel genuinely generous rather than squeezed.

Ready to Shower Your Heart Out?

The decision between a tub-to-shower conversion and a full bathroom overhaul isn’t always obvious — but it doesn’t have to be stressful. The right remodeler asks the right questions first, looks at your home’s layout and your long-term plans, and helps you make a decision that serves both your lifestyle and your investment.

At Pat Scales Remodeling, we’ve been helping Columbus homeowners make exactly these kinds of decisions for years. We handle bathroom remodeling from initial design through final installation, with an in-house design team that considers everything — resale, safety, aesthetics, and how you actually live in your home. Whether you’re considering a full whole home remodel or a focused bathroom renovation in Worthington, Powell, Clintonville, or anywhere across Central Ohio, we bring the same attention to detail to every project. You can also view our process or explore our portfolio to see past work before reaching out.

We don’t believe in one-size-fits-all answers. We believe in getting it right for your home. Call us at 614-505-6084 or contact us online to start a no-pressure conversation about your tub-to-shower conversion or bathroom renovation in Columbus, Ohio.